

Get Started with Isaac™ Sim
Get Started with Isaac™ Sim
NVIDIA® Isaac™ Sim is part of the NVIDIA® Omniverse platform; it is a high-fidelity, photorealistic simulator tailored to robotics simulation. This tutorial covers the essential steps needed to get started with Isaac™ Sim and the ZED. For a more in-depth tutorial, you can follow the official guides from NVIDIA®.
Build and install NVIDIA® Isaac™ Sim
Since version 5.0, the recommended way to install Isaac™ Sim is to build it from source using the official GitHub repository.
Make sure your workstation meets the System Requirements before proceeding.
Prerequisites
The ZED Camera extension shares the same requirements as Isaac™ Sim itself. Refer to the official Isaac™ Sim requirements page for the full list of hardware and software prerequisites. The two that most often block a first build:
- NVIDIA driver 595.58.03 or newer on Linux (595.97 or newer on Windows). The build does not check the driver, so an unsupported one only shows up when you first launch Isaac™ Sim.
- At least 50 GB of free disk space. A first build consumes roughly 40 GB, and not all of it lands in the clone: the downloaded dependencies and Kit extensions also fill
~/.cache/packmanand~/.local/share/ovin your home directory.
Building from source additionally needs a toolchain that the requirements page does not cover:
Linux:
Isaac™ Sim must be built with GCC/G++ 11; version 12 and newer are unsupported. Check with gcc --version and g++ --version before building. Ubuntu 22.04 already defaults to GCC 11.
Windows: install Microsoft Visual Studio 2022 with the Desktop development with C++ workload (which brings the Windows SDK and the MSVC toolchain), plus Git LFS:
Windows limits paths to 260 characters. Clone the repository close to a drive root (for example C:\isaacsim), or the build may fail with errors about missing files.
Clone and build
Linux:
Windows:
On the first build, the script prints the NVIDIA Omniverse licensing terms and waits for input:
Type yes and press Enter. Answering anything else, or running the build non-interactively (from a script or CI job), aborts with:
Your answer is recorded in a .eula_accepted file at the repository root, so later builds do not ask again.
The build downloads tens of gigabytes of dependencies and compiles them, so expect it to run for a while on a first, cold build.
Congrats! 🎉 You are now ready to start using Isaac™ Sim and the ZED Camera extension.
Launch Isaac™ Sim
Once Isaac™ Sim has been built in the previous step, you can run the application from a terminal:
Linux:
Windows:
Create your environment
The environment in Isaac™ Sim consists of a Stage (panel to the right) that holds all of the assets in the USD scene. To have a working simulation with physics, you need to:
- Create a physics scene that enables physics simulation and gravity.
- Add a ground plane that prevents objects from falling infinitely.
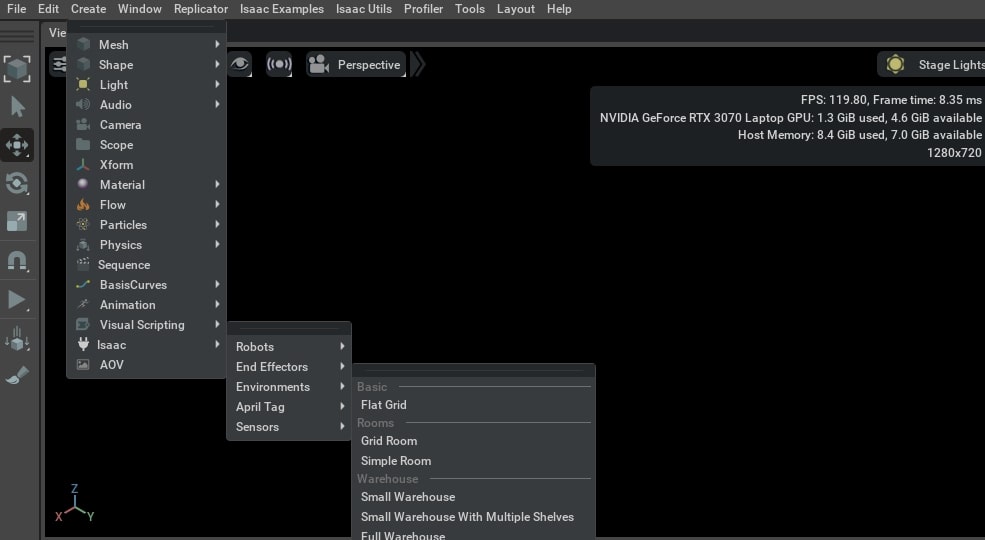
A quick way to explore these things is to use a predefined environment by going to the top menu bar Create -> Isaac -> Environments and choosing the Flat grid as it is the simplest one.
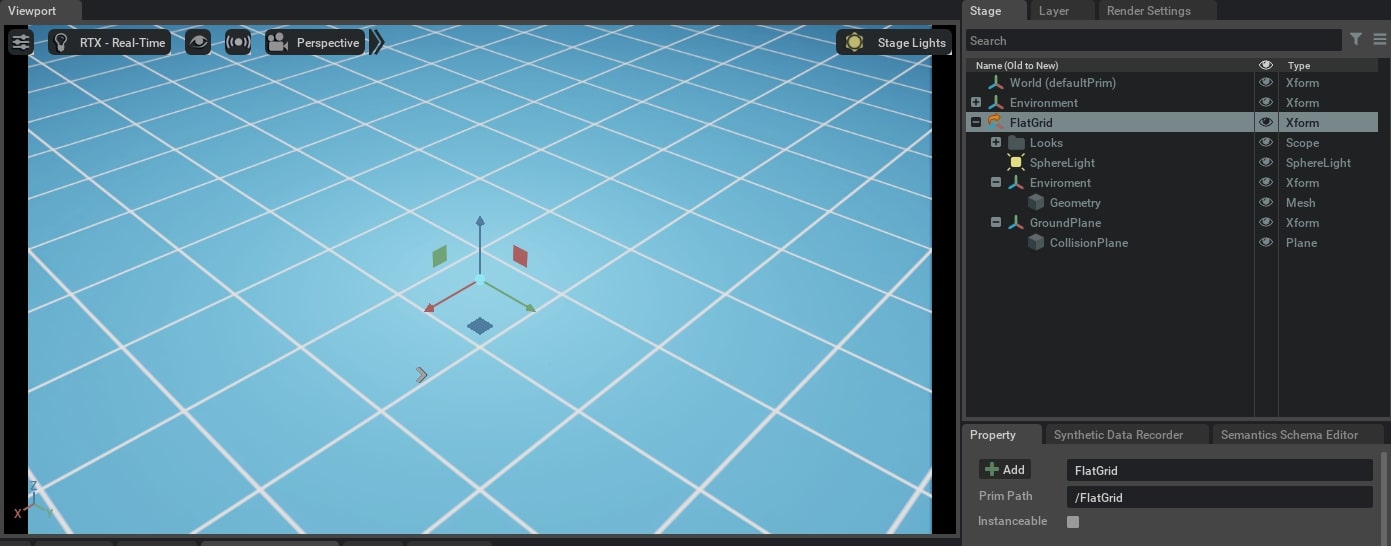
You will notice that the stage has been populated with items represented by different prims (Prim is short for primitive, the fundamental container object in Omniverse). The window that shows the flat grid is called the Viewport.
Add objects to the scene
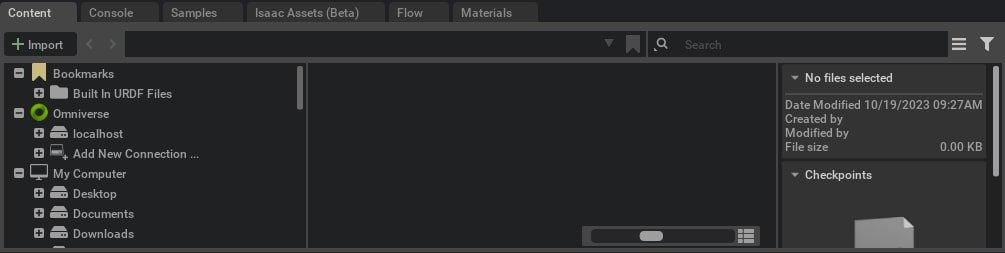
You can use the Content and Isaac Assets panels located at the bottom of the window to add prims to the stage.
The Content tab lets you look for files located on your machine, while the Isaac Assets tab shows all of the available assets in Isaac™ Sim. To add an item, simply drag it into your scene or the stage panel.
Create an Action Graph
Action Graphs are part of the Visual Scripting tools provided by Isaac™ Sim, allowing for programming using nodes instead of code. They are event-based and enable the user to execute actions based on a sequence of events and conditions. To create an Action Graph, right-click anywhere in the viewport and select Create -> Visual Scripting -> Action Graph.
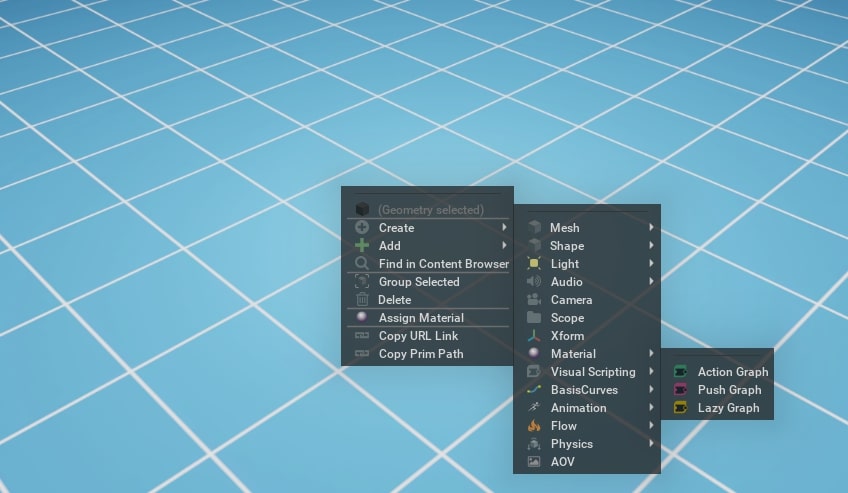
A new Action Graph appears in the Stage view, and the related Action Graph panel is now open at the bottom of the screen.
Start typing “OnPlaybackTick” in the search bar on the left side of the panel to find the node. Then drag and drop it into the graph. Do the same for the “Print Text” node.
Connect the Tick of the OnPlaybackTick to the In of the Print Text. Then click on the Print Text node and fill out its properties in the Property panel on the right.
You can experiment with different settings to print on the screen (viewport) or on the Console tab. To execute the graph, simply press play (to trigger a playback tick) and you should see the printed text.
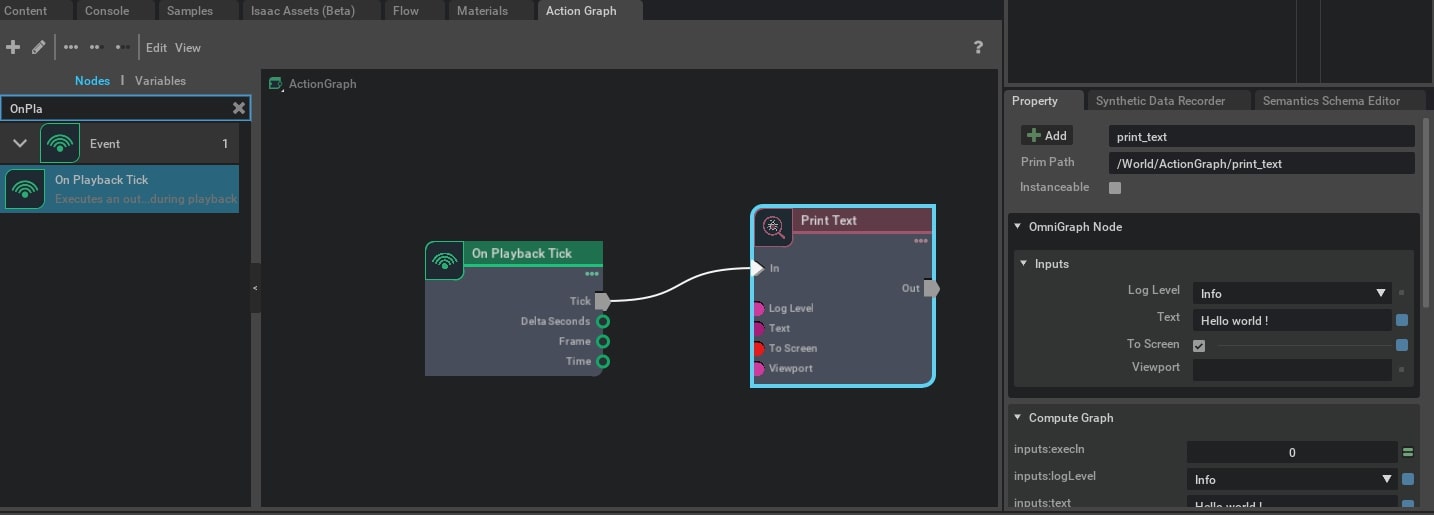
For a detailed explanation of OmniGraph, Omniverse’s visual programming framework, refer to the official documentation, which shows you how to control a robot using Action Graphs.
Install the ZED SDK
To receive the simulated camera stream, the ZED SDK 5.4.1 or newer must be installed on the machine that runs your application. This does not have to be the machine running Isaac™ Sim: the stream can be received over the network, or on the same machine using low-latency IPC. You can find the installation instructions here.
Install the ZED Camera extension
The ZED Camera extension is not published in the Isaac™ Sim extension registry, so it is not listed in the extension manager until you point Isaac™ Sim at a local copy. Clone and build the GitHub repository:
Linux:
Windows:
The build downloads the runtime ZED library (libsl_zed) and the ZED Sim2Real library from the Stereolabs CDN, then compiles the C++ plugin. If the optional Sim2Real archive cannot be downloaded, the build still succeeds and prints a warning; only the ZED Sim2Real feature is disabled.
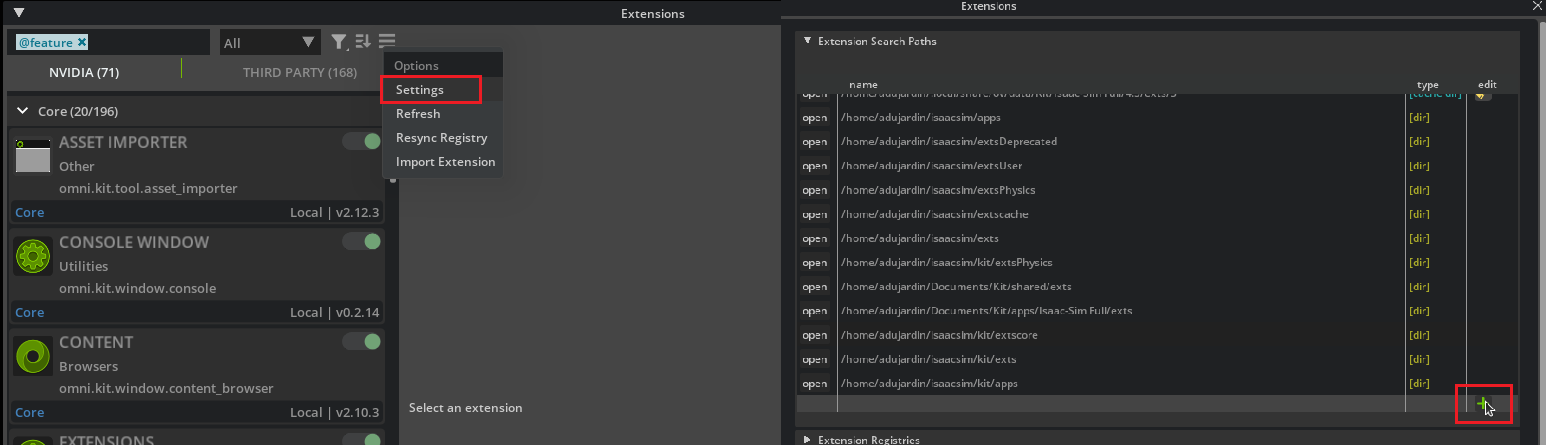
Now register the extension with Isaac™ Sim. Open the Extensions view from the menu, Window -> Extensions. Click the menu button (hamburger icon near the search field), open Settings, and click the + button to add the path to the exts folder of the cloned repository (e.g. <your_workspace>/zed-isaac-sim/exts).
Enable the ZED Camera extension in the Third-Party tab.
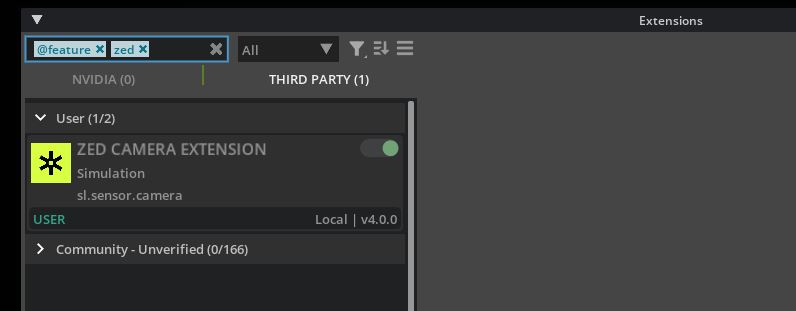
Adding the path registers three extensions: ZED Camera (sl.sensor.camera, the one you need), plus the optional ZED Calibration Exporter (used for virtual stereo cameras) and a demo extension. Enable AUTOLOAD on the ZED Camera extension to skip this step on future launches.
Verify the installation (headless)
Before building a scene in the GUI, you can run a quick headless check to confirm that Isaac™ Sim starts and that the ZED Camera extension and its OmniGraph nodes load correctly. This is handy for automated or CI setups.
Save the following script as verify_zed_extension.py, updating EXTS_FOLDER to point to the exts folder of your cloned extension:
Run it with the Python interpreter shipped with your Isaac™ Sim build:
If everything is set up correctly, zed_verify_result.txt ends with ZED_EXTENSION_OK and lists the three registered node types (ZED Camera Helper, ZED Camera One Helper, and the low-level ZED Stream). A missing node type makes the script exit with an error instead.
The first run compiles the RTX shaders and can sit for several minutes with no visible progress (the Kit log reports Waiting for RtPso async group async compilation). It is compiling, not hung; later runs start in seconds.
If you run this inside the NVIDIA® Isaac™ Sim container, make sure GPU access is enabled with the NVIDIA Container Toolkit, launch with full driver capabilities (-e NVIDIA_DRIVER_CAPABILITIES=all), and install the runtime dependencies of libsl_zed.so that are not bundled in the image: libpng16-16, libjpeg-turbo8, libturbojpeg, and libusb-1.0-0.
Now that we have a solid grasp of Isaac™ Sim’s core concepts and interface, and the ZED Camera extension installed, we are ready to configure a ZED camera within the Isaac™ Sim environment.