ZED Explorer
ZED Explorer is the tool that lets you check that both software and hardware are working properly, and that the ZED camera is recognized by your computer.
ZED Explorer allows you to visualize the camera’s raw video feed, test camera controls, and access raw calibration parameters. You can use this tool with both Stereo and Monocular cameras.
ZED Explorer also provides the easiest way to record and play back camera streams in SVO format, which is the native video format of the ZED SDK. SVO files can be used to replay recorded data in your applications, allowing you to test and develop without needing a live camera feed.
Finally, ZED Explorer can also become a ZED Local Streaming server, allowing you to stream the camera video feed over the network to other devices or applications that support ZED streaming.
Run ZED Explorer
After connecting your camera and installing the ZED SDK, you can run ZED Explorer to visualize the camera feed and test its features.
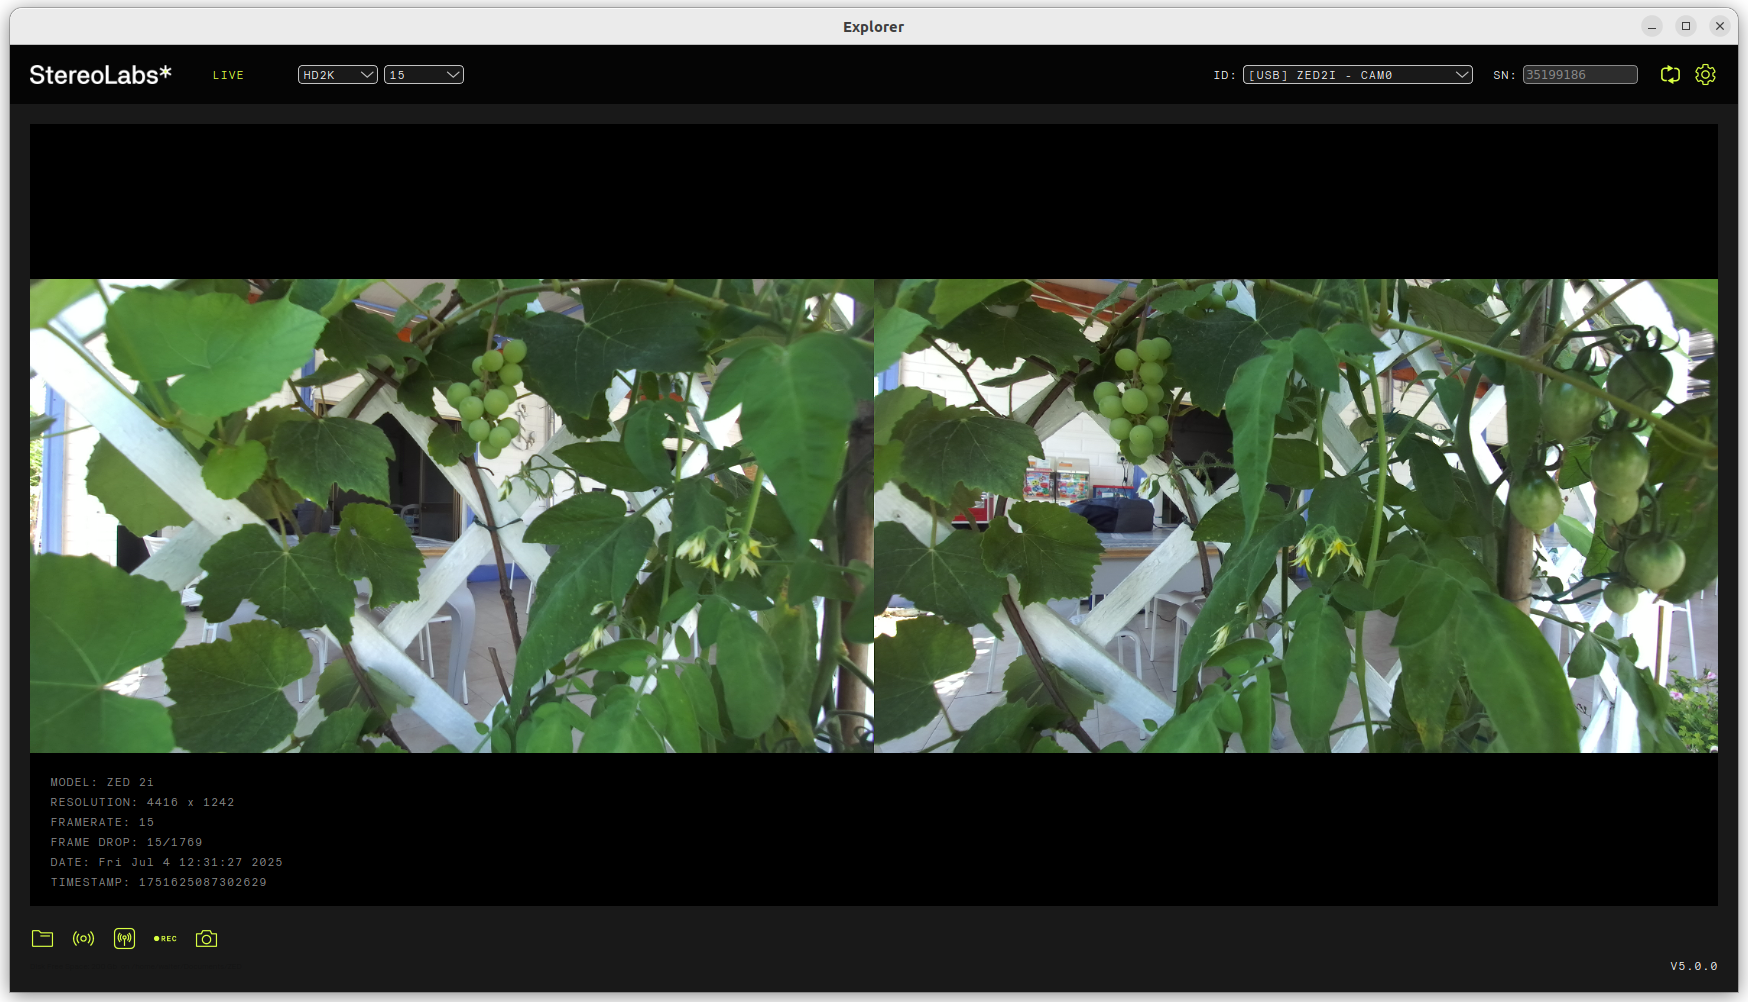
ZED Explorer is an application for ZED live preview and recording. It lets you change video resolution, grab frequency, camera parameters, and capture high-resolution snapshots and videos.
Under Windows, you can find ZED Explorer in the Start menu under the ZED SDK folder. You can also run it from the command line by navigating to the ZED SDK installation directory: C:\Program Files (x86)\ZED SDK\tools\ZED Explorer.exe.
Under Ubuntu, you can run ZED Explorer from the terminal by typing ZED_Explorer or by navigating to the ZED SDK installation directory: /usr/local/zed/tools/ZED_Explorer.
Select the camera
When you launch ZED Explorer, it automatically detects all connected ZED cameras and opens the first available. You can select the camera you want to use from the dropdown menu at the top right of the window.

You can click on the arrows icon on the right side of the dropdown menu to refresh the dropdown content after unplugging and replugging one camera.
You can click on the gear icon on the right side of the serial number text field to open the Camera and Application Settings dialog.
Select the video mode
You can select the resolution and framerate from the dropdown menus at the top left of the window. The available video modes depend on the camera model and its capabilities.

Between the StereoLabs logo and the video mode dropdown, you can see the current playback mode: LIVE, SVO PLAYBACK, or STREAMING (NETWORK).
Monitor the Stream status

Under the video feed, you can see the camera status information, including:
- Camera Model: The model of the connected ZED camera.
- Resolution: The current video resolution.
- Framerate: The current video framerate.
- Frame Drop: The number of frames dropped during the current session.
- Date and Time: The current date and time for live video feeds or the time of recording for SVO playback.
- Timestamp: The timestamp of the current frame in nanoseconds.
Control the stream
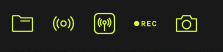
On the left bottom corner of the window, you can find the stream controls, which allow you to:
- Open an SVO file for playback by clicking on the folder icon.
- Connect to a ZED streaming server by clicking on the network icon.
- Start or stop a local streaming server by clicking on the antenna icon.
- Start or stop SVO recording for the current video feed by clicking on the record icon.
- Take a snapshot of the current video frame by clicking on the camera icon.
Control the SVO playback

When you are in SVO playback mode, you can start, stop, or pause the playback using the playback controls at the bottom of the window. You can also navigate through the recorded frames using the slider.
Configure the Camera and the Application
You can click on the gear icon on the right side of the serial number text field to open the Camera and Application Settings dialog.
Application settings
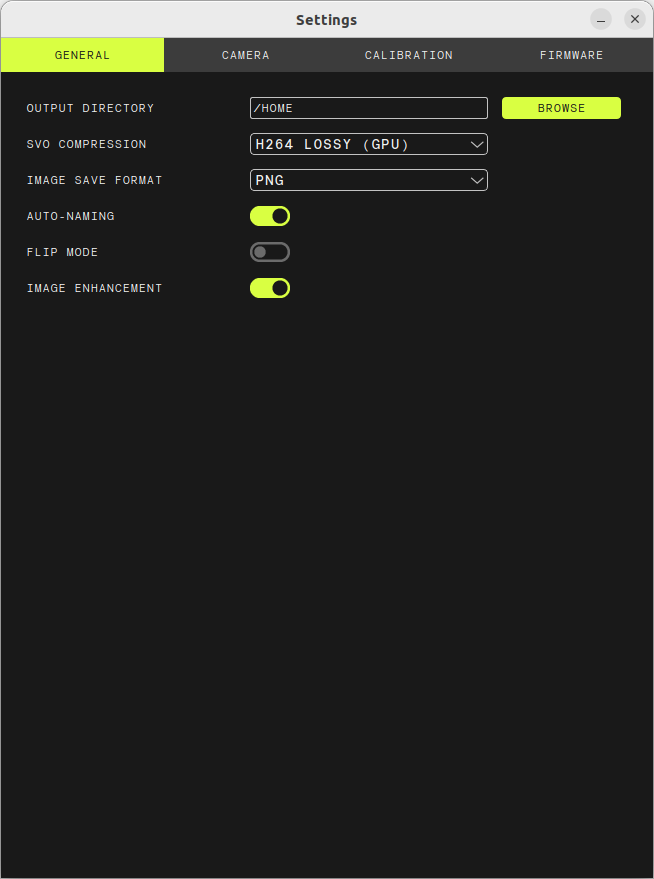
In the Application Settings tab, you can configure the following options:
- SVO and Screenshot Folder: The folder where SVO files and screenshots will be saved.
- SVO Compression: The compression level for SVO files. Higher compression reduces file size but may affect image quality.
- Image Save Format: The format for saving screenshots (PNG, JPEG, or BMP).
- Auto Naming: Enable or disable automatic naming of SVO files and screenshots according to the current date and time.
- Flip Mode: Enable or disable the flip mode for the video feed. This can be useful if the camera is mounted upside down or in a different orientation.
- Image Enhancement: Enable or disable image enhancement features such as denoising and color correction.
Camera settings
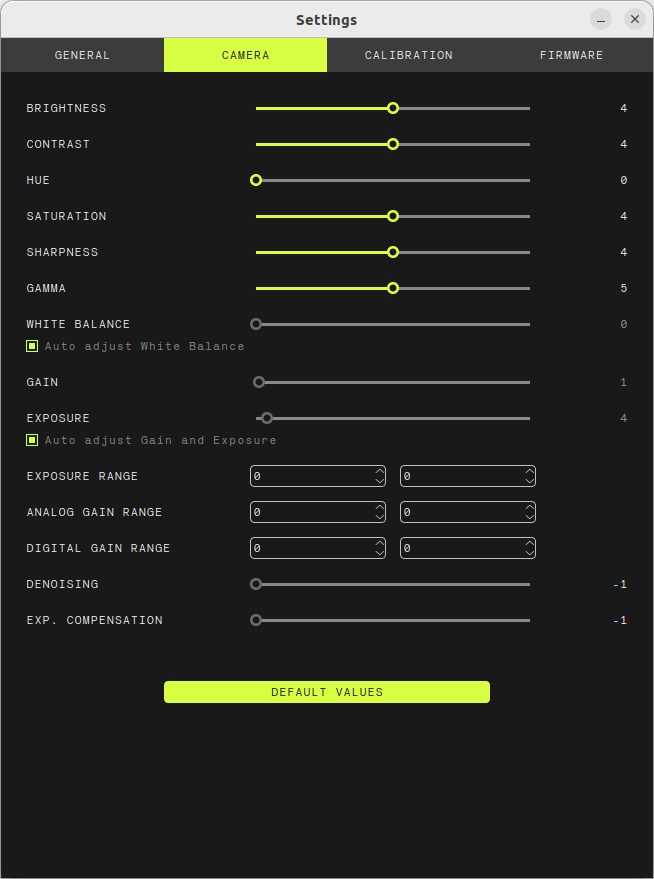
In the Camera Settings tab, you can control the camera parameters, including:
- Brightness: Adjust the brightness of the video feed.
- Contrast: Adjust the contrast of the video feed.
- Saturation: Adjust the saturation of the video feed.
- Hue: Adjust the hue of the video feed.
- Gain: Adjust the gain of the video feed.
- White Balance: Adjust the white balance of the video feed.
- Exposure: Adjust the exposure of the video feed.
- Sharpness: Adjust the sharpness of the video feed.
- Gamma: Adjust the gamma of the video feed.
- Auto Exposure: Enable or disable automatic exposure adjustment.
- Auto White Balance: Enable or disable automatic white balance adjustment.
- Exposure Range: Adjust the exposure range of the video feed.
- Analog Gain Range: Adjust the analog gain range of the video feed.
- Digital Gain Range: Adjust the digital gain range of the video feed.
- Denoising: Adjust the denoising filter strength.
- Exposure Compensation: Adjust the exposure compensation for the video feed.
These settings allow you to fine-tune the camera parameters to achieve the desired video quality and performance. You can adjust these parameters in real-time while the camera is streaming live or network streams.
Some of these parameters may not be available for all camera models or video modes. The available parameters depend on the camera model and its capabilities.
Click on the DEFAULT VALUES button to reset the camera parameters to their default values.
Calibration parameters
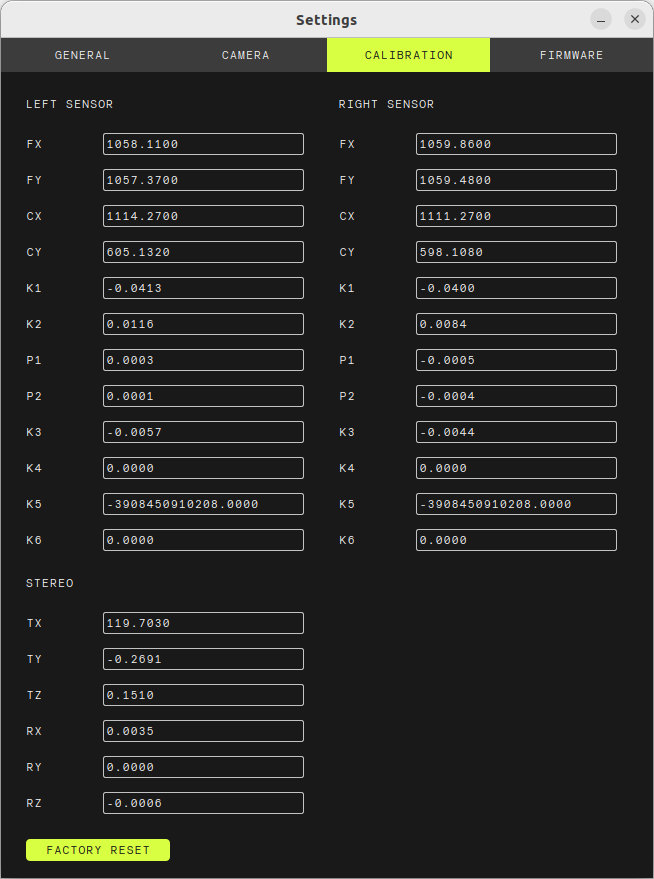
In the Calibration Parameters tab, you can view the raw calibration parameters of the camera. These parameters are used for 3D reconstruction and depth estimation. A description of the meaning of each parameter is provided in ZED SDK documentation.
You can click the FACTORY RESET button to reset the calibration parameters to the factory settings. This will overwrite any custom calibration you may have applied using the ZED Calibration tool.
The calibration parameters shown in this tab are the raw, unrectified values used internally by the ZED SDK for image rectification. When you access camera parameters through the ZED SDK in your applications, you will typically see “rectified” values, which may differ from those displayed here. For a detailed explanation of these differences, see this article.
Firmware update

In the Firmware Update tab, you can check for firmware updates for your ZED camera and update it if a new version is available. The firmware is the software that runs on the camera hardware and controls its functionality.
Not all the ZED cameras support firmware updates. If your camera does not support firmware updates, this tab will be disabled.
Command line options
ZED Explorer also exposes command line options that let you record SVO files, stream the camera over the network, update the firmware, manage the calibration, and more — without using the GUI. Run the tool with -h (or --help) to display the full list:
Here is a description of each option:
-h,--help: displays the help on command line options.--help-all: displays the help, including Qt-specific options.-o,--output <output.svo2>: starts SVO recording to the given.svo2file. No GUI is started; pressCtrl+Cto stop.-r,--resolution <AUTO>: when recording or streaming, sets theRESOLUTION_MODEto use.-i,--input <0>: when recording or streaming, selects the camera by its index in the device list.--sn,--serial_number <0>: when recording or streaming, selects the camera by its serial number (S/N) in the device list.-f,--frequency <30>: when recording or streaming, sets the framerate to use.--cpm,--compression_mode <1>: when recording, sets the SVO compression mode —0= LOSSLESS PNG,1= LOSSLESS ZSTD,2= LOSSY JPEG,3= H264 Lossy (NVIDIA),4= H265 Lossy (NVIDIA),5= H264 Lossless (NVIDIA),6= H265 Lossless (NVIDIA).--fm,--flip mode <1>: when recording, sets the flip mode —0= no flip,1= flip.-l,--length <0>: when recording, sets the number of frames to record; recording stops automatically once this count is reached.-a,--all: lists the connected devices.--dc,--download_calibration: downloads the factory calibration and writes it to the camera EEPROM. It accepts a list of serial numbers and requires an Internet connection to download the factory calibration. This is the option to use to provision the EEPROM of cameras that do not yet have their calibration stored on-board (see Camera Calibration).-v,--version: displays the current version of the ZED SDK.--upf,--updatefw <fw.bin>: updates the camera firmware with the specified.binfile.--rbt,--reboot: reboots the camera. You can specify the desired serial number, or pass nothing to reboot the connected camera.-s,--stream: opens a network stream using the specified arguments.-p,--port <30000>: sets the port used for video streaming.--bit,--bitrate <8000>: sets the bitrate used to encode the video during streaming.--senc,--stream_encoding <H265>: sets the codec (H264orH265) used to encode the video during streaming.--gop,--group_of_picture <-1>: sets the group of pictures (GOP) size used to encode the video during streaming.--adbit,--adaptive_bitrate <false>: enables (true) or disables (false) adaptive bitrate, which adjusts the stream quality to match the viewer’s network connection speed.--cs,--chunk size <32768>: sets the chunk size used for video streaming.
The tool also accepts a positional argument:
svo_file: path to an SVO file to open.