ZEDfu
ZEDfu is the tool that allows you to test the Spatial Mapping module of the ZED SDK. It provides a simple interface to generate 3D maps from live data captured by a ZED camera or from recorded data on SVO files.
Run ZEDfu
Under Windows, you can find ZEDfu in the Start menu under the ZED SDK folder. You can also run it from the command line by navigating to the ZED SDK installation directory: C:\Program Files (x86)\ZED SDK\tools\ZEDfu.exe
Under Ubuntu, you can run ZEDfu from the terminal by typing ZEDfu or by navigating to the ZED SDK installation directory: /usr/local/zed/tools/ZEDfu
Select the Data Source and the Depth Mode

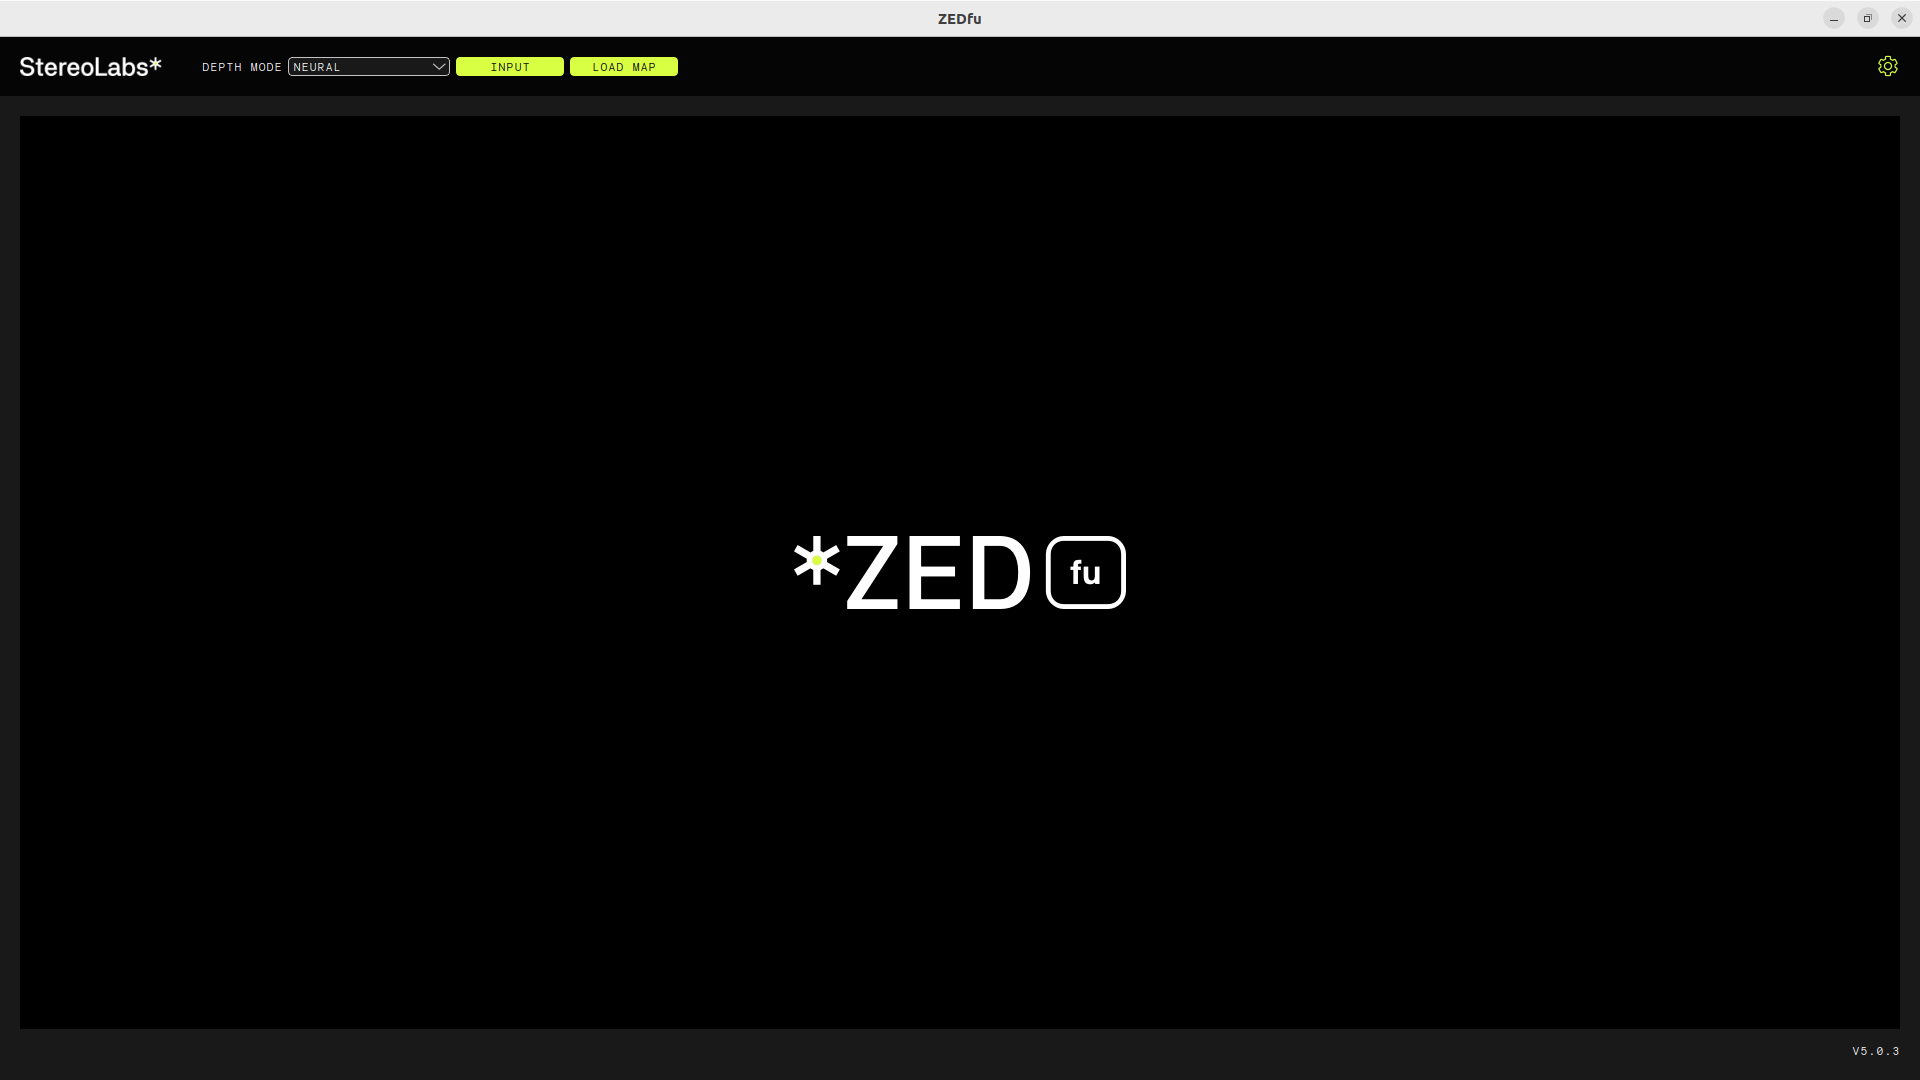
When you launch ZEDfu, you can select the data source from which to generate the 3D map. You can choose between:
- Live Camera: Use a connected ZED Stereo Camera to capture live data.
- Local Streaming: Use a ZED Local Streaming server to receive data from a remote camera. Useful when using a Dual ZED X One Virtual Stereo Camera.
- SVO File: Use a recorded SVO file to generate the map.
From the dropdown menu, you can also select the depth mode to use for the map generation. The available options are:
- NEURAL LIGHT: Uses the neural light depth mode for lower-quality depth estimation but better live performance.
- NEURAL: Uses the neural depth mode for a good compromise between quality and performance.
- NEURAL PLUS: Uses the neural plus depth mode for high-quality depth estimation, recommended in OFFLINE mode.
You can also open an existing map file to visualize it without generating a new one.
SVO Input
When using an SVO file as input you can select the OFFLINE mode, to preprocess the full SVO file before starting the map generation. This will allow you to obtain a higher-quality map, but it will take more time to process the data.

Configuration
Map Settings
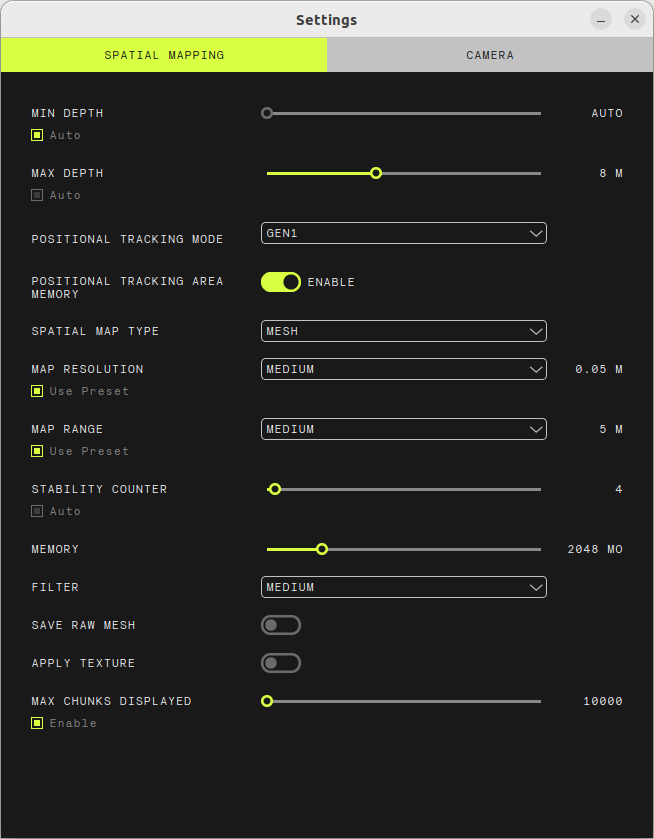
Click on the top-right gear icon to open the configuration panel.

Here you can set the map generation parameters:
- Depth range: Set the minimum and maximum depth range for the Depth acquisition. They can be both set to
Autoto let the ZED SDK automatically adjust the range based on the scene. - Positional Tracking mode: Choose between
GEN_1,GEN_2, orGEN_3. More information on the API documentation. - Area Memory: Enable or disable the Area Memory feature, which allows the ZED SDK to remember previously mapped areas and improve tracking performance.
- Map Type: Choose between
MESHorPOINT CLOUD. TheMESHtype generates a 3D mesh of the environment, while thePOINT CLOUDtype generates a point cloud representation. - Map Resolution: Set the resolution of the generated map. Higher resolutions will result in more detailed maps but will require more processing power and memory. You can choose between
LOW,MEDIUM, andHIGHresolution presets, or deselectUse presetto enter a manual value. - Map Range: Set the range of the map to be generated. This can be set to
Autoto let the ZED SDK automatically adjust the range based on the scene, or choose a preset value betweenNEAR,MEDIUM, andFAR. You can also deselectUse presetto enter a manual value. - Stability Counter: Set the stability counter value, which determines how long the ZED SDK will wait before considering a point as stable and adding it to the map. Higher values will result in more stable maps but will take longer to generate. Select
Autoto let the ZED SDK automatically adjust the value based on the scene. - Memory: Set the GPU memory usage for the map generation. You can choose a value from 512 MB to 8 GB.
- Filter: Select the strength of the filtering of the generated map. The filter will remove noise and improve the quality of the map. You can choose between
LOW,MEDIUM, andHIGHfiltering presets, orNONEto disable the filter. - Save Raw Mesh: Enable this option to save the raw mesh data in the map file. This can be useful for further processing or analysis of the map.
- Apply Texture: Enable this option to apply a texture to the generated mesh. This will improve the visual quality of the map but will require more processing power and memory.
- Max Chunks Displayed: Set the maximum number of chunks to display in the map. This can be useful to reduce the memory usage and improve the performance of the map visualization. You can choose a value from 10000 to 50000. You can also disable this feature.
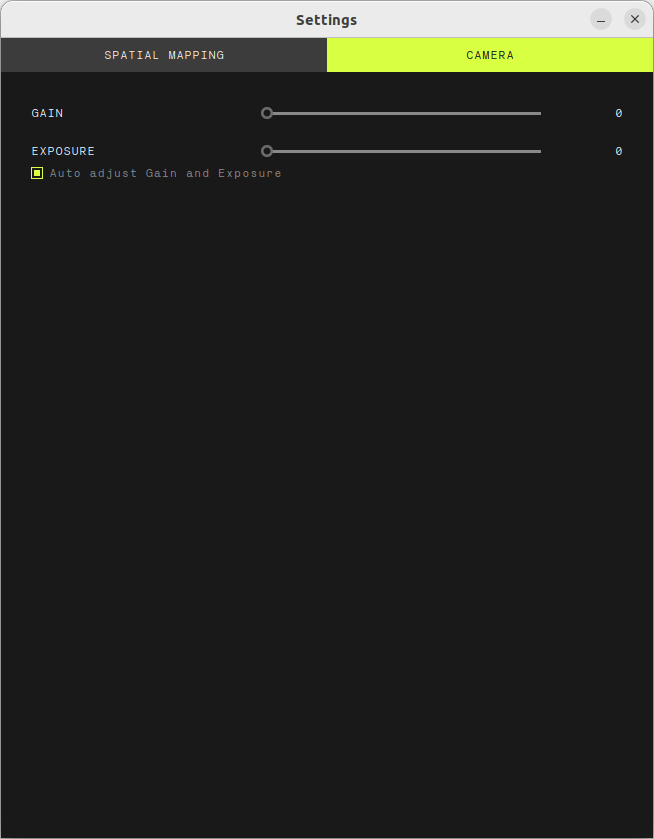
Live Camera Settings
When using a live camera as input, you can also configure the camera settings:
- Gain: Set the gain value for the camera. Higher values will result in brighter images but will also increase noise.
- Exposure: Set the exposure value for the camera. Higher values will result in brighter images.
You can also select the Auto option to let the ZED SDK automatically adjust the gain and exposure values based on the scene.
Generate the Map
It’s not possible to select the folder where the map will be saved. The map will be saved in the ZED/Meshes folder in the user’s home directory. When the map generation is complete, the full path of the generated map will be displayed in the status bar at the bottom of the window.
SVO Data Source
After selecting the SVO file, you can start the map generation by clicking on the START button. The ZEDfu tool will process the SVO file and generate the 3D map based on the selected settings.
Select the OFFLINE mode to preprocess the full SVO file before starting the map generation. This will allow you to obtain a higher-quality map, but it will take more time to process the data.

When the preprocessing is complete, the map generation will start automatically.
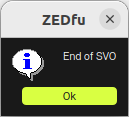
At the end of the process, a notification will appear to inform you that the map has been generated successfully.
Input Data Source
When using a live camera or a local streaming server as input, you can start the map generation by clicking on the START button. The ZEDfu tool will start capturing data from the camera and generate the 3D map based on the selected settings.
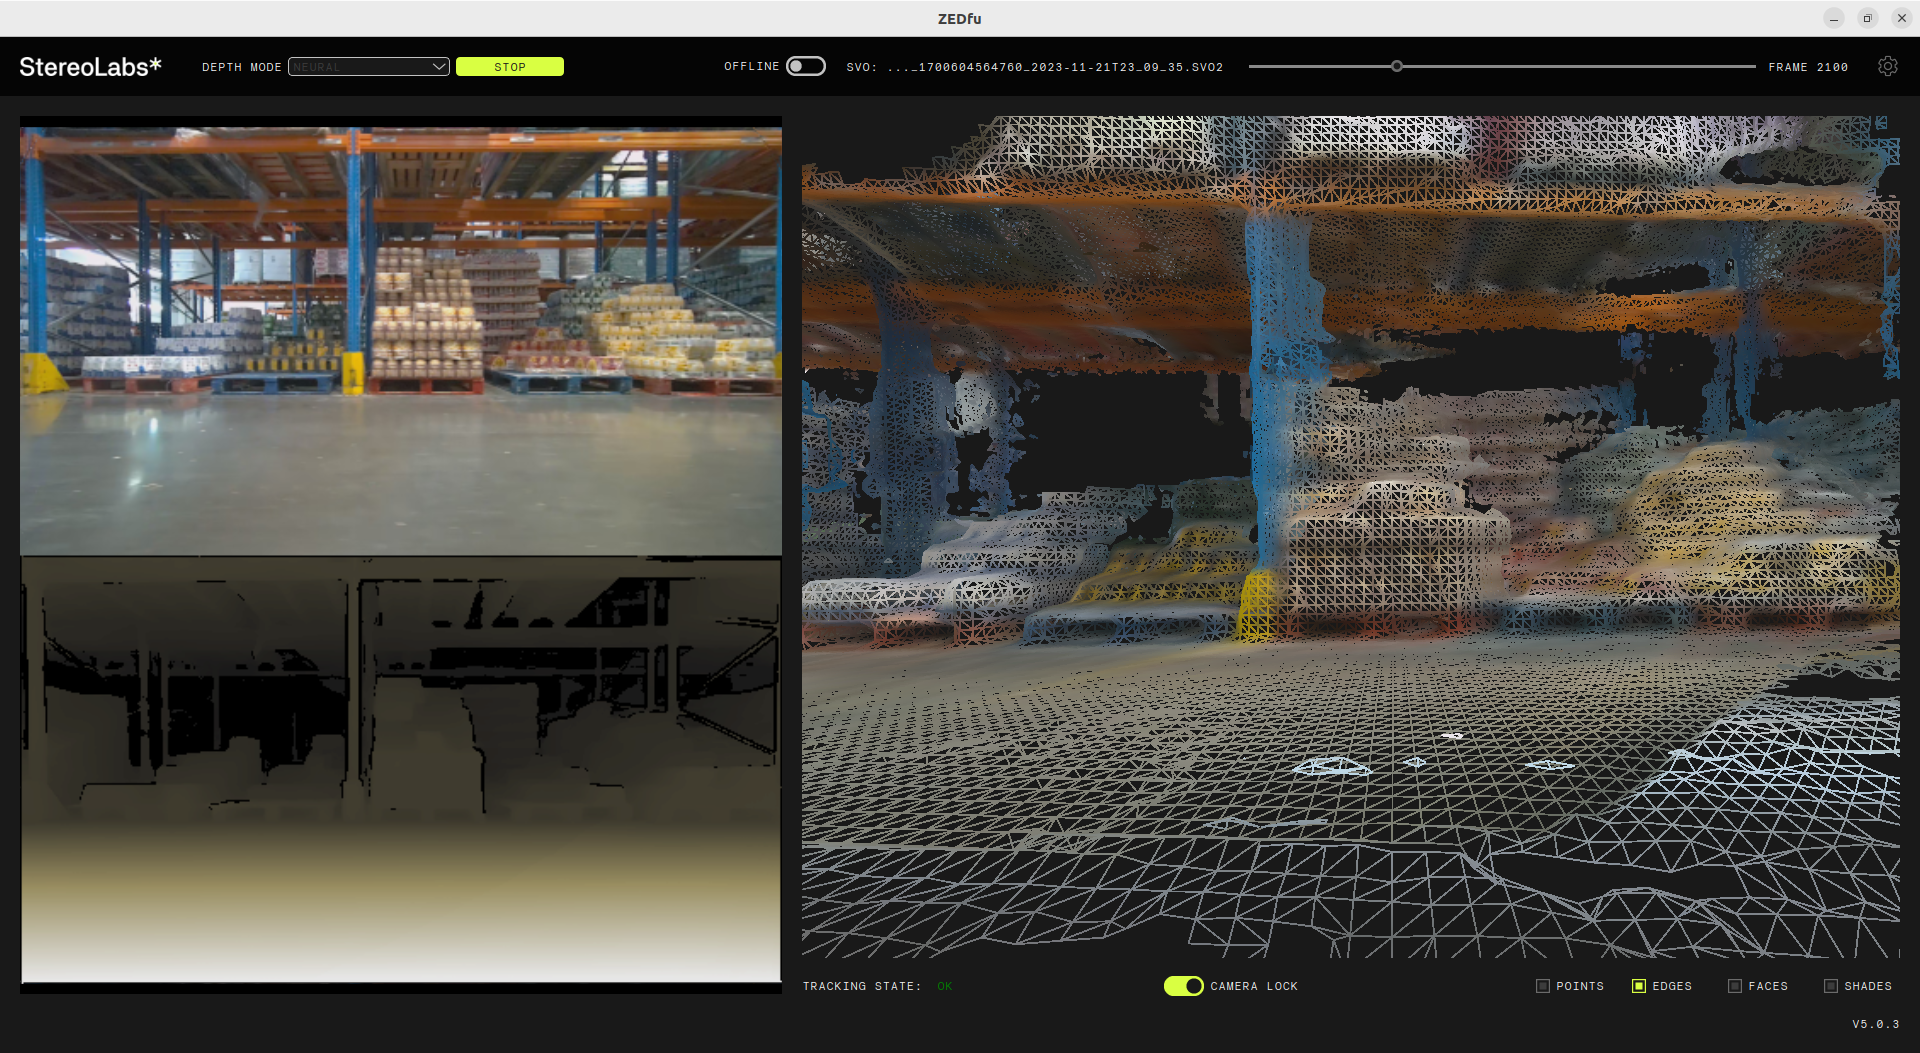
Move the camera around the environment to capture the 3D map. The ZEDfu tool will display the progress of the map generation in real-time.
You can select to follow the camera position by clicking on the Camera Lock button at the bottom. This will automatically move the camera view to follow the position of the ZED camera, showing the area being mapped in real-time.
The interface will display in real-time the status of the Positional Tracking. In case it switches to SEARCHING, you can move the camera around to help the ZED SDK to reinitialize the tracking and continue the map generation.
When the map generation is complete, click on the STOP button to stop the process. The ZEDfu tool will process the information and save the generated map in the selected format (MESH or POINT CLOUD) and display a notification to inform you that the map has been generated successfully.
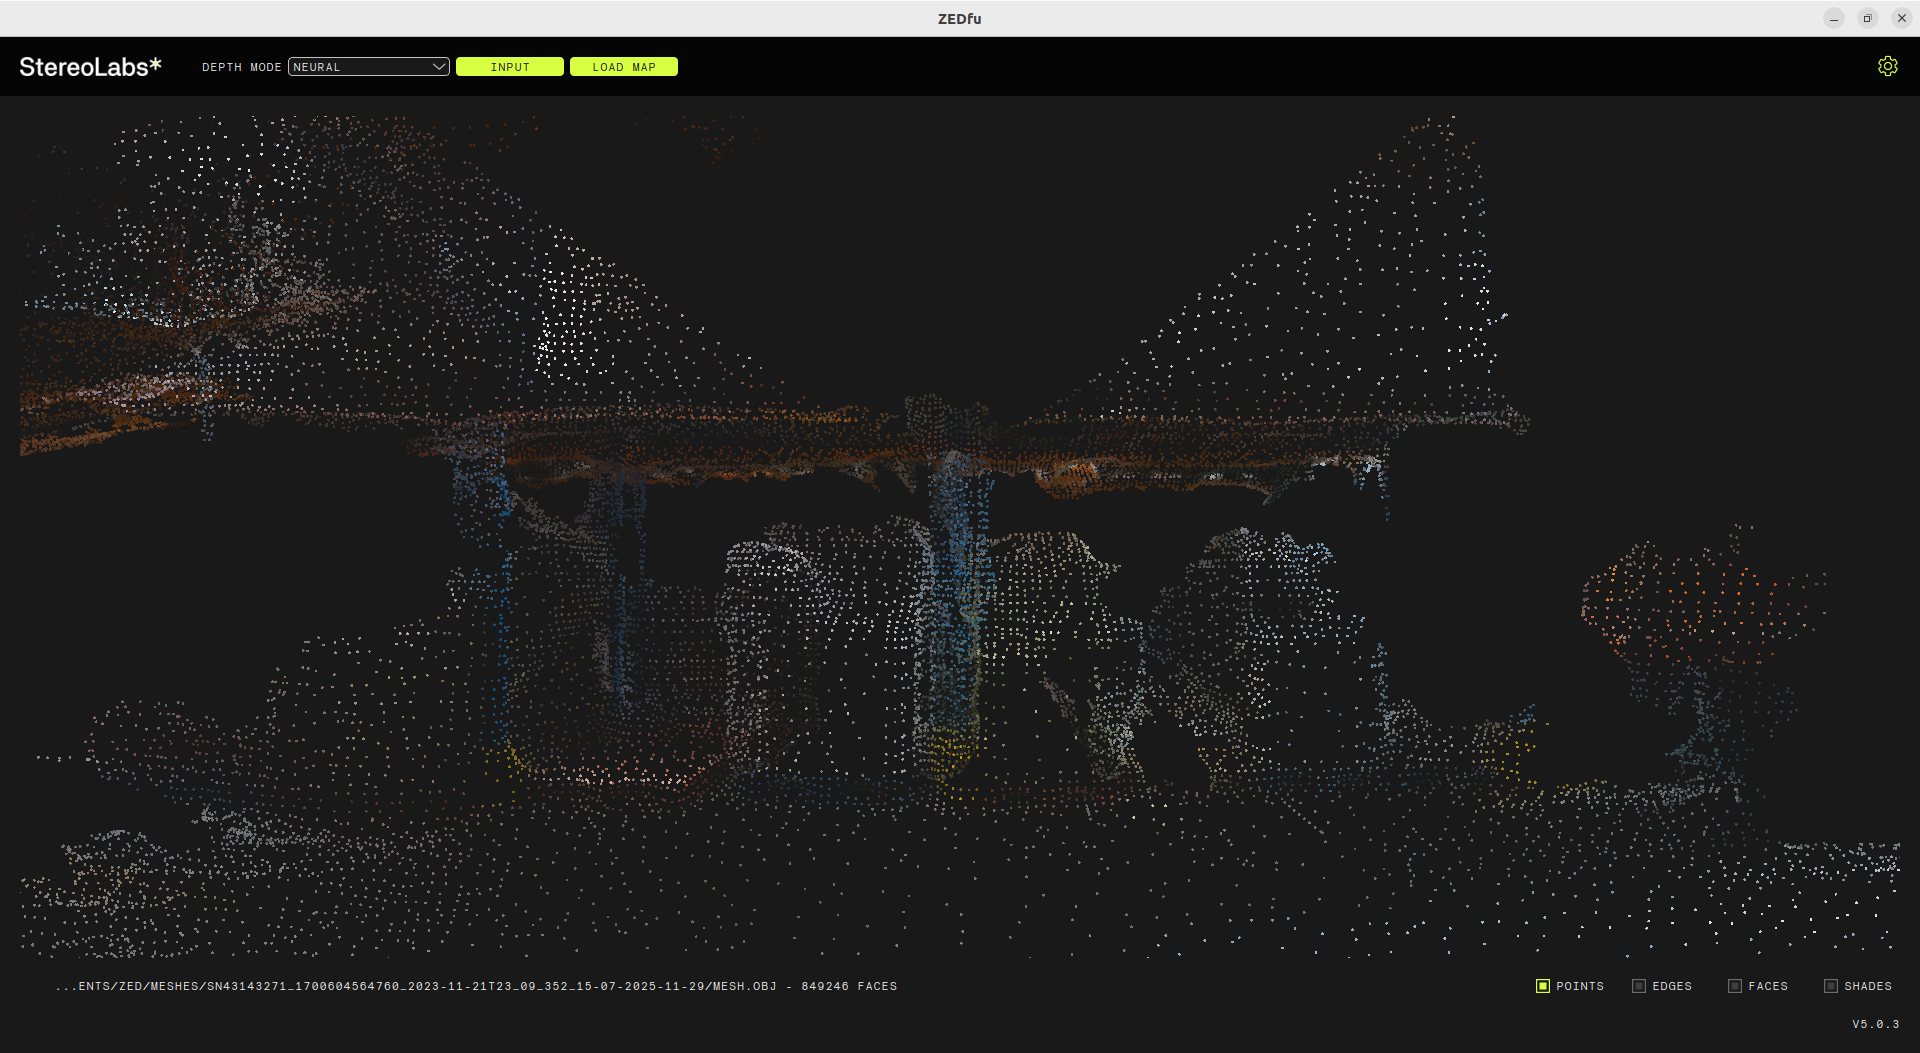
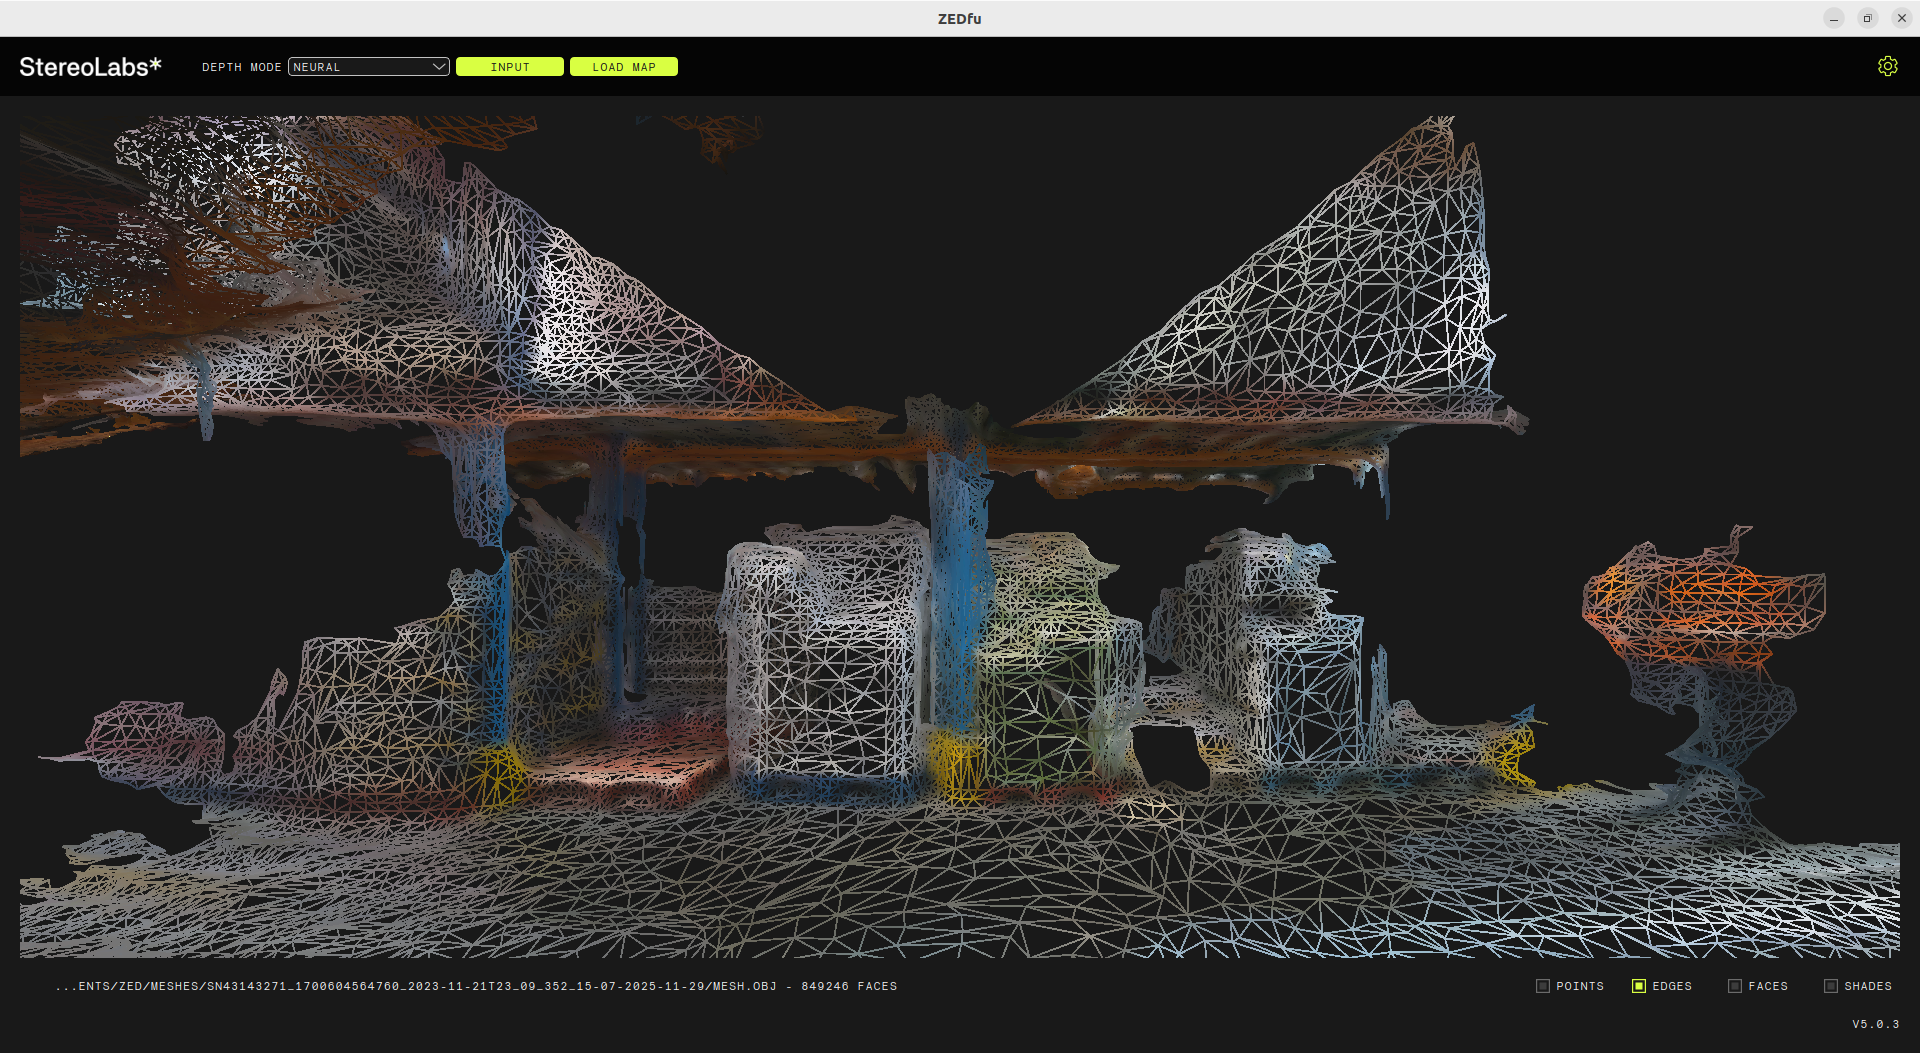
Explore the Map
Once the map generation is complete, or you downloaded a map file, you can explore the map in the main window.
Click on the left mouse button to rotate the camera view, use the mouse wheel to zoom in and out, and use the right mouse button to pan the camera view.
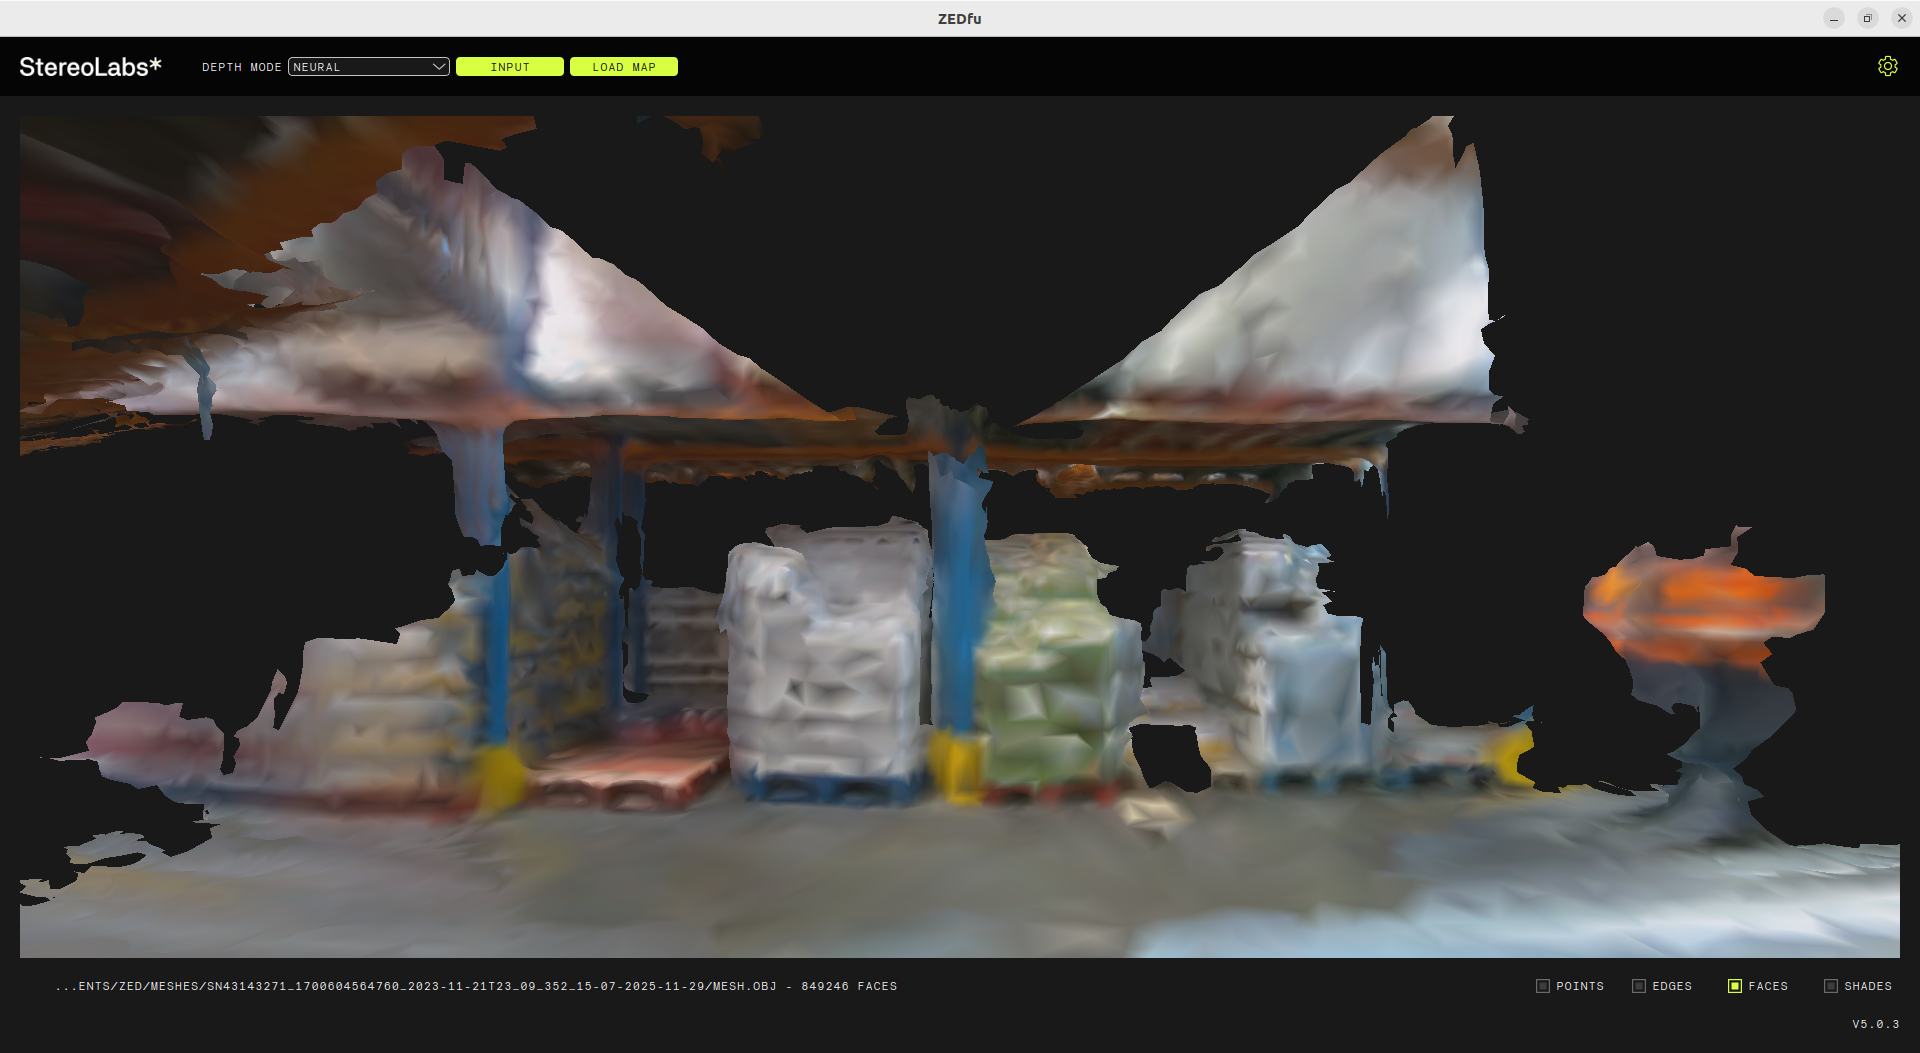
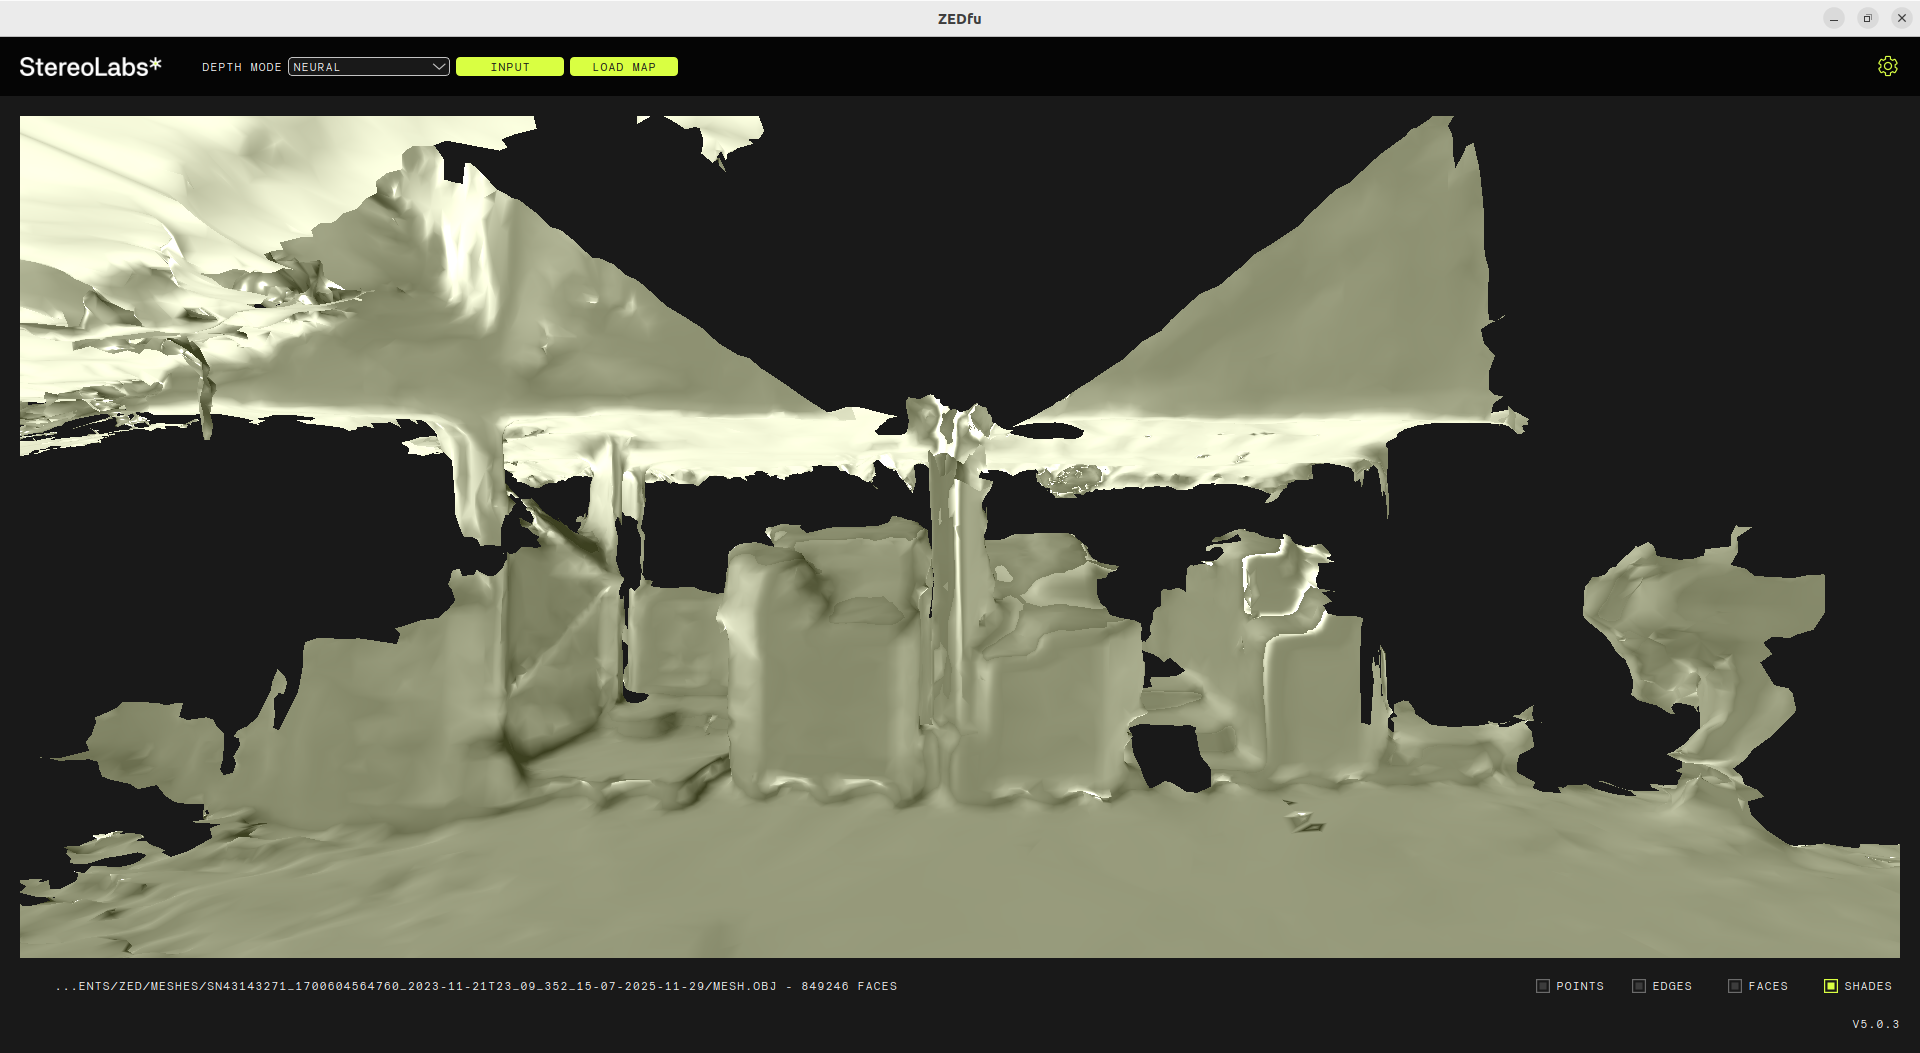
If the map has been generated as a “MESH”, you can switch between different rendering views by selecting the desired option from the bottom right toolbar:

- Points: Displays the map as a point cloud.
- Edges: Displays the map with edges highlighted.
- Faces: Displays the map with faces highlighted.
- Shades: Displays the map with shading applied.
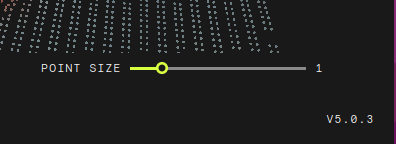
If the map was generated in “POINT CLOUD” mode, you can only select the Point Size.