ZED Depth Viewer
ZED Depth Viewer is the tool that lets you explore the depth processing capabilities of the ZED camera. It allows you to visualize the depth map, point cloud, and other depth-related data in real-time.
ZED Depth Viewer can work with live camera feeds, Network streams, or recorded SVO files. It provides a user-friendly interface to visualize depth data and adjust various parameters to optimize the depth perception.
Run ZED Depth Viewer
After connecting your camera and installing the ZED SDK, you can run ZED Depth Viewer to visualize the depth data.
ZED Depth Viewer is an application for ZED depth map and point cloud visualization. It lets you change video resolution, depth mode, and camera parameters, and capture high-resolution images, depth maps, and point clouds.
Under Windows, you can find ZED Depth Viewer in the Start menu under the ZED SDK folder. You can also run it from the command line by navigating to the ZED SDK installation directory: C:\Program Files (x86)\ZED SDK\tools\ZED Depth Viewer.exe
Under Ubuntu, you can run ZED Depth Viewer from the terminal by typing ZED_Depth_Viewer or by navigating to the ZED SDK installation directory: /usr/local/zed/tools/ZED_Depth_Viewer
Select the camera
When you launch ZED Depth Viewer, it automatically detects all connected ZED cameras and opens the first available. You can select the camera you want to use from the dropdown menu at the top right of the window.

You can click on the arrows icon on the right side of the dropdown menu to refresh the dropdown content after unplugging and replugging one camera.
You can click on the gear icon on the right side of the serial number text field to open the Camera and Application Settings dialog.
Select the video mode and source
You can select the resolution and framerate from the dropdown menus at the top left of the window. The available video modes depend on the camera model and its capabilities.

Between the StereoLabs logo and the video mode dropdown, you can see the current playback mode: LIVE, SVO PLAYBACK, or STREAMING (NETWORK).
You can select the input source by clicking on the related icon:
- Live Camera: Use the live feed from the connected ZED camera.
- SVO File: Use a recorded SVO file for playback.
- Network Stream: Use a network stream from another device or application that supports ZED streaming.
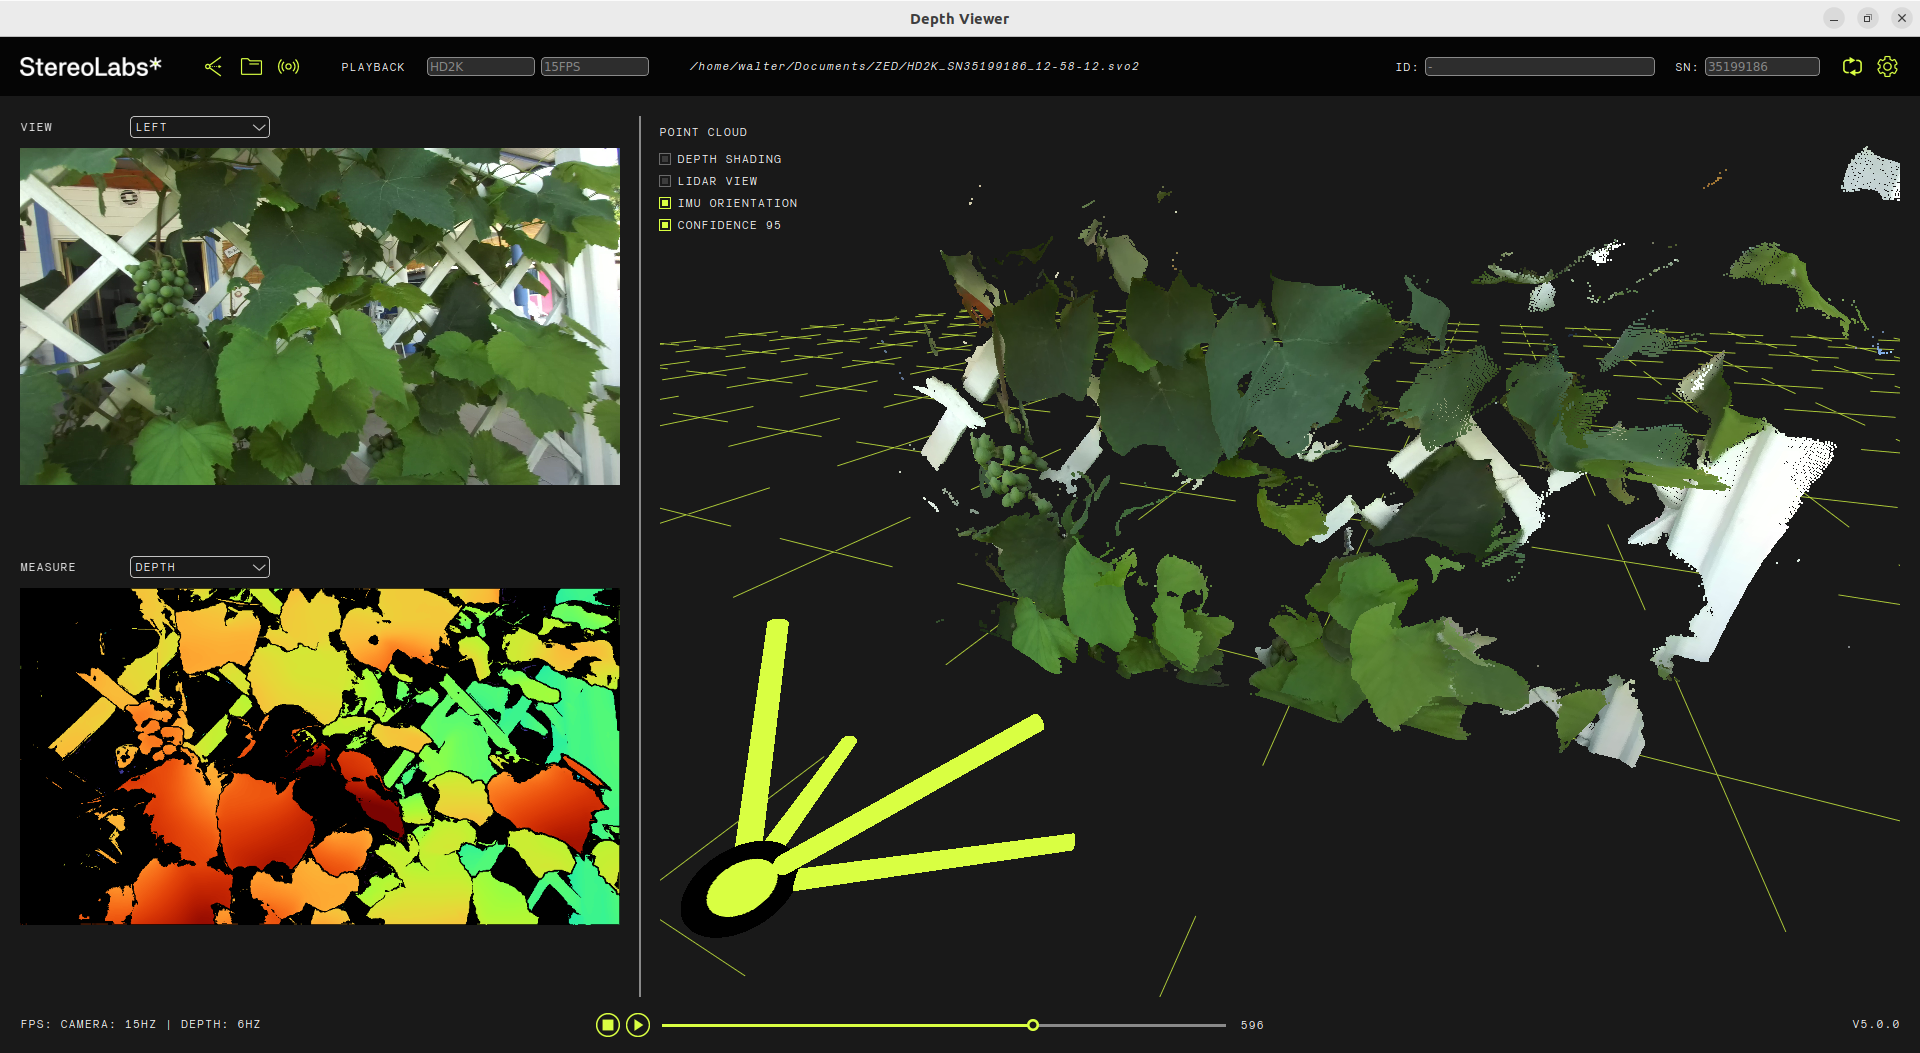
Visualize the data
The interface of ZED Depth Viewer is divided into three main sections:
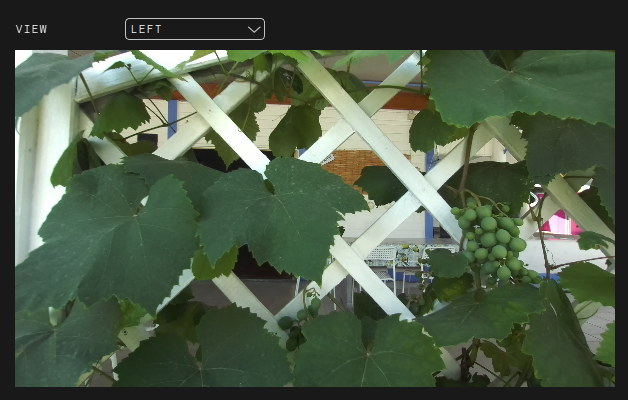
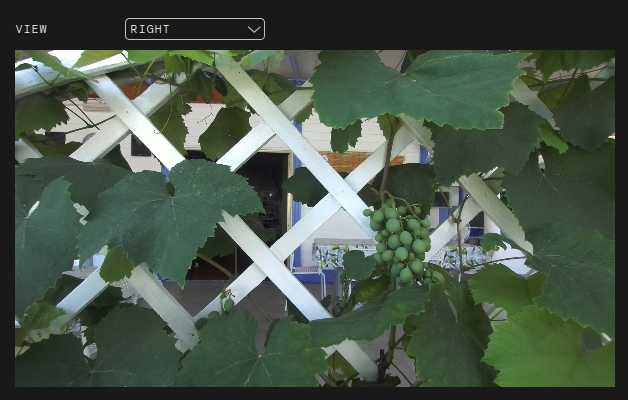
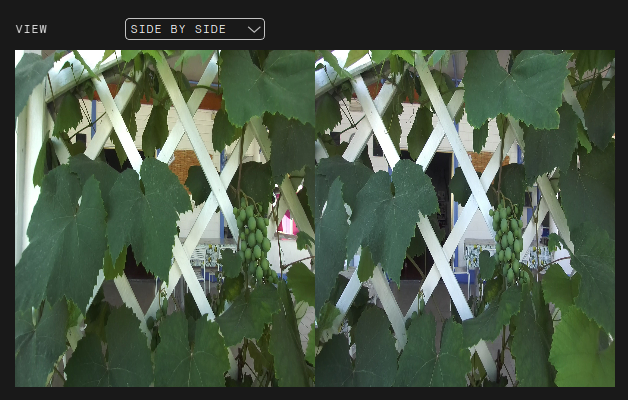
- Color Video Feed: Displays the color video feed, allowing you to select between the left, right, or synchronized stereo side-by-side data.
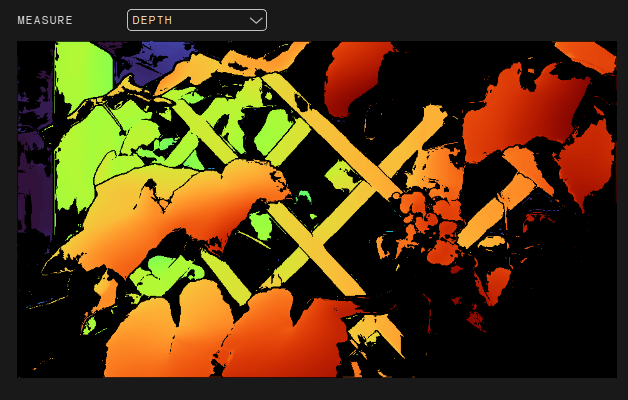
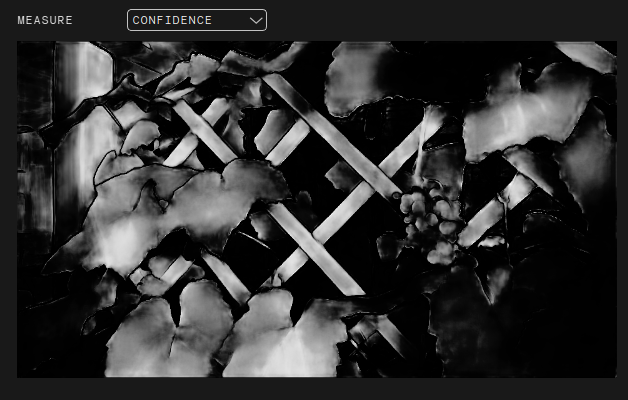
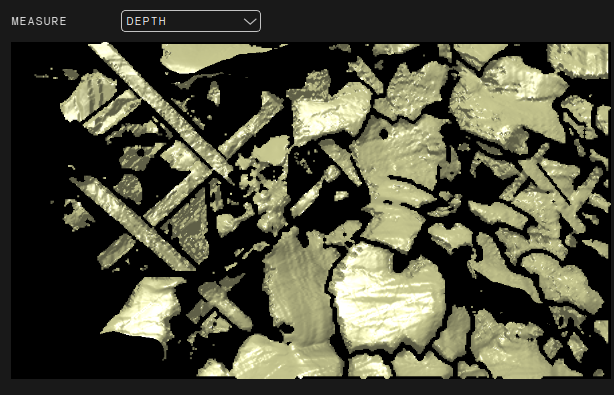
- Depth Feed: Displays the depth map or the confidence map, depending on the selected mode.
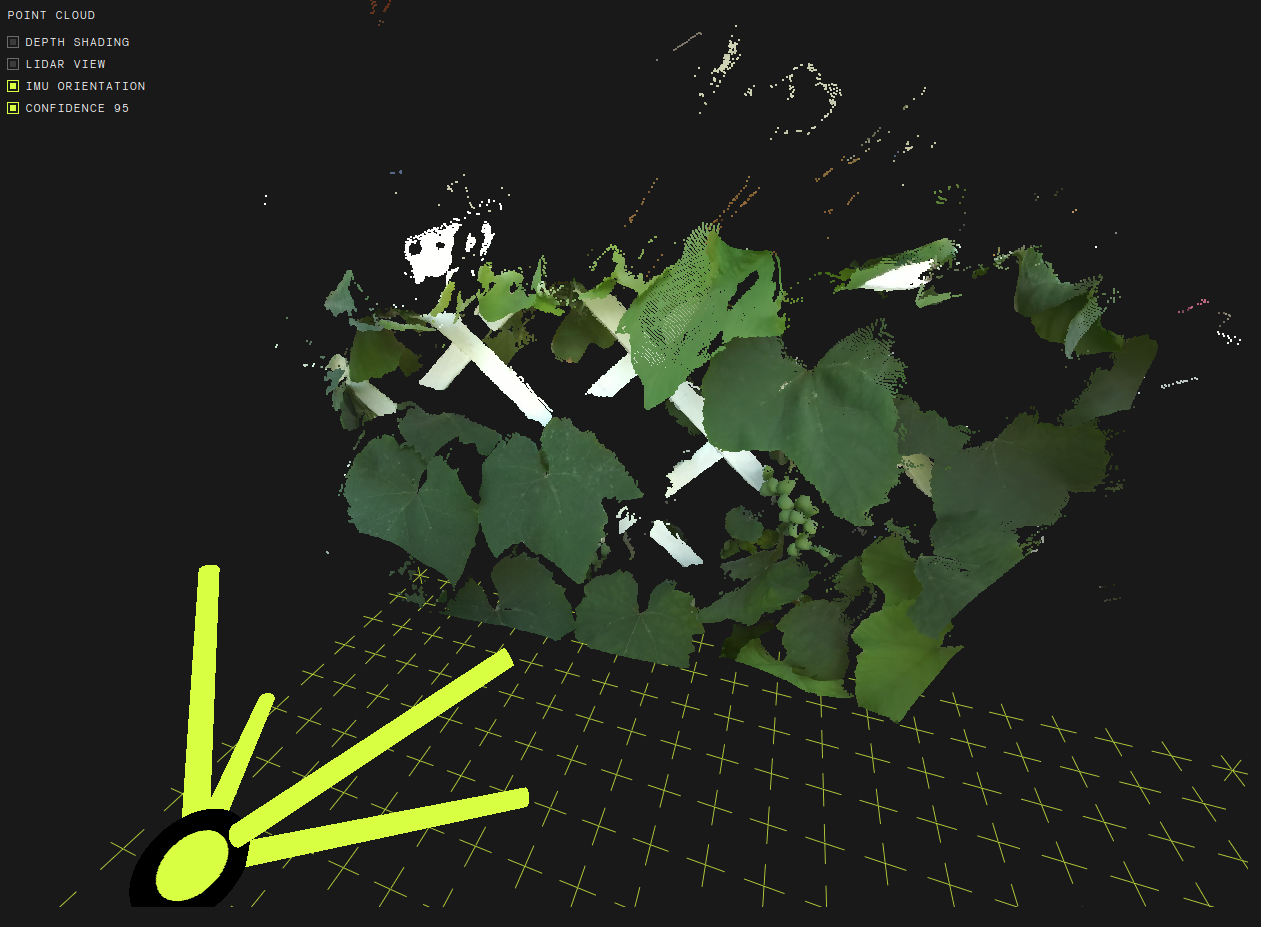
- 3D Data Feed: Displays the point cloud generated from the stereo data.
- You can rotate the camera view by clicking the left button and dragging the mouse in the 3D view.
- You can zoom in and out by scrolling the mouse wheel.
- You can pan the view by clicking the right button and dragging the mouse in the 3D view.
By toggling the options at the top left of the interface, you can:
- Enable/Disable the Depth Shading: toggle the depth shading effect on the depth map.
- Enable/Disable the Lidar View: transform the point cloud into a Lidar-like view, where points are colored based on their depth value.
- Enable/Disable the gravity alignment: align the point cloud to the gravity vector using the IMU data from the camera. This is useful for applications that require a consistent orientation of the point cloud.
- Quickly toggle between Confidence level 95 and 100: Allows you to quickly remove noisy points by filtering measures with lower confidence values.
Monitor the Depth Processing performance
![]()
Under the video feed, on the bottom left, you can see the processing status information, including:
- Image grab frequency: The frequency at which images are grabbed from the camera.
- Depth processing frequency: The frequency at which depth data is processed.
Configure the Application and Camera
Configure the application
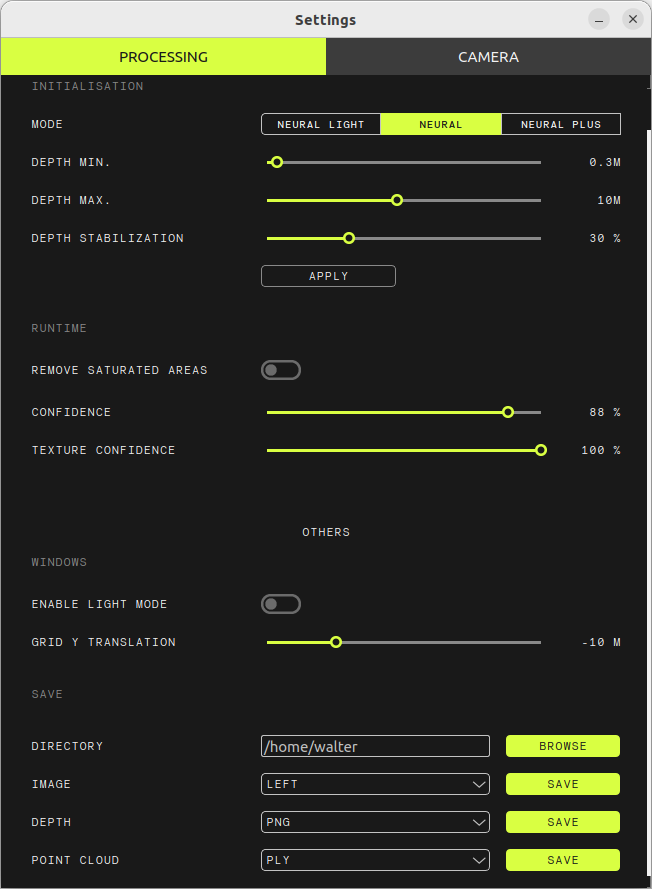
In the Application Settings tab, you can configure the following options:
- Depth Initialization: Depth settings to be tuned before opening the camera. Every modification will require a camera restart by clicking the APPLY button.
- Depth Mode: Select the depth mode (
NEURAL_LIGHT,NEURAL,NEURAL_PLUS) to adjust the depth quality and processing speed. - Depth Min.: Set the minimum depth range for depth processing.
- Depth Max.: Set the maximum depth range for depth processing.
- Depth Stabilization: Set the strength of the depth stabilization filter. Lower values result in less smooth but more reactive depth maps; higher values result in smoother depth maps that may appear blurred in dynamic scenes.
- Depth Mode: Select the depth mode (
- Depth Runtime: Depth settings that can be modified while the camera is open.
- Remove Saturated Areas: Enable or disable the removal of color image saturated areas in the depth map.
- Confidence Threshold: Set the confidence threshold for depth data. Higher values result in more reliable depth data but may reduce the effective range.
- Texture Confidence: Enable or disable texture confidence for depth processing.
- Other settings:
- Enable Light Mode: Switch the application window to light mode for better visibility in bright environments.
- Grid Y Translation: Adjust the Y translation of the reference grid in the point cloud view.
- Data Saving:
- Directory: Set the directory where captured images, depth maps, and point clouds will be saved.
- Image: Select the image to be saved (
PNGformat) betweenLEFT,RIGHT,SIDE BY SIDE, orDEPTH IMAGE. Click on SAVE to save the current image. - Depth: Select the format for saving depth maps (
PNG,PFM, orPGM). Click on SAVE to save the current depth map. - Point Cloud: Select the format for saving point clouds (
PLY,XYZ,PCD, orVTK). Click on SAVE to save the current point cloud.
Configure the camera
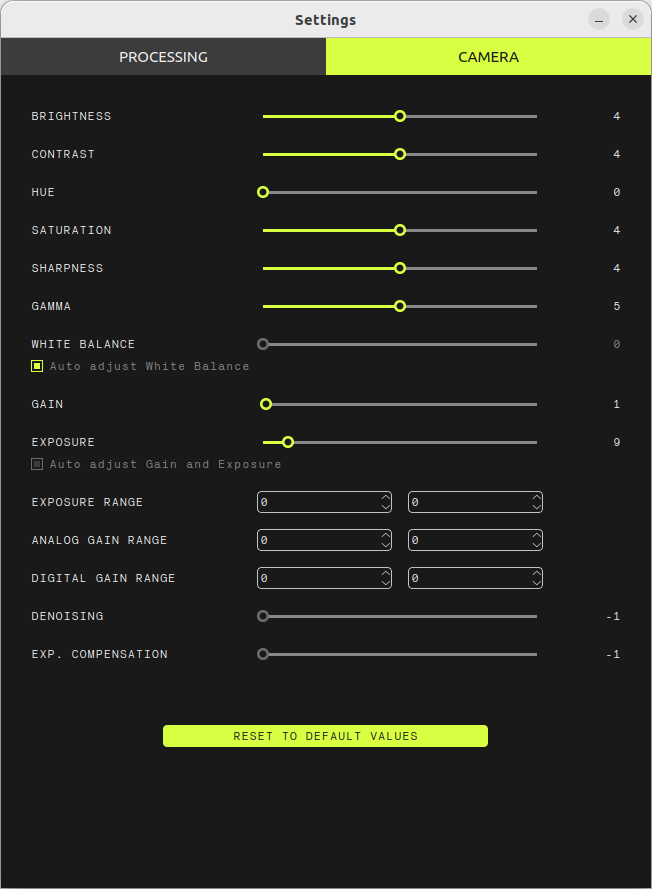
In the Camera Settings tab, you can control different camera parameters:
- Contrast: Adjust the contrast of the video feed.
- Saturation: Adjust the saturation of the video feed.
- Hue: Adjust the hue of the video feed.
- Gain: Adjust the gain of the video feed.
- White Balance: Adjust the white balance of the video feed.
- Exposure: Adjust the exposure of the video feed.
- Sharpness: Adjust the sharpness of the video feed.
- Gamma: Adjust the gamma of the video feed.
- Auto Exposure: Enable or disable automatic exposure adjustment.
- Auto White Balance: Enable or disable automatic white balance adjustment.
- Exposure Range: Adjust the exposure range of the video feed.
- Analog Gain Range: Adjust the analog gain range of the video feed.
- Digital Gain Range: Adjust the digital gain range of the video feed.
- Denoising: Adjust the denoising filter strength.
- Exposure Compensation: Adjust the exposure compensation for the video feed.
These settings allow you to fine-tune the camera parameters to achieve the desired video quality and performance. You can adjust these parameters in real-time while the camera is streaming live or network streams.
Some of these parameters may not be available for all camera models or video modes. The available parameters depend on the camera model and its capabilities.
Click on the DEFAULT VALUES button to reset the camera parameters to their default values.