Getting Started with Jetson Xavier NX
Learn how to set up the new NVIDIA Jetson™ Xavier NX and install everything you need to use the full power of this tiny AI-ready embedded board.
Learn how to set up the new NVIDIA Jetson™ Xavier NX and install everything you need to use the full power of this tiny AI-ready embedded board.
Prerequisites
- Ubuntu host PC
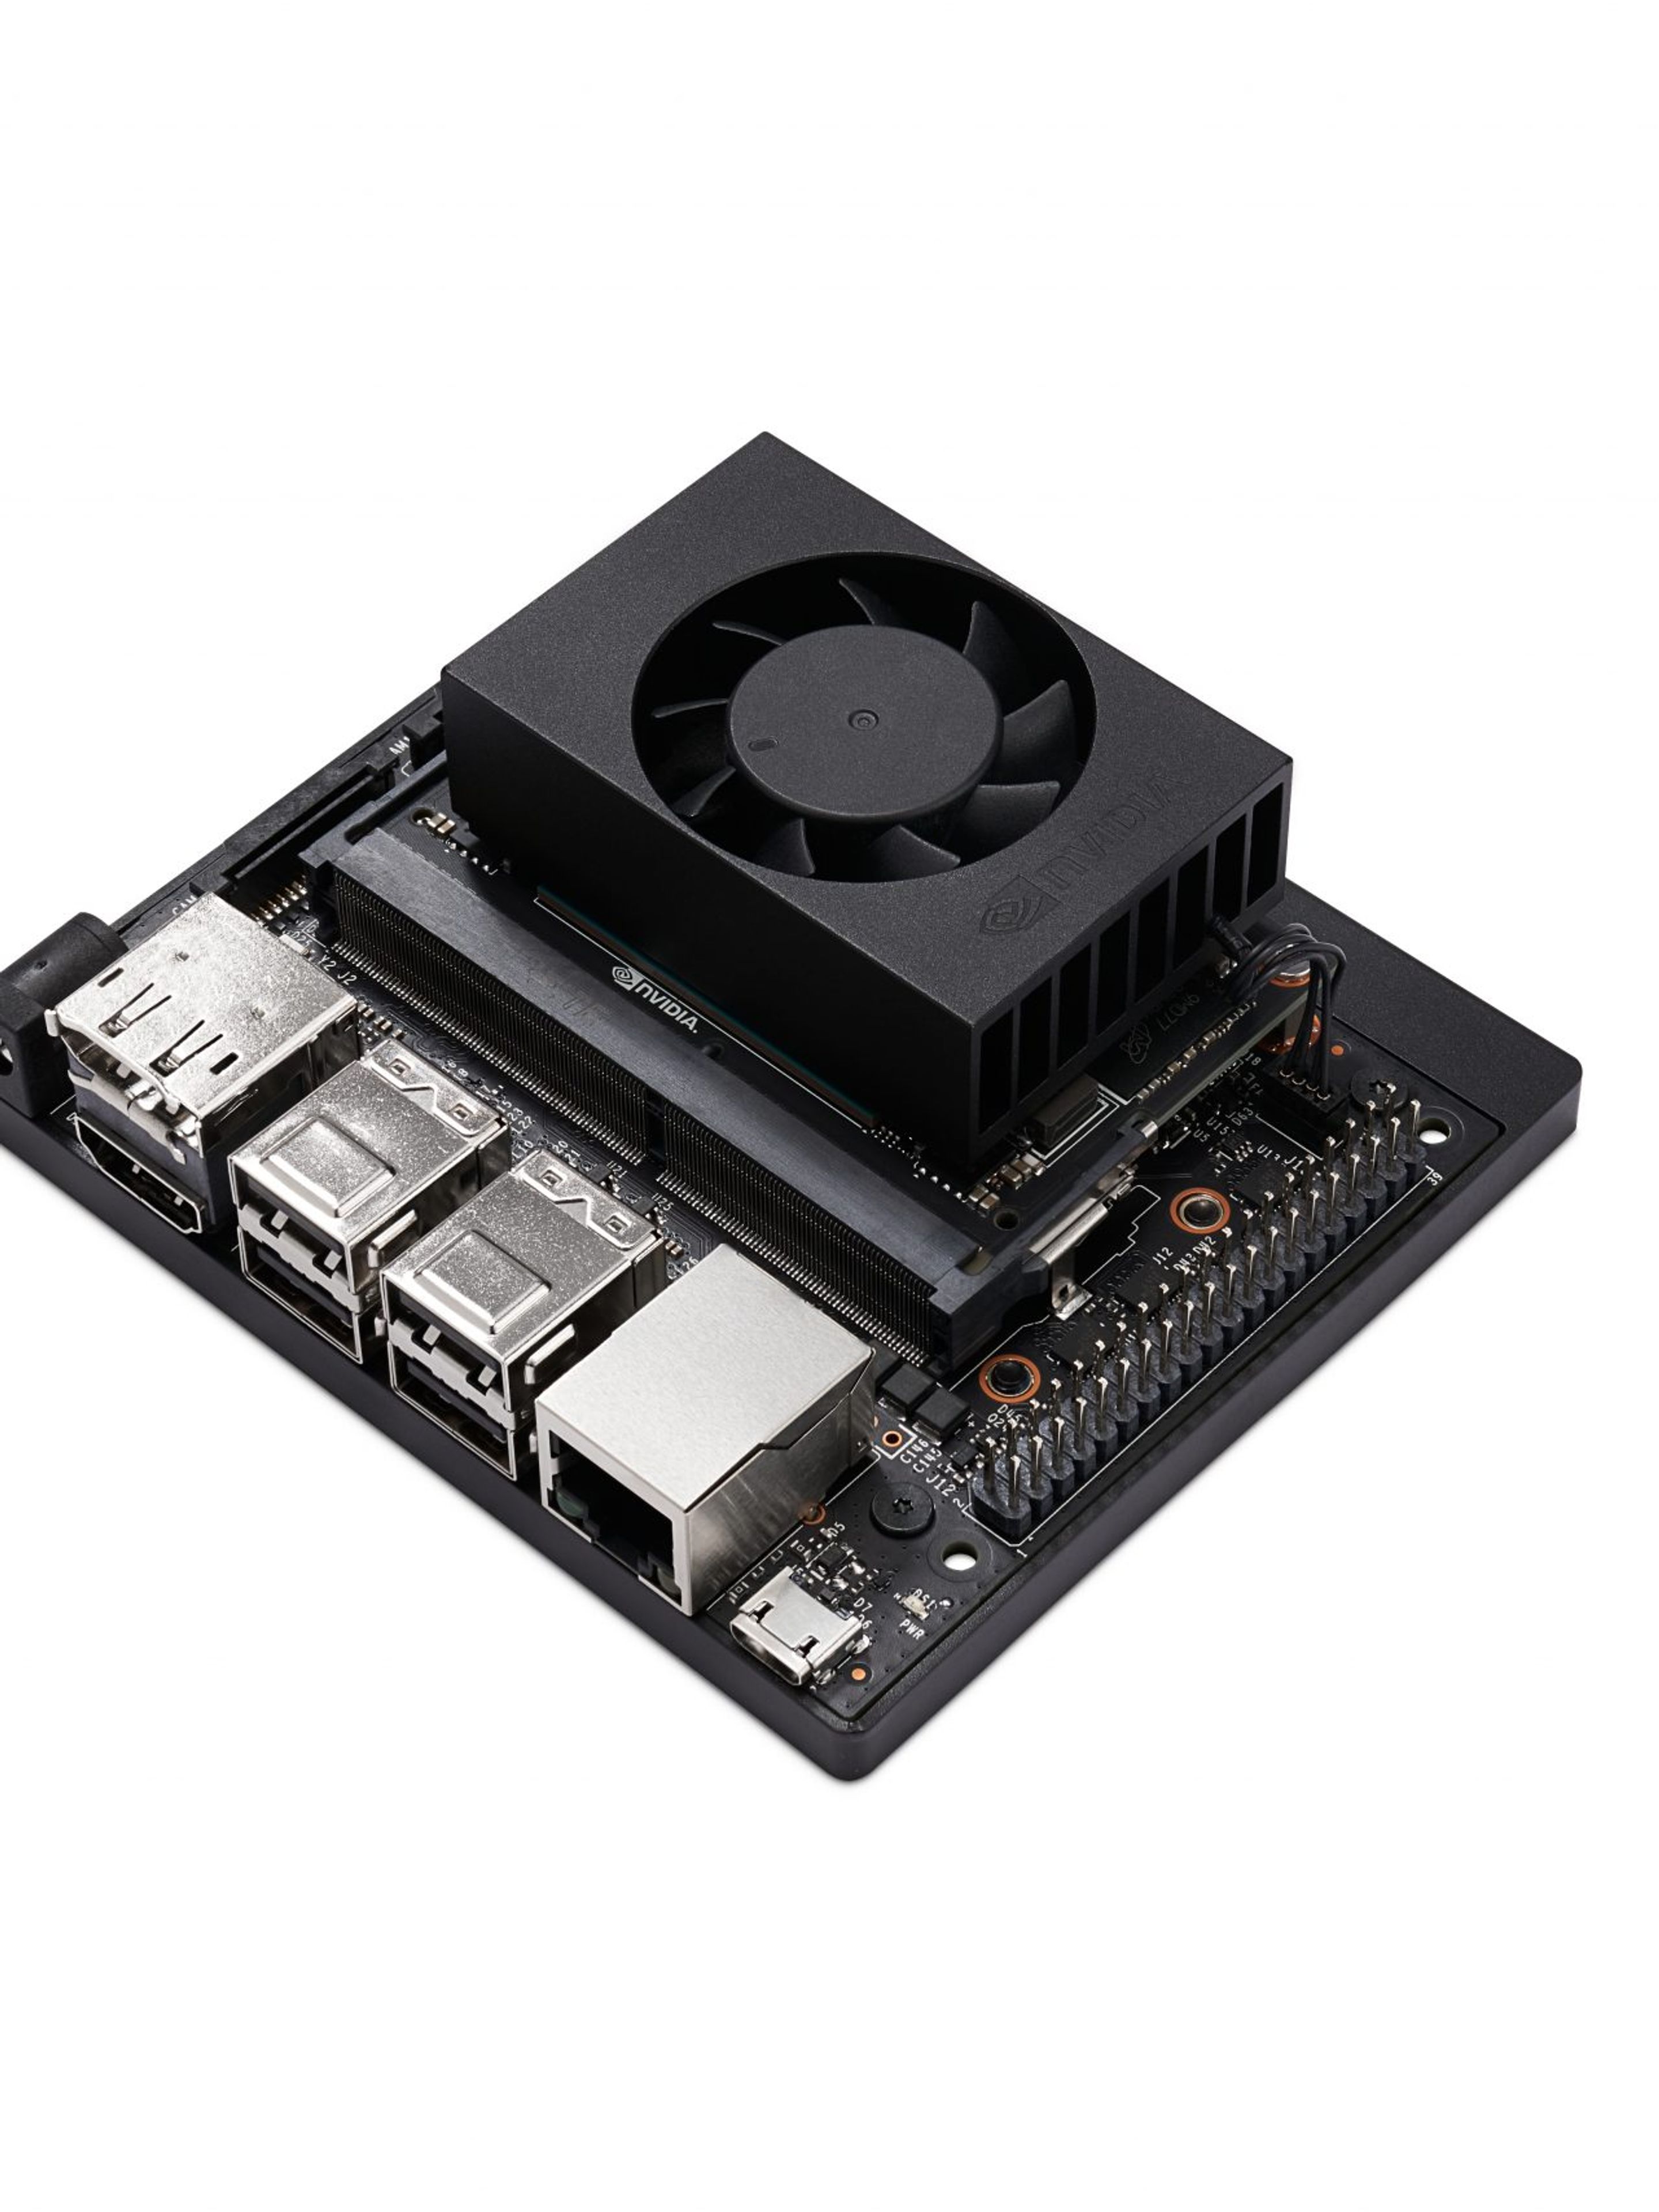
- Jetson™ Xavier NX Dev Kit with 30W power supply (recommended)
- Display with HDMI input
- Keyboard and mouse
- Internet connection through Ethernet cable or USB Wi-Fi adapter
Flashing the OS Image
To setup the Jetson™ Xavier NX, you need to flash the Xavier NX kit with the latest version of the linux4tegra operating system (an Ubuntu derived OS) and install NVIDIA® drivers and libraries.
Install NVIDIA SDK Manager
- Download NVIDIA® SDK Manager.
- From a terminal, install the Debian package:
$ sudo apt install ./sdkmanager_[version]-[build]_[arch].deb
where [version], [build] and [arch] represent the current version, the build number and the architecture of SDK Manager (e.g. sdkmanager_1.1.0-6343_amd64.deb).
Run NVIDIA SDK Manager
When the installation is complete, start the SDK Manager from the Ubuntu launcher, or using the command:
$ sdkmanager
Select the NVIDIA DEVELOPER tab, enter your developer credentials and click Login.

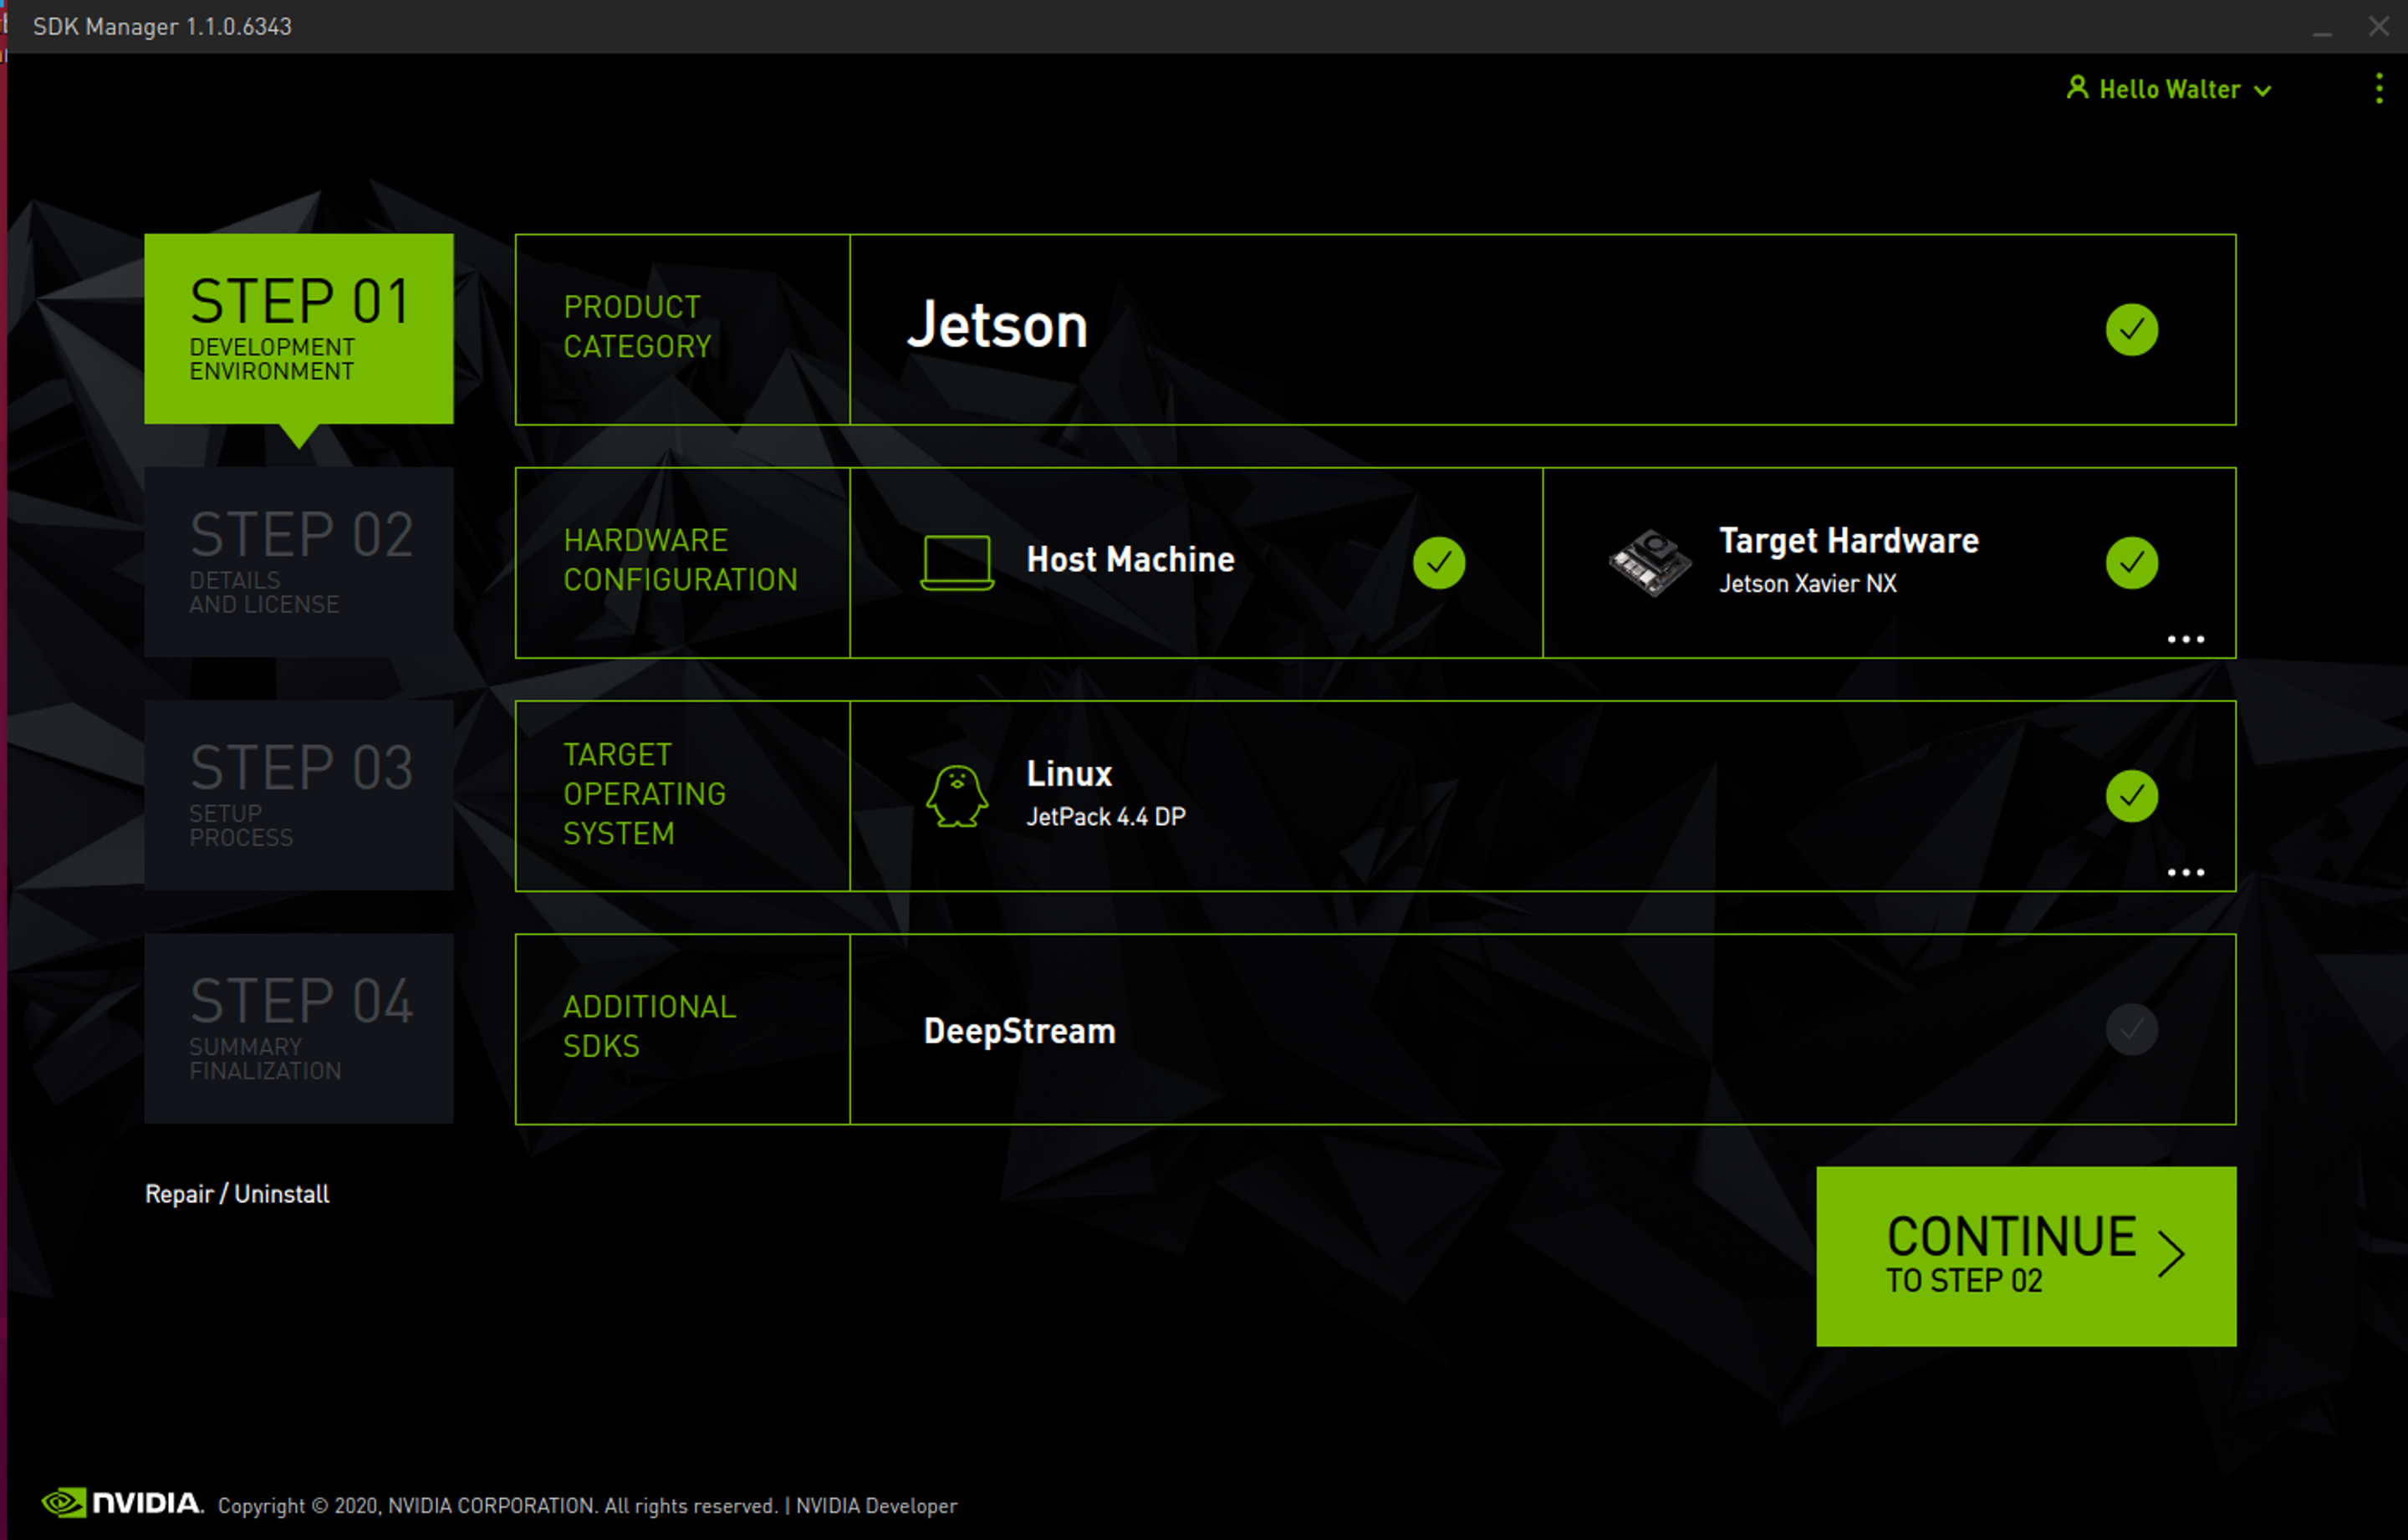
Select your Development Environment
STEP 01 lets you select the board to flash, the version of the operating system and additional SDKs to be installed.
- Click on “Target Hardware” and select “Jetson Xavier NX” from the list.
- Click on “Linux” and select the latest version of operating system to install (e.g. “Jetpack 4.4 DP”).
- Eventually select additional SDKs if you plan to use them
Review Target Components
Review the components that will be installed on your system. We recommend installing Jetson SDK Components along the OS on your Xavier NX. You can also change the “Download folder” and “Target HW image folder”.
Accept the terms and conditions and click on CONTINUE TO STEP 03 to start the OS flashing process.

Note: We faced issues when using an external USB storage for the “Target HW image folder”, so we suggest to use a folder located on the host internal storage.
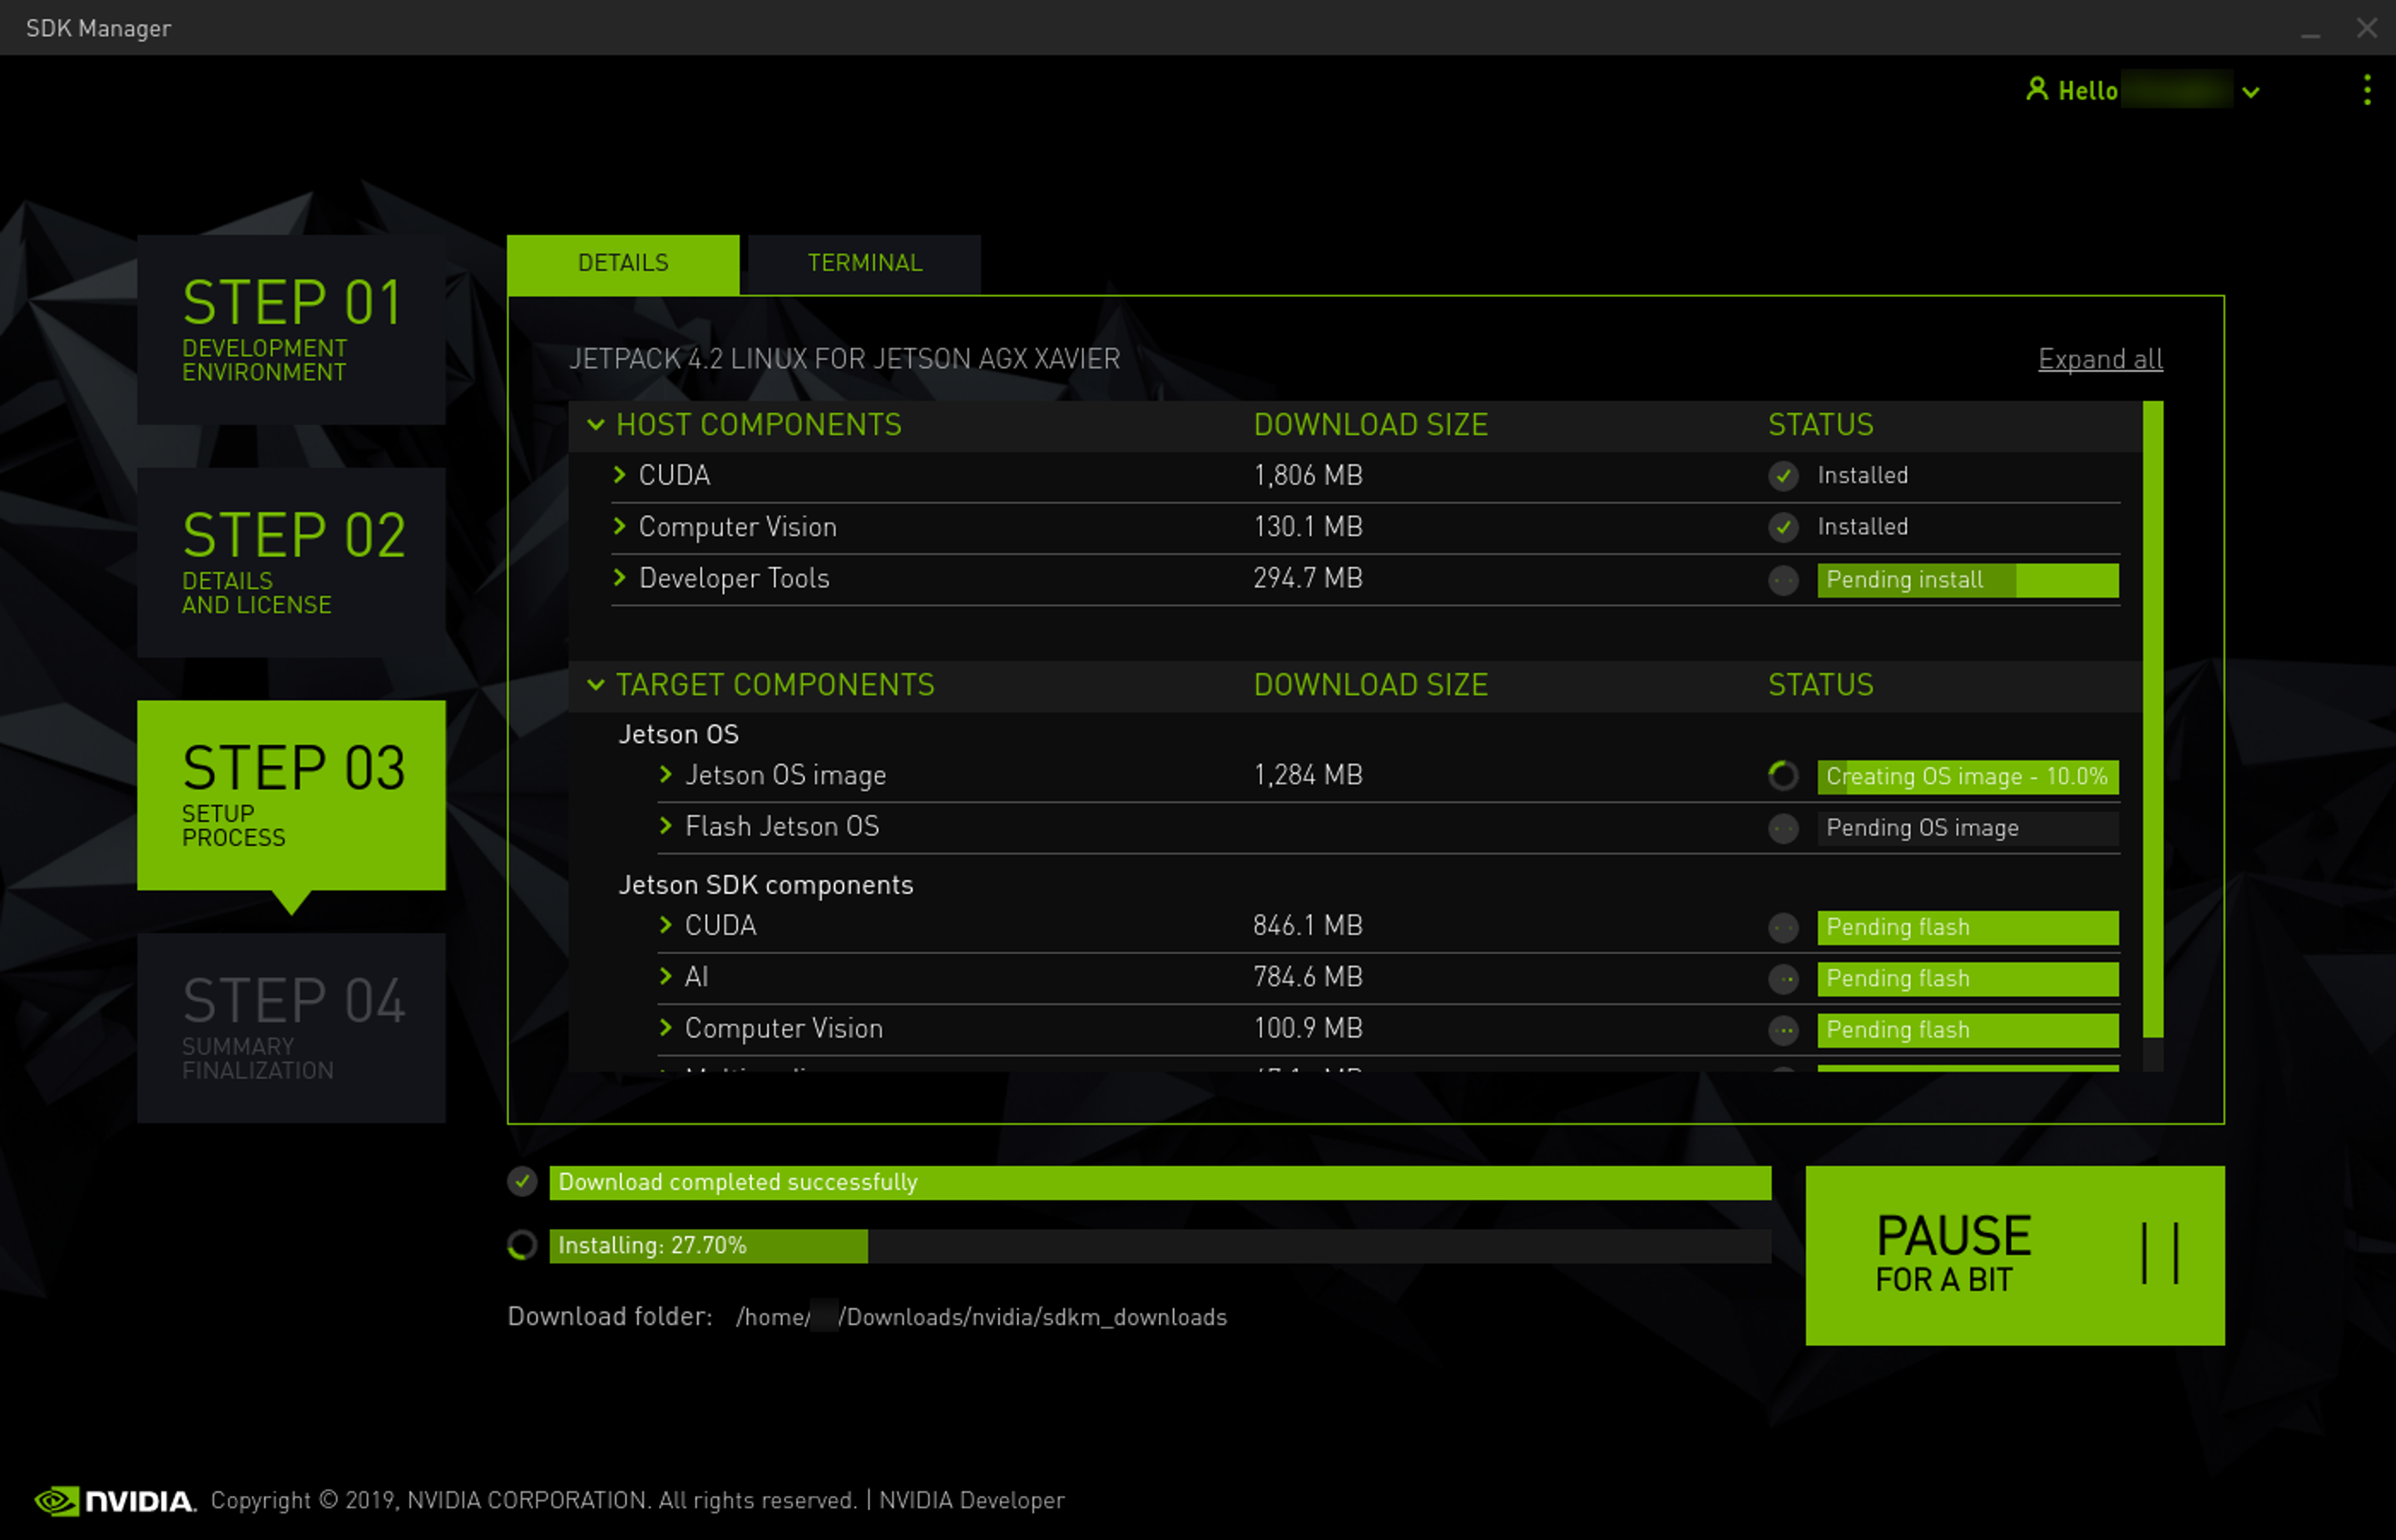
Launch the Jetson OS Install
Before the installation can begin, you will need to enter your sudo password. The SDK Manager will then display the progress of the download and software installation.
At the top, you can toggle between the Details and Terminal tabs. The Terminal tab shows detailed information about the download and installation, highlighting errors (if any).
Hardware Setup
The SDK Manager opens a dialog when it is ready to flash your target device. A prompt provides instructions for preparing your device to get it ready for flashing.
Connect a Micro USB cable to the USB connector.

Insert a jumper to connect the PINs #9 and #10 of the connector J50 just under the Xavier NX module to Force Recovery on boot.

Insert a jumper on the connector J48 (behind the power jack connector) to enable the power jack.

Connect the USB cable to the host PC and insert the power jack to power on the Xavier NX board.

The flashing process starts automatically.
After the SDK Manager completes the flashing process, you must remove the jumper on the PINs #9 and #10 of the connector J50 to be able to boot the Xavier in normal mode.
Connect an HDMI display, an USB keyboard and an USB mouse to the Jetson™ Xavier NX.
Now you can unplug and replug the power jack to restart the board and start configuring Ubuntu.
Note: Do not close the SDK Manager, you will need it for the last step.
Ubuntu Initial Configuration
After the Jetson™ Xavier NX boots up for the first time, it will start system configuration as a common Ubuntu installation.
- Accept the EULA license.
- Choose language, keyboard and time zone.
- Choose a username/password.
Jetson SDK Components Installation
If you selected to install Jetson SDK Components, follow the step below to complete the installation.
- Go back to the SDK Manager and enter the username and password you chosen in the previous step while configuring Ubuntu on the Xavier NX board.
Make sure that the microUSB cable is still plugged between the host and the Xavier NX, that way a virtual ethernet connection is created and the host can directly communicate with the board to continue the installation process.
The IP address of the board is 192.168.55.1, the host will get the default IP address 192.168.55.100.
- Click Install and wait for installation completion.
Now you can close the SDK Manager and start using your Jetson™ Xavier NX board!
Enable Maximum Performance
If you are using at least a 20W power supply and want to have access to the full power of the Jetson™ Xavier NX, you can enable the Max performance model:
$ sudo nvpmodel -m 0
This will maximize the performance of your application at the expense additional power consumption.
Troubleshooting
Jetson™ Xavier NX shuts down as soon as my app opens the ZED camera.
This is also a power-related issue. Make sure you are using a DC power jack with 12V 2A power (3A or more is recommended).
You can also use this command to enter low-performance mode and reduce power consumption:
$ sudo nvpmodel -m 1
Adding a ZED camera

Your Jetson Xavier NX will need an Internet connection to install the ZED SDK as it downloads a number of dependencies. You can use an Ethernet cable or the included Wi-Fi adapter.
Download the ZED SDK for Jetson Xavier NX and install it by running this command and following the instructions that appear:
$ chmod +x ZED_SDK*
$ ./ZED_SDK_Tegra_JP44_v3.2.0.run