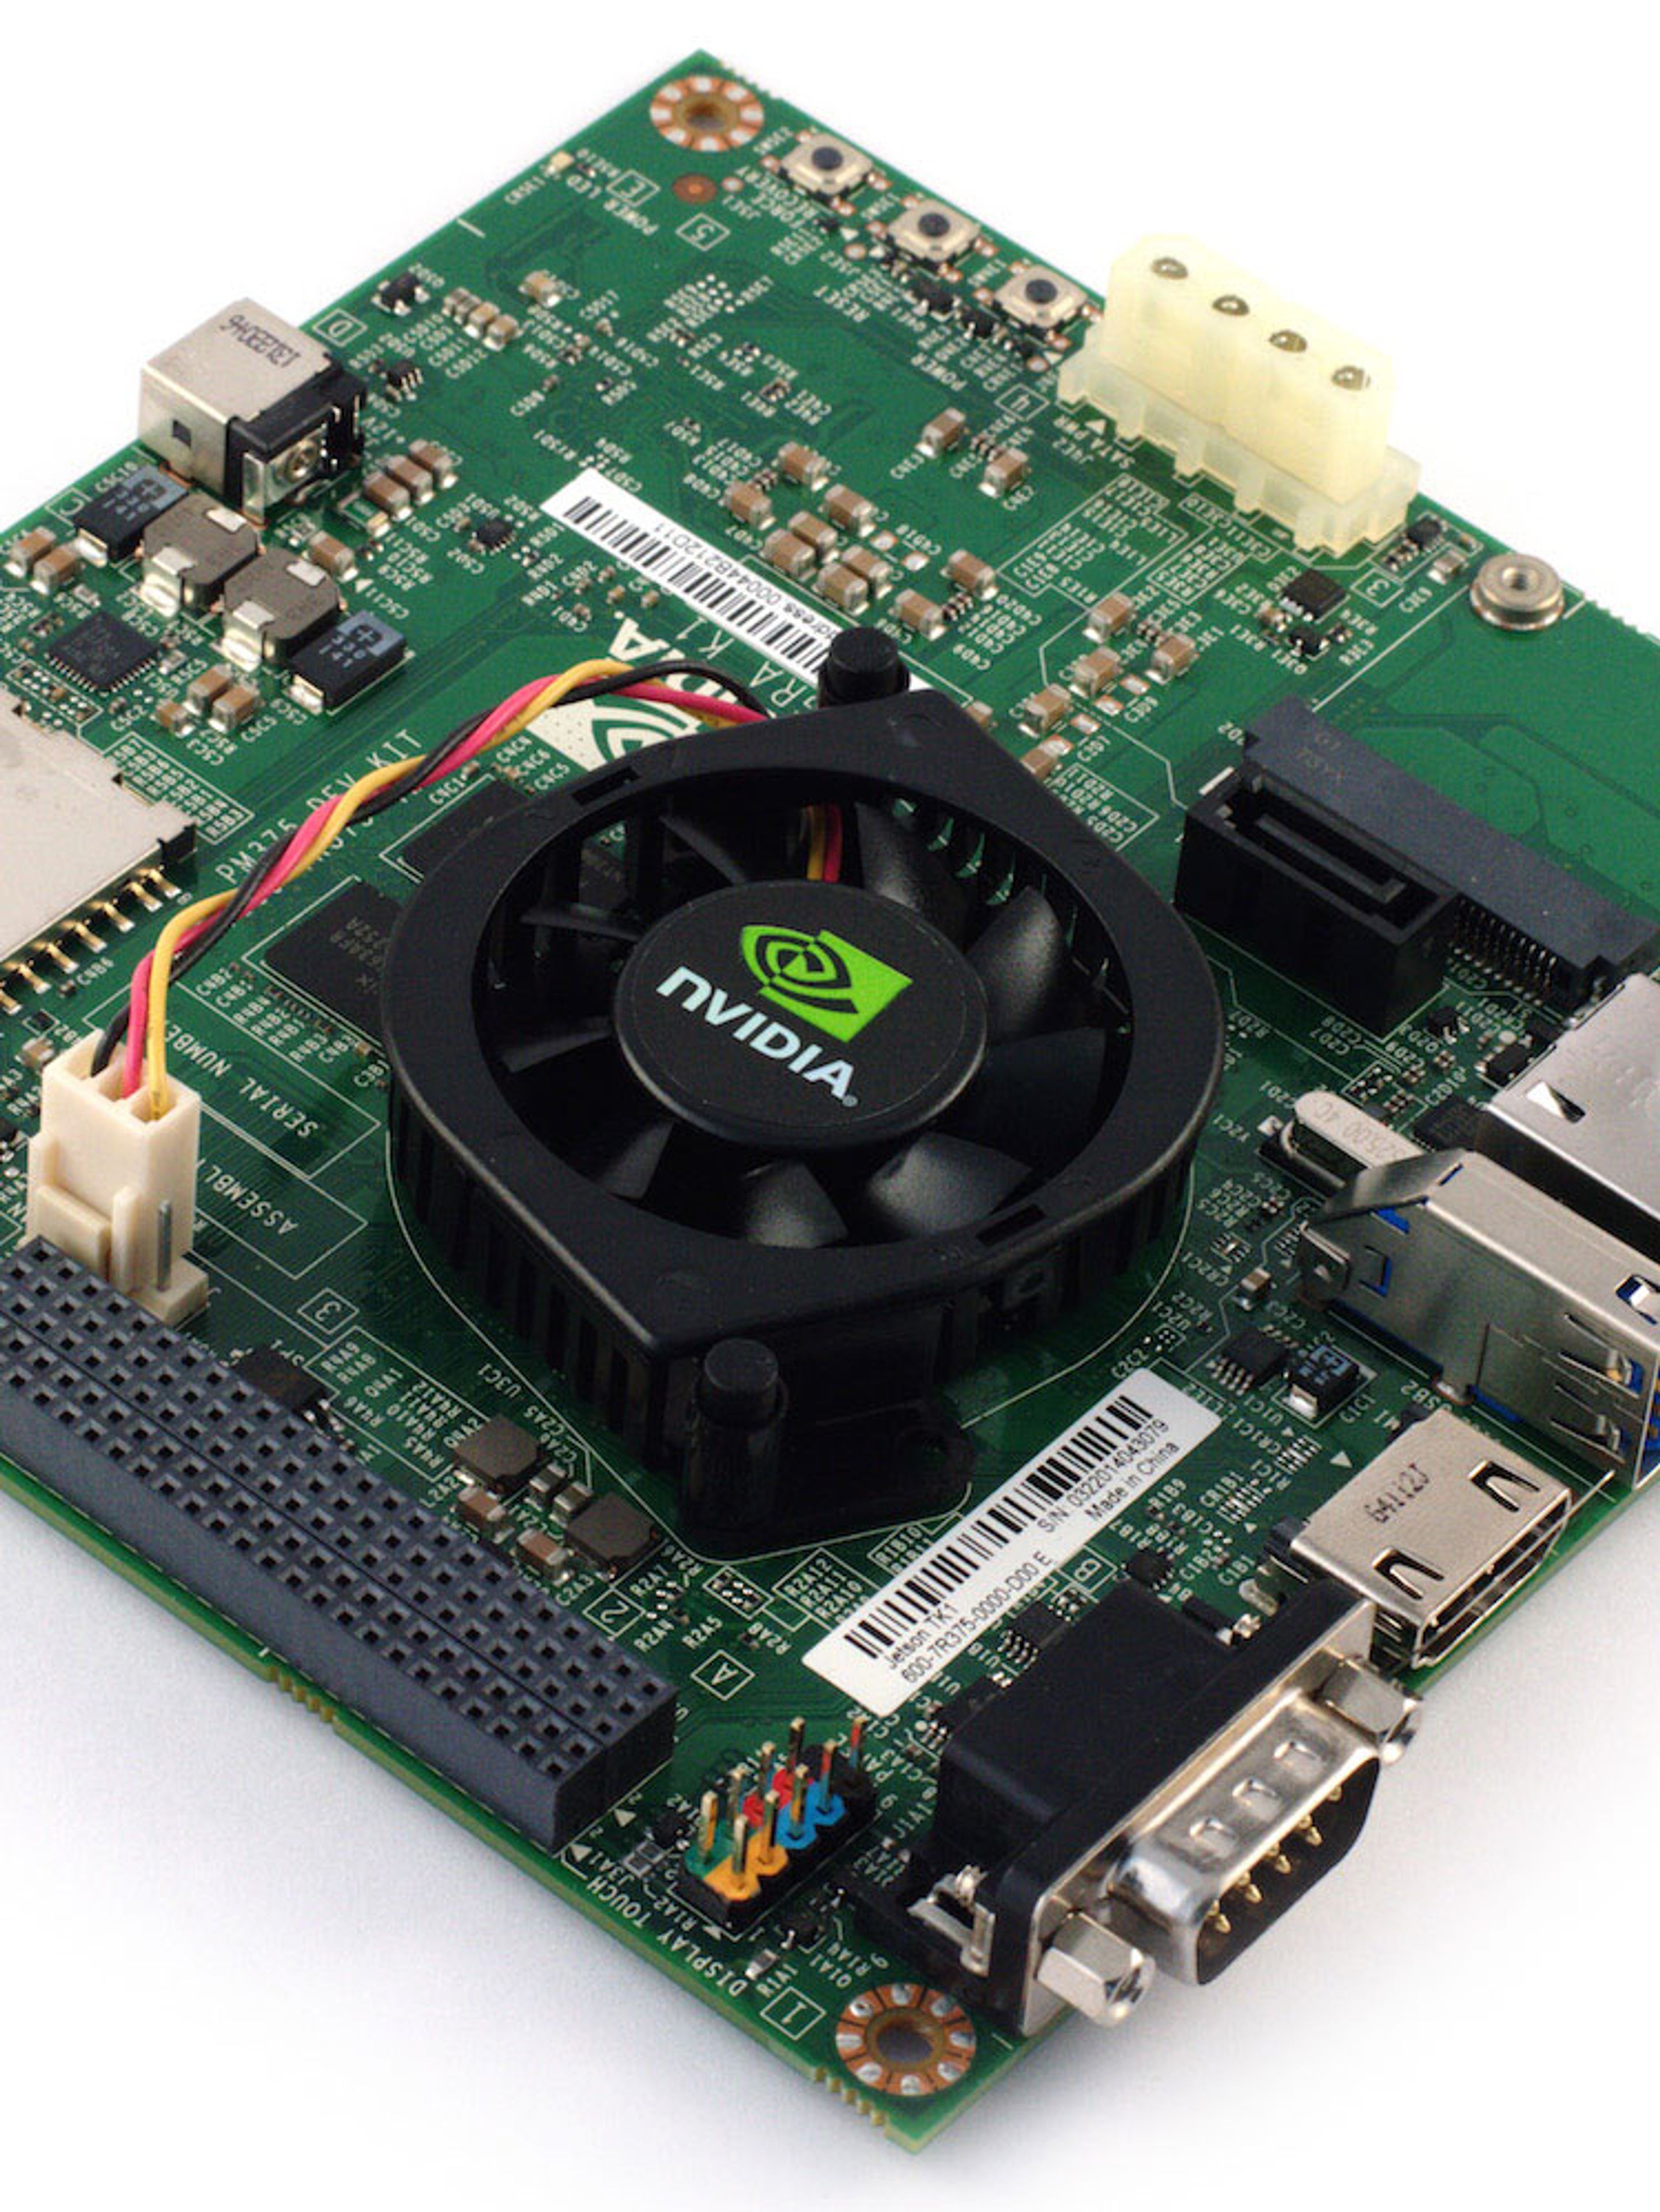
Getting Started with Jetson TK1 and the ZED
In this tutorial, you will learn how to set up NVIDIA Jetson TK1 to use the ZED stereo camera.
[To get started with Nvidia Jetson Nano, please follow this tutorial]
In this tutorial, you will learn how to set up NVIDIA Jetson TK1 to use the ZED stereo camera. For additional information, you can also check NVIDIA Developer documentation here.
Prerequisites
To set up the Jetson TK1, you will need a micro-USB cable connected to a host computer running Ubuntu. Ubuntu 12.04 or 14.04 64 bits are recommended. If you are on Windows, you can use VirtualBox to run Linux in a virtual machine.
Installing the Jetson TK1 Development Pack
1. Download the latest version of the JetPack TK1 here. At the time of writing, the latest release is 1.2 with Linux for Tegra r21.4. For more information, feel free to check the official documentation here.
2. Make sure the run file has the exec permission and launch the graphical installer, in a terminal:
chmod +x JetPackTK1-*.run
./JetPackTK1-*.run

3. After you accept the license agreement, select the target folder where JetPack will be installed and a “Complete” installation type. Configure your proxy if necessary. The installer might ask the administrator password to install the necessary packages on the host machine.
Installing Ubuntu and CUDA on the Jetson TK1
This section explains how to set up the Jetson TK1 when you get it out of the box. We detail here how to flash Ubuntu onto an SD card and install CUDA. If your SD card already has Linux and CUDA installed, you can skip this section.
1. After JetPack TK1 setup is complete, you will need to flash the OS to your devkit.

2. You will see instructions in a pop-up window to put your device into “recovery mode”. Follow the instructions. The installer will begin flashing your device.
If an error occurs, simply click “Back” then “Next” and put the Jetson in recovery mode to try flashing the Jetson again.

3. After flashing the device, a dialog screen will appear that requests the device information.

To get the IP address, you will need to connect the Jetson on the same network as the host computer (with an ethernet cable) and then log into the Jetson. Username/password is ‘ubuntu’. Then in a terminal type this command to get the IP address:
ifconfig
For example:

4. After CUDA is installed, the installer will compile CUDA and GameWorks OpenGL samples. You can choose whether or not to deploy the compiled binaries to the target device. This is optional.
5. Make sure your system is up to date. You can check this by opening a terminal and writing the following command:
sudo apt-get update
sudo apt-get upgrade
This may take a while for a new out of the box TK1.
Enabling USB 3.0 on the Jetson TK1
By default the USB 3.0 port is recognized as USB 2.0. You will need to configure it as USB 3.0. To do this, open the file /boot/extlinux/extlinux.conf as root in a terminal:
sudo vi /boot/extlinux/extlinux.conf
And look for usb_port_owner_info=0. If there is two occurrences, modify the last one. Replace ‘usb_port_owner_info=0‘ by ‘usb_port_owner_info=2‘.

Save and Exit (with vi: press Escape then ‘:‘,’w‘ and ‘q‘ and press ‘Enter‘) and reboot.
Your board is now ready!
Installing the ZED SDK
The Jetson TK1 installation process is very similar to the Linux desktop process. The only difference is that the installation of OpenCV is handled by the JetPack, in order to use Tegra optimizations for OpenCV. It is therefore not required to compile and install it manually.
1. The ZED SDK installer is contained in a ‘run’ file, specific to the Jetson TK1. You can download it here.
Make sure the run file has the exec permission and launch the installer, in a terminal:
chmod +x ZED_SDK_JTK1_v*.run
./ZED_SDK_JTK1_v*.run
Note: If you want to install the ZED SDK into a Linux desktop, you must select an other version of the ZED SDK installer : ‘ZED SDK for Linux’ which is compiled for x86_64 Intel/AMD CPU.
2. To accept the EULA, press ‘q’ then ‘Y’. Follow the instructions.
Note: The ZED SDK installer contains a script that will automatically set the Jetson to ‘Performance mode’ at boot time. This is required to use the full computational power of the card. The script activates the 4 CPU cores and set the GPU to its highest frequency. This operation is perfectly safe, but the devkit will consume a bit more power. For more information: elinux.org/Jetson/Performance
In order to apply the performance script, the board has to be rebooted after the installation.
ZED SDK Supported Modes
The ZED SDK on Jetson TK1 has the same functionalities as the ZED SDK x86_64 for Linux. However due to the limited bandwidth of the USB 3.0 on the Jetson TK1, the ZED video resolution and frame rate will be set to lower values to prevent corrupted frames. Maximum supported resolution on TK1 is currently 720p, and frame rate is automatically adjusted depending on the bandwidth available. Unsupported resolution will return an error during use.
To select a resolution, simply change the argument ‘ZEDResolution_mode‘ in the constructor of the Camera class. The framerate can be optionally set by the argument ‘fps‘. The API documentation can be found here.
sl::zed::Camera* zed = new sl::zed::Camera(sl::zed::HD720, 15);
All done! It’s time to use your ZED with the Jetson TK1!