
Unity - Green Screen VR Capture
Capturing VR in Mixed Reality #
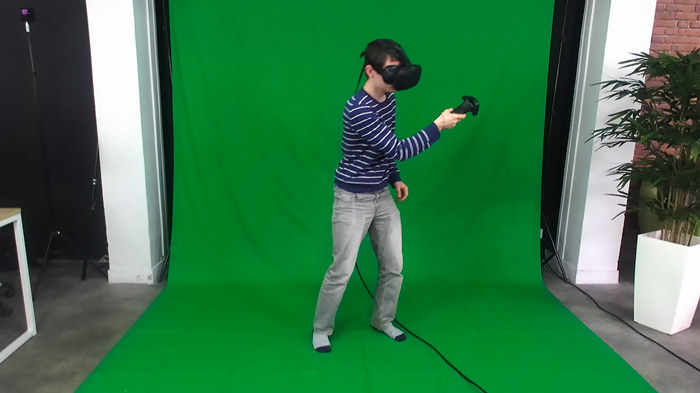
In this tutorial, you will learn how to capture VR applications in mixed-reality using the ZED, an HTC Vive or Oculus Rift and a green screen.
The main advantage of using depth data from the ZED camera is pixel occlusion and lighting. This means that the depth of every pixel in the camera’s view will be compared against its corresponding virtual pixel, so the nearest one will be rendered. In addition, you can enhance your real scene with virtual lights and shadows.
Requirements #
For this tutorial, you will need the following items:
- ZED camera
- Green screen
- HTC Vive or Oculus Rift headset
- 2x Vive controllers, 1x Vive Tracker and 2x controllers, or 2x Oculus Touch controllers.
First, you will need to mount a controller/tracker onto the ZED and make sure they are firmly attached. The controller will let you track the ZED in the same space as the HMD and allow you to move the camera while filming. To attach the ZED and controller/tracker from Oculus or Vive, you can 3D print the following mount (download STL, OBJ).
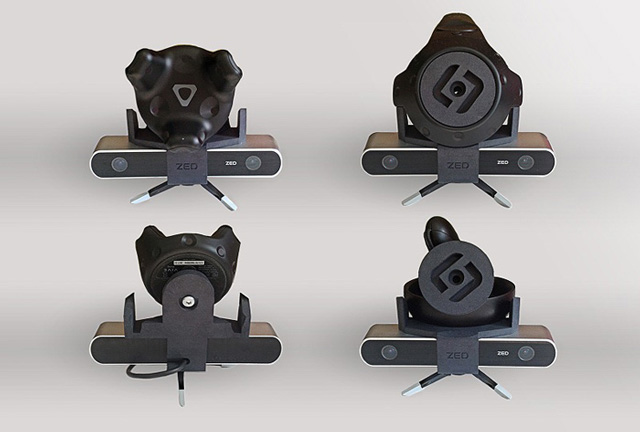
If you don’t have access to a 3D printer, you can attach the devices with clamps, tape, etc. But you must ensure two things: First, that your attachment mechanism doesn’t occlude too many of the controller/tracker’s sensors. Second, your attachment must be firm (no wobbling) or else you will have to recalibrate constantly.
How It Works #
To start recording mixed reality footage, we will go through the following steps:
- Create a new Unity project and import the ZED_Green_Screen prefab.
- Adjust ZED camera settings to improve image quality.
- Adjust chroma key to remove the green screen.
- Add a VR headset.
📌 Note: If you experience random freezes while using Vive with ZED, update your NVIDIA® drivers (version 390.77 or greater for GeForce cards) to fix the issue. Read more.
Create a new Project #
Open your Unity project, or create a new project.
Follow the instructions on importing the ZED Unity package.
In Edit > Project settings > Player, check Virtual Reality Supported.
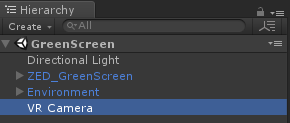
In the Project panel, navigate to Asset > ZED > Examples > GreenScreen > Prefabs. Drag and drop the ZED_GreenScreen.prefab in the Hierarchy view.
In the Hierarchy view, select ZED_ GreenScreen > Camera_Left.
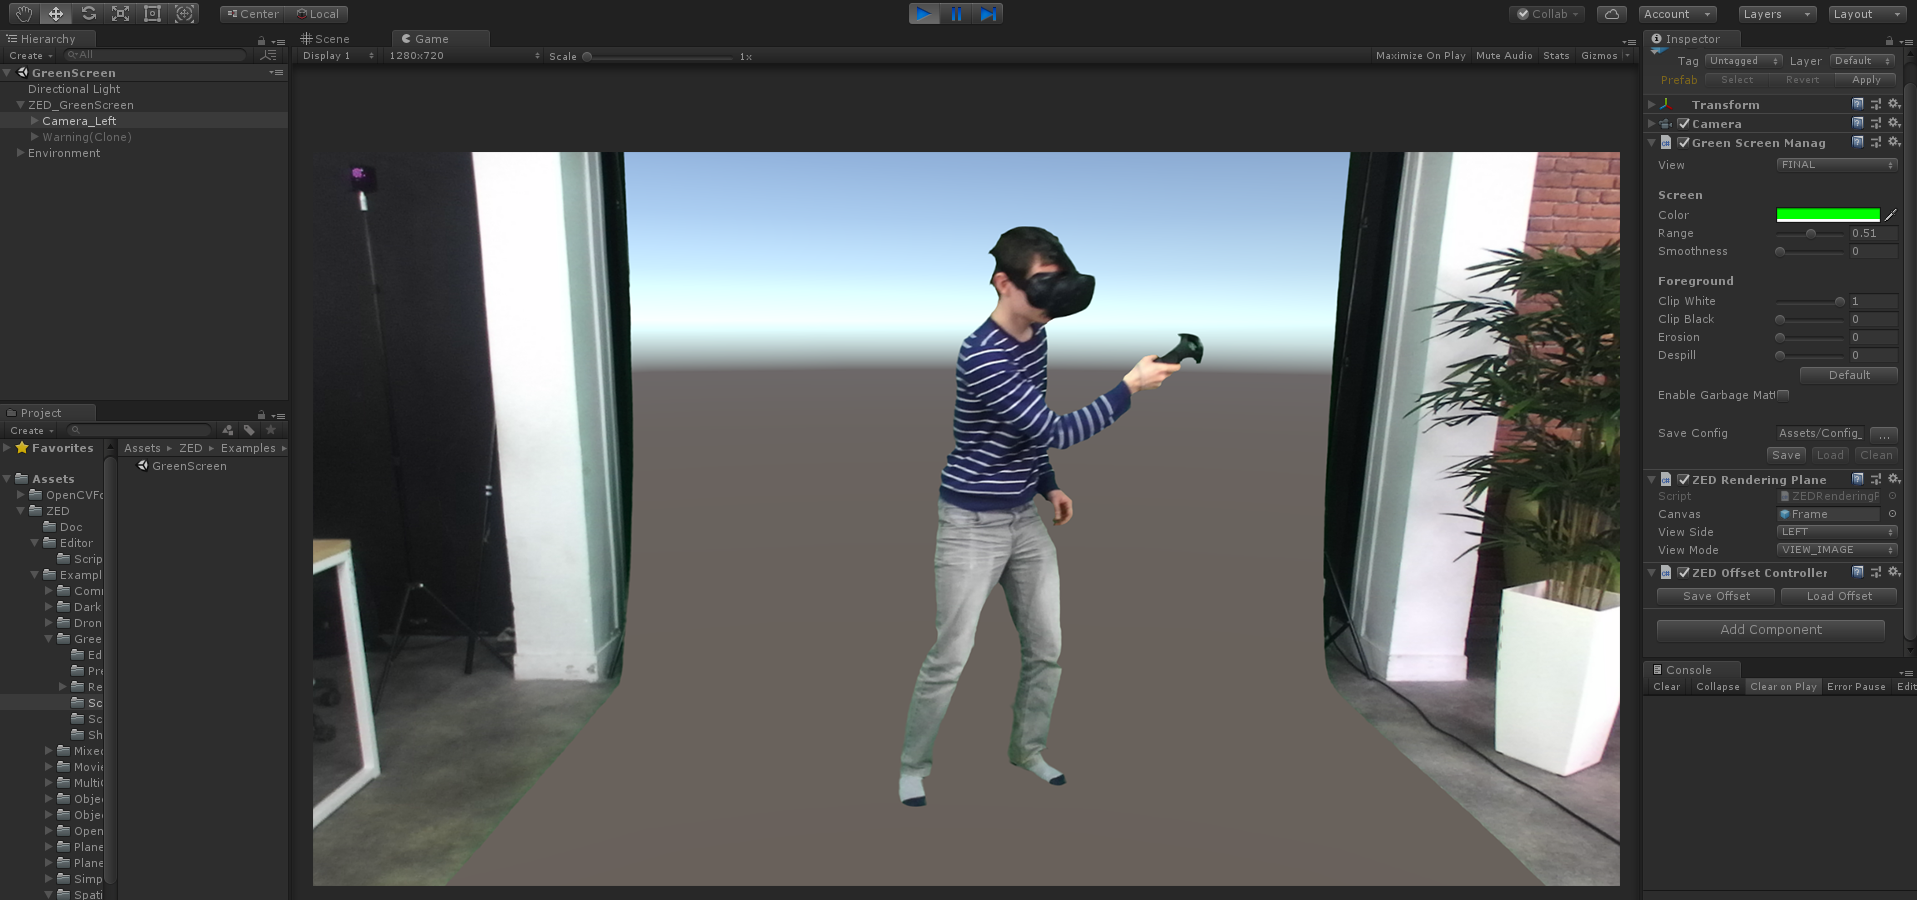
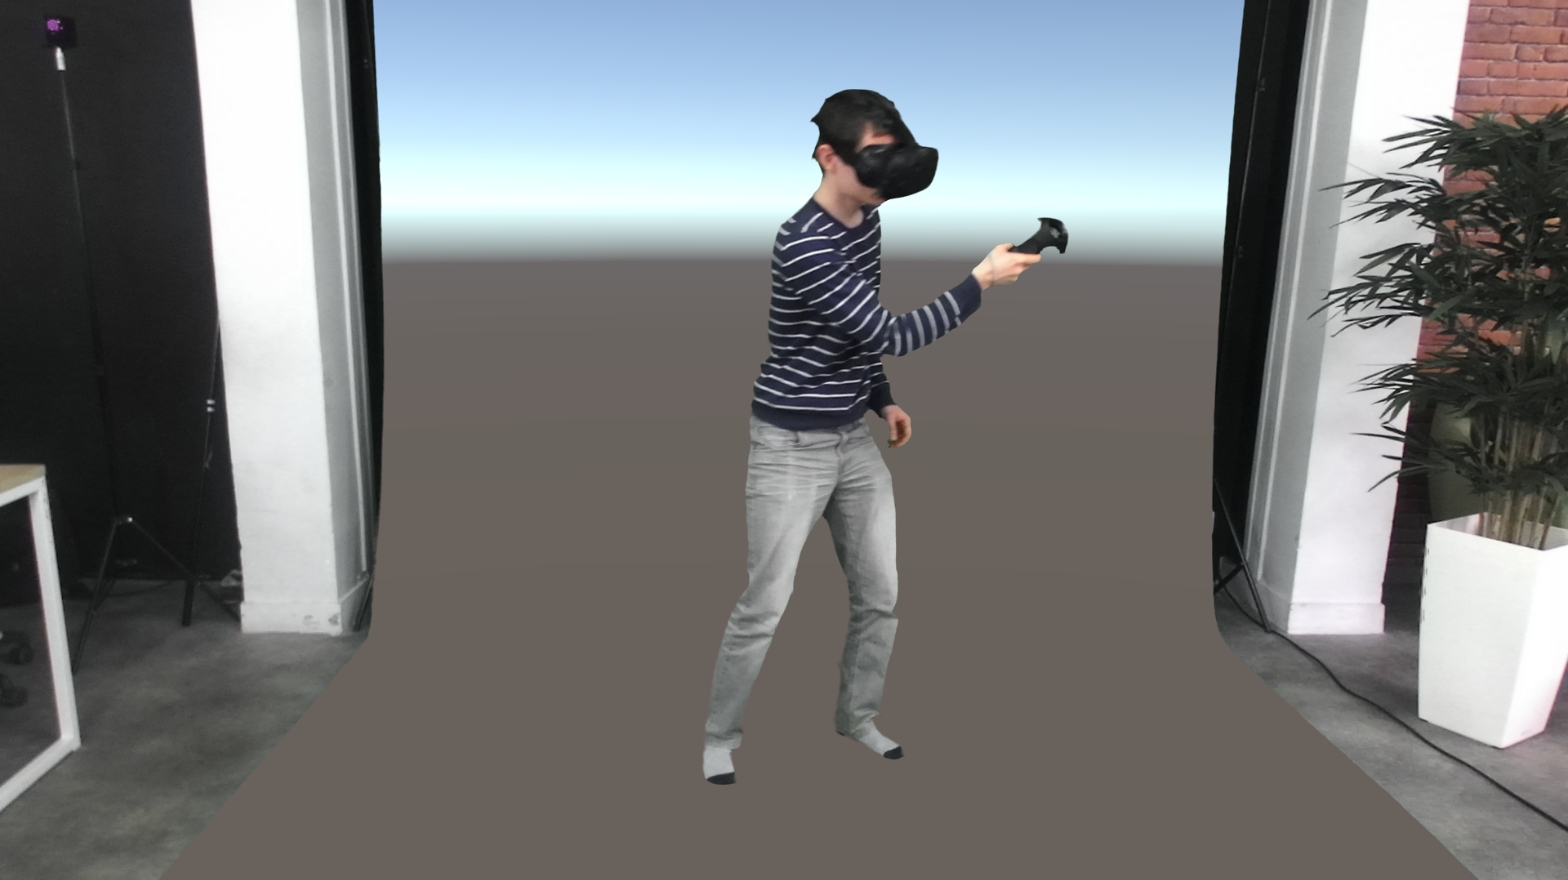
Click on the Play button. Your Unity interface should look like this:
Adjusting Camera Parameters #
In the ZED_ GreenScreen > ZED Manager (Script), make sure the camera is set in HD1080 mode (1920*1080 resolution).
After selecting ZED_ GreenScreen > Camera_Left, click on the Camera Control button of the Green Screen Manager in the Inspector view.
By default, the camera exposure and white balance are adjusted automatically. Auto White Balance tends to add a green tint to the picture when placing the ZED in front of a green screen. Since you’re shooting in a controlled environment with fixed lighting, you can disable the Automatic settings and manually adjust the parameters of the Camera Control panel.
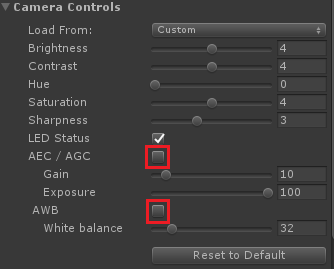
Hit Save once you’re happy with your settings, so they can be easily loaded later after restarting Unity.
Adjusting Chroma Key Settings #
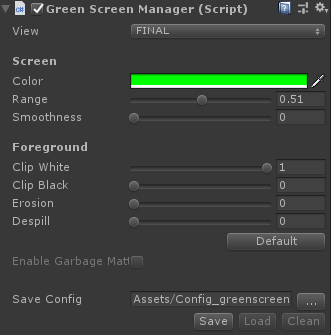
In the Inspector panel, you can adjust your chroma key settings with the Green Screen Manager script. Below are explanations of what each setting does and when to adjust it.
Views #
Select the FOREGROUND view to get a better feel for what remains visible in your scene and what doesn’t. This can be useful for setting the critical settings in the next section. Change the view to FINAL to see the result.
Color Range #
The Color, Range and Smoothness values are the most important and where you’ll likely spend the most time adjusting. When the script goes through each frame, it will check each pixel’s color to see if it should turn it invisible.
If you’re using a background that’s not green, adjust the Color setting to match. Otherwise, adjust the shade of green to better fit the screen’s exact color and your lighting setup.
Range indicates how close a color on the spectrum can be to the exact color of your background. You need to add some range because even the highest quality green screen studio has shading to it.
Smoothness defines how colors just outside the range get blended in. With zero smoothness, a color just outside the range is completely visible. With more smoothness, it will be partially visible. You’ll get further control over how smoothness effects the image in the next section.
The easiest way to find a good Range and Smoothness is to start the scene, set both values to 0, adjust the Range, then adjust the Smoothness.

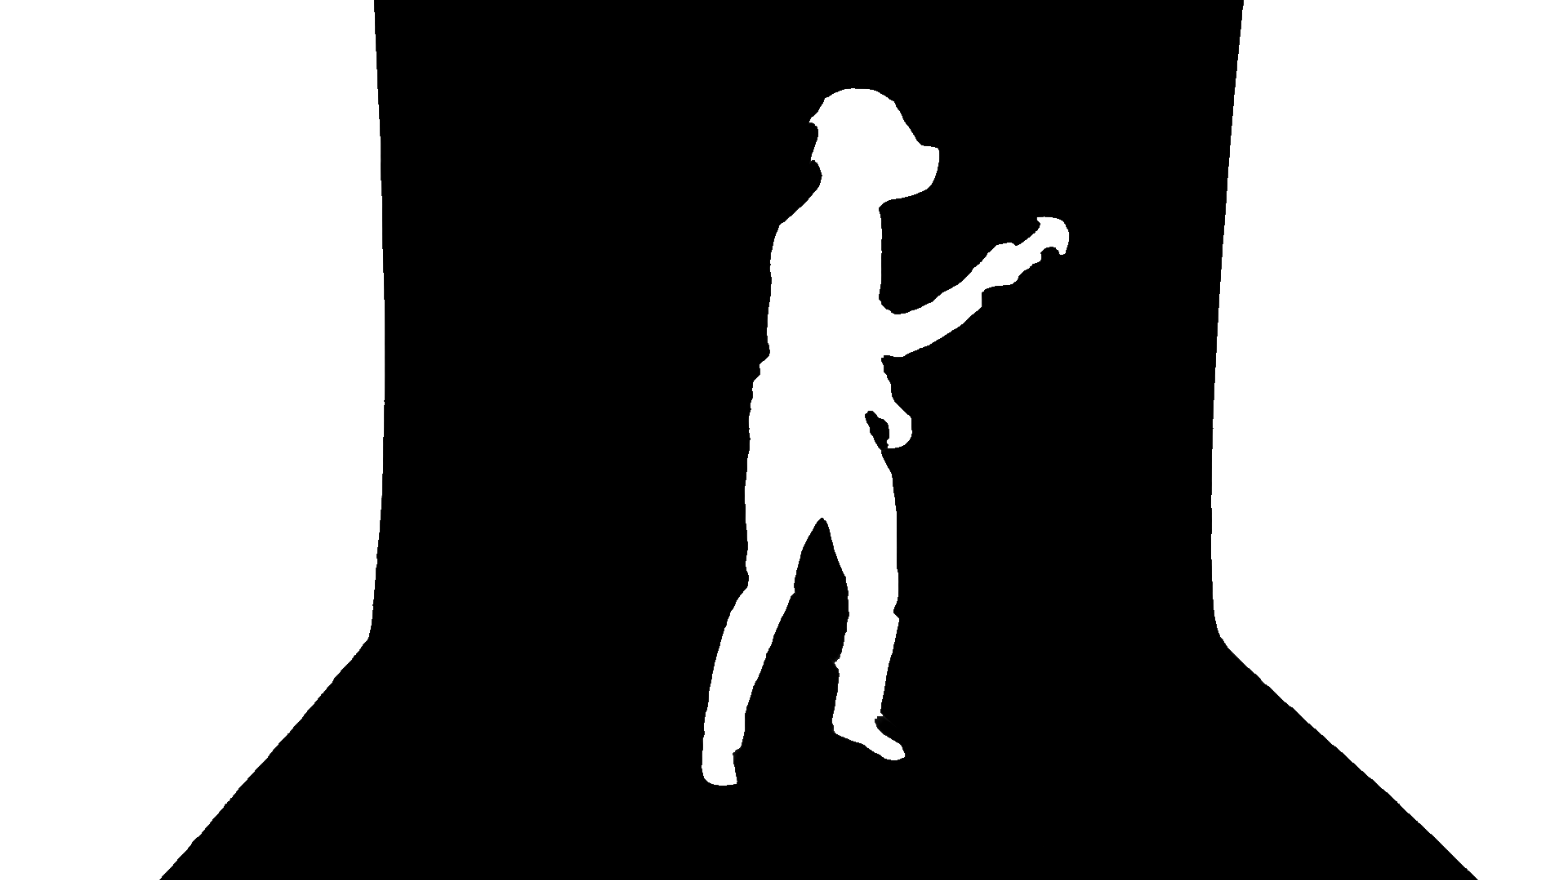
Refining the Matte #
Next, refine the edge of the matte with the Erosion, Black Clip, White Clip, Edge Softness and Despill settings. The ALPHA view can be helpful for making these adjustments.
The Erosion setting erodes the edges of the matte to remove the remaining green areas.
Without erosion With erosion 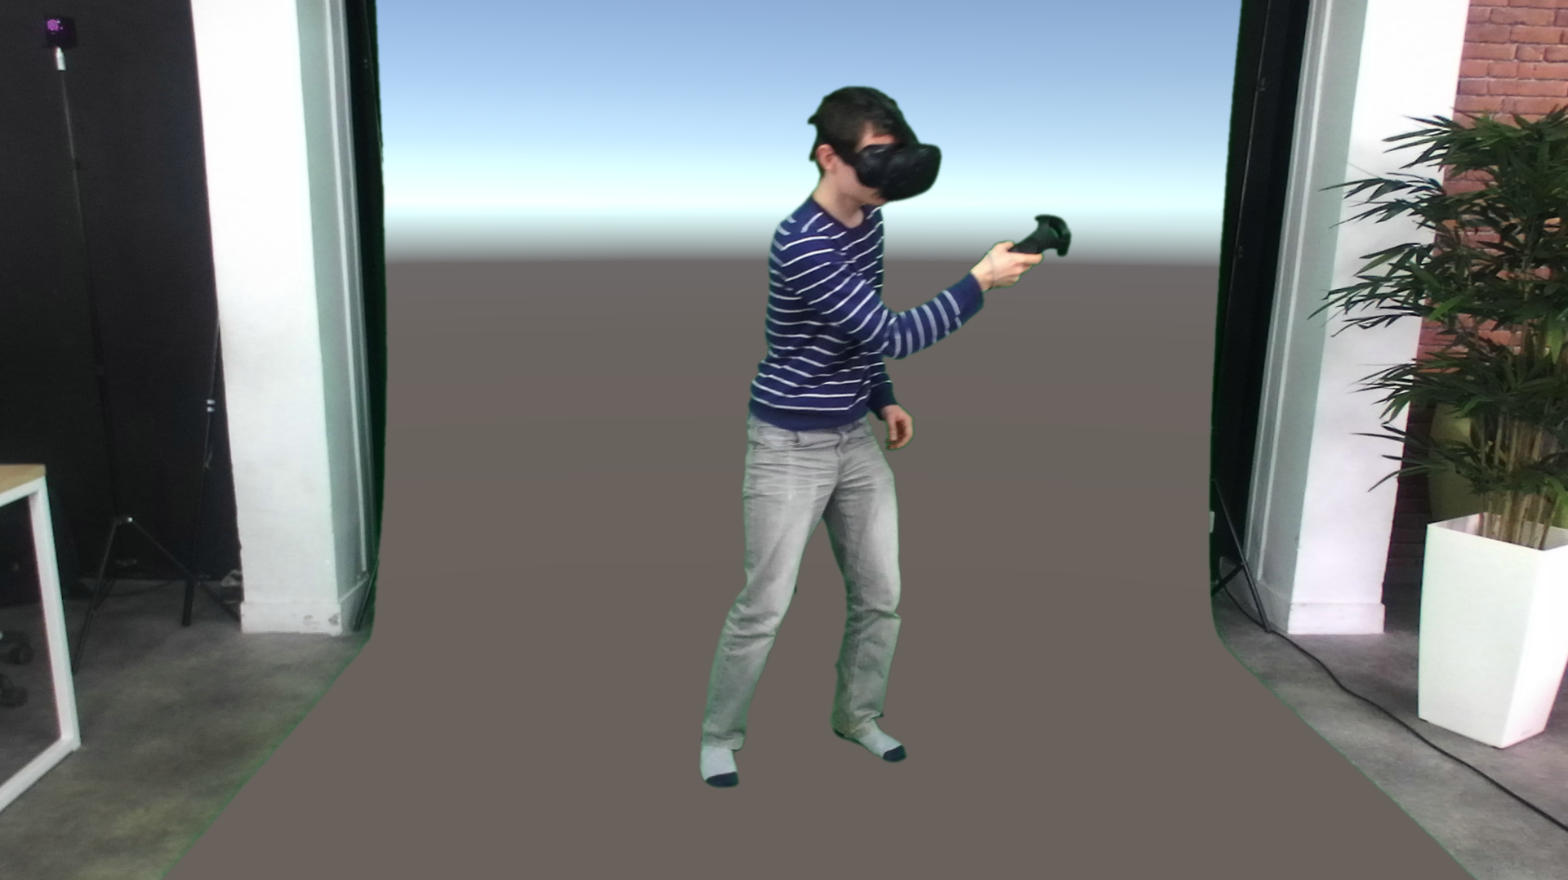

White Clip and Black Clip: Alpha values above the White Clip value will be set to 1 (fully opaque), and alpha values below the Black Clip value will be set to 0 (fully transparent). In other words, White Clip makes nearly opaque pixels fully opaque, and Black Clip does the same for nearly invisible pixels. This helps you remove noise that results from your smoothness setting.
Without white clip With white clip 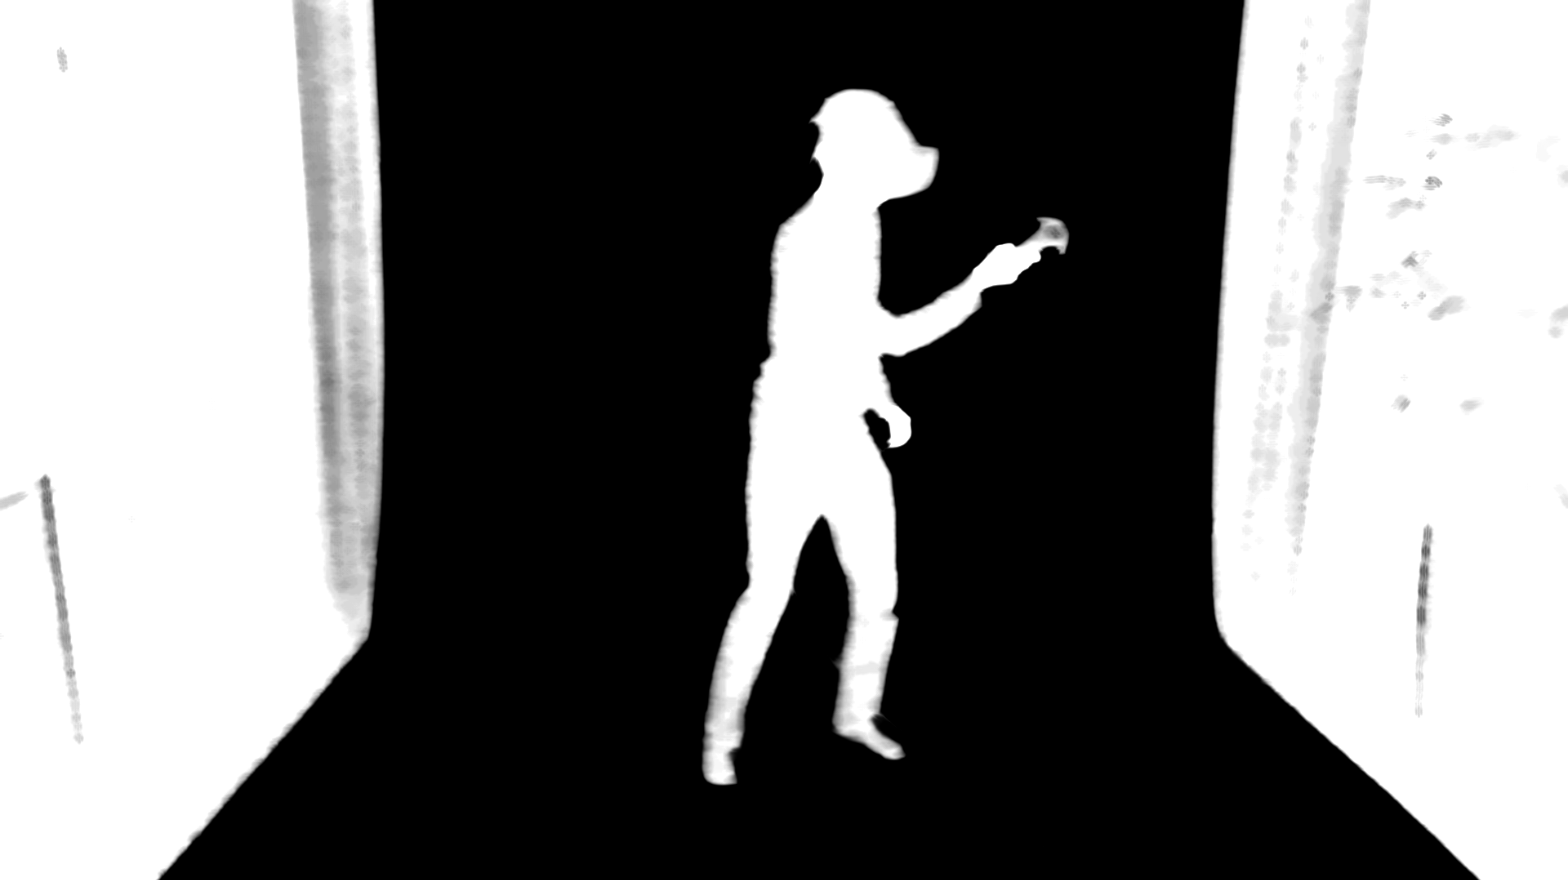
Despill reduces the green screen color reflections on the key. Increase this if you have a slight green hue showing on your subject, but be careful not to use more than you need or the other colors will appear less vibrant. Change the view to FINAL before adjusting color despill.
Without despill With despill 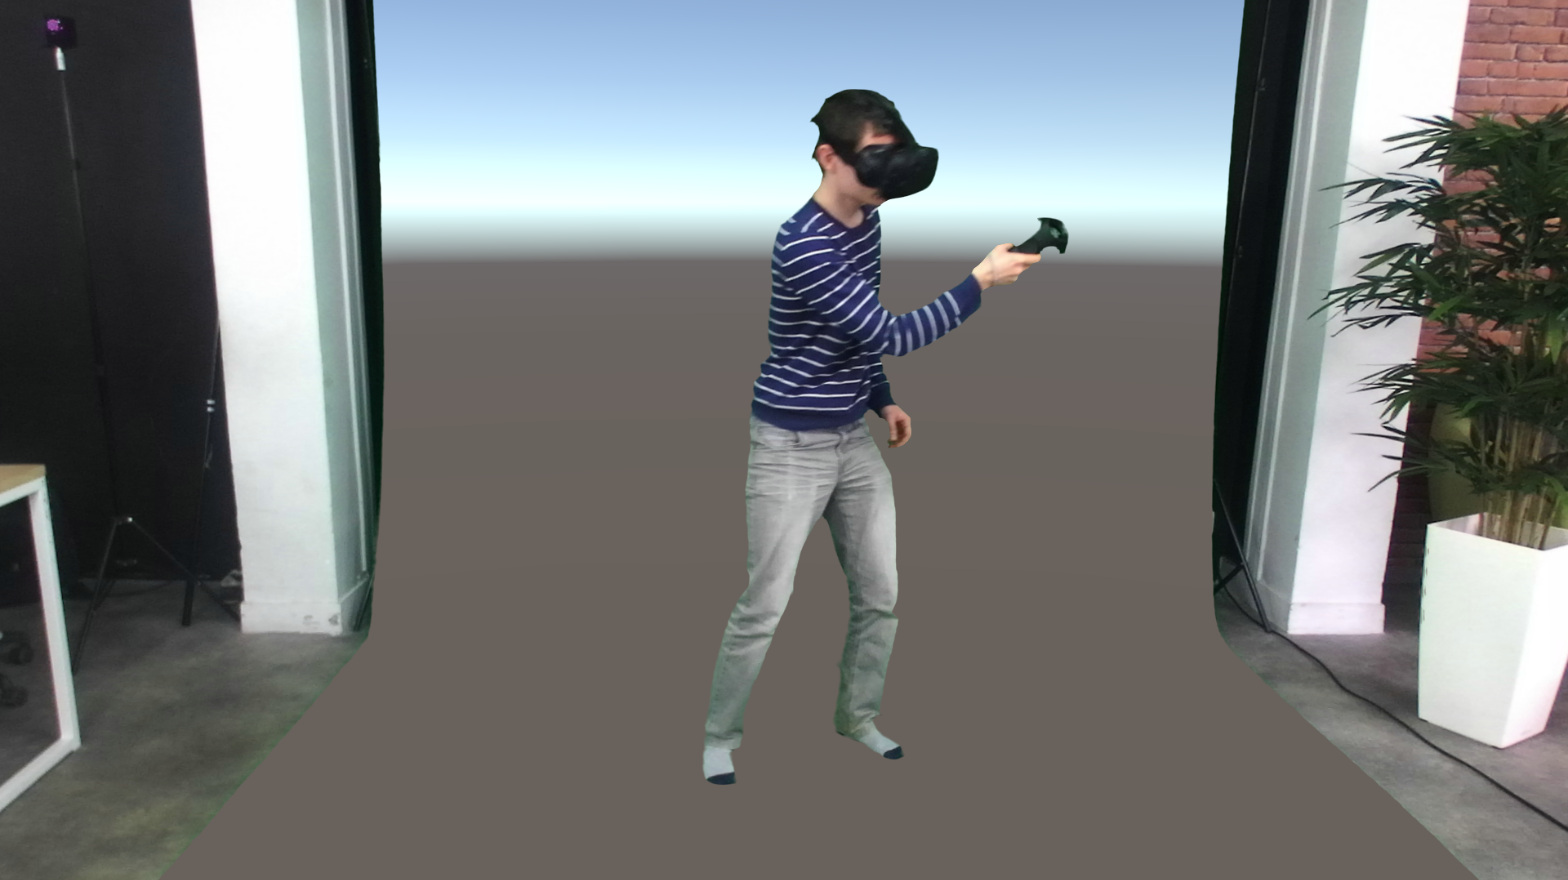
- Finally, store your chroma key parameters by clicking on Save.
Garbage Matte #
The Garbage matte script lets you extend the virtual world beyond the green screen’s limited size. It allows you to define a region in space and exclude image pixels that do not belong to this region. To use camera tracking with the garbage matte (as we don’t do in this demo as we’re using the headset) you need to activate tracking before setting your garbage matte. Tracking can be activated by clicking on the ZED_Greenscreen prefab, and enabling it in the ZED Manager component.
Click on Enable Garbage Matte
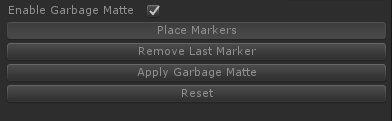
Start your scene.
Make sure Place Markers is selected.
Define your green screen region by clicking on the image in your Game display window to place your markers. You should see spheres appear at each place you click.
Repeat the previous step until the whole green screen area is covered with a white mesh.
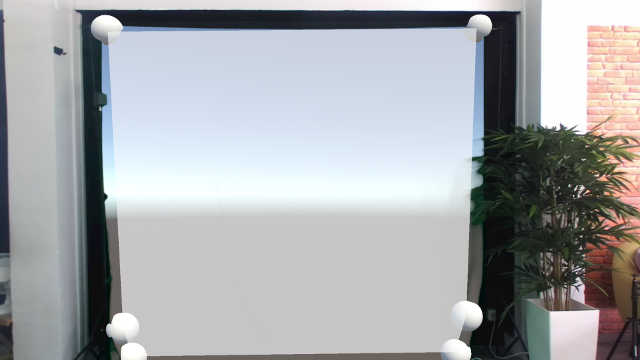
Click on Apply Garbage Matte to exclude the outside region of the mesh (set to transparent).
To save and load markers, use the Save/Load option.
📌 Note: If the area is not covered correctly, use Remove Last Marker to disable the garbage matte and remove the last marker. You can also adjust the position of a specific marker with a right click to select a sphere and a left click on a new position.
Adding the VR headset #
Interfacing the ZED with SteamVR #
SteamVR is required for the HTC Vive and optional for the Oculus Rift.
Download and import the SteamVR Unity package.
Add the [CameraRig] prefab located in the folder SteamVR / Prefabs.
Right click in the Hierarchy view, and then on Create Empty to create a GameObject.
Rename the GameObject “VR Camera”
Drag the ZED_GreenScreen prefab and drop it on this VR Camera object. Then make sure its Position and Rotation values are all zero in the Inspector panel.
To film someone in a VR headset, you’ll need to calibrate the ZED’s virtual position and rotation so that it matches the ZED’s real position relative to the VR headset’s tracked space. We’ll use SteamVR to track the object the ZED’s attached to.
Download and import the SteamVR Unity package.
Select the ZED_GreenScreen object and add the ZEDControllerTracker script.
If the component window in the Inspector only displays a “Load data” button, press it. It should now look like this:
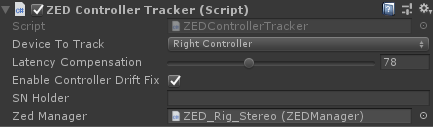
Change the Device to Track option to match the object to which you’ve attached your ZED.
Drag and drop the ZED_GreenScreen root object into the Zed Manager field. This will help the plugin determine not to use latency compensation designed for controllers on the ZED, which can cause unwanted movements when tracking the ZED itself.
Lastly, select the ZED_GreenScreen object, and add a ZEDOffsetController component. This will move the virtual ZED to match the tracked object found in the calibration file we’re about to create.

Calibrating the camera #
Manually calibrating the ZED can be tedious, so we’ll use the in-VR calibration app Stereolabs provides within the Unity plugin.
- Open the MR Calibration Scene found in ZED -> Examples -> Mixed Reality Calibration
- Make sure all your tracked objects are on and visible to your base stations
- Run the scene
- If SteamVR prompts you to set up bindings, do so. You only need to assign keys for “Click” and “Grab.” Then restart the scene.
📌 Note: If using a Vive Tracker, you may need to create a blank binding profile for it, or else the bindings for your controllers may not work.
In the center of your tracked space, you’ll see a cube for each tracked object to which you can attach your ZED. Stick a controller into the one already attached to the ZED and Click.
After a brief moment, you’ll see a few new things:
- A model of your ZED/ZED Mini near your tracked object. The offset from the tracked object will be incorrect at first.
- A 2D screen showing what the ZED sees, along with 3D models of your controllers. Like the ZED model itself, the controllers won’t line up with the real ones at first.
- A menu, either over one of your hands (if using a Vive Tracker) or hovering in front of you (if using one of your controllers to anchor the ZED)
The goal is to get the model of the ZED to be at the exact same offset as your real ZED is to your real controller/Tracker. When it’s perfect, you’ll also see the virtual controllers on the 2D screen lining up with the real ones.
There are two ways to adjust the ZED: Manual and Automatic. We’ll get it roughly lined up with Manual and fine-tune it with Automatic.
Manual Mode #
- Stand in front of the ZED
- Grab and pull on the three rings to rotate the ZED until it’s facing you
- Grab and pull on the arrows to move the ZED until it’s where the ZED is in real life.
- Looking at the 2D screen, tweak the position and rotation to make sure the virtual and real controllers are roughly lined up.
With the ZED close to the correct position, we’ll use Automatic mode to tweak the offset to perfection.
Automatic Mode #
📌 Note: It’s possible to finish calibrating without going into Automatic mode. But it’s a tricky process that takes experience to get right. Before skipping this section, make sure that the controllers stay lined up when you move closer to /further from the camera, and when you’re in the far left and right sides of the image.
- On the menu, click the button with the circles. You’ll see five balls appear in front of the ZED.
- Put your controller inside one of the balls and click. This will freeze the video in the 2D screen but not the virtual controllers.
- Move the virtual controller until it lines up with the real controller.
- Click again.
You’ve just added a reference point the app can use to calculate the offset. The ZED will move slightly as it tries to calculate the offset from it.
- Repeat this process until you’ve done it with all five balls, or until you’re sure it’s calibrated correctly
- If you want to retry a position you just set, click the Undo button, then click on that ball again
- If you want to reset all the reference points, switch to Manual mode and then back to Automatic
Finishing Up Calibration #
Move your controllers around the room and make sure the virtual and real controllers stay aligned in the 2D screen. Make sure to check with the controllers close to and far from the camera, and with the controllers near all four edges of the screen. Tweak it in Manual mode until everything lines up well.
📌 Note: The hardest part of calibration is knowing whether you need to translate or rotate the camera to make an adjustment. A good way to check is to look at how the 3D model of the ZED is positioned, and take off the headset to see how close it is to the real ZED.
When you’re done, click the Save button in the menu.
Close the app, go back to Unity and run the scene. The calibration file will load automatically. You’ll now see your subject in the virtual world as if they were really there.