Build your first AR/MR App with Unity
Build your first AR/MR App with Unity
In this tutorial, you will learn how to create a simple mixed reality application.
Create a new Project
-
Run Unity.
-
Select File > New Project.
-
Select 3D mode and click Create project.
-
Make sure the ZED SDK is installed, and import ZEDCamera.unitypackage.
-
After importing the package, set the aspect ratio of your Game Window to 16:9 with a scale of 1x . If the aspect ratio and scale is anything else, the image will appear distorted or blurry in the main window.

Add the AR camera
Here we will add the ZED Rig prefab to the scene to replace Unity’s conventional camera. The ZED Rig appears at (0,0,0) with -Z representing the forward direction facing the camera.
-
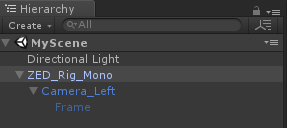
In the Hierarchy panel, delete the Main Camera.
-
In the Project panel, navigate to Asset > ZED > Prefabs.
-
Drag the ZED_Rig_Mono.prefab into the Hierarchy.
Enable Positional Tracking
-
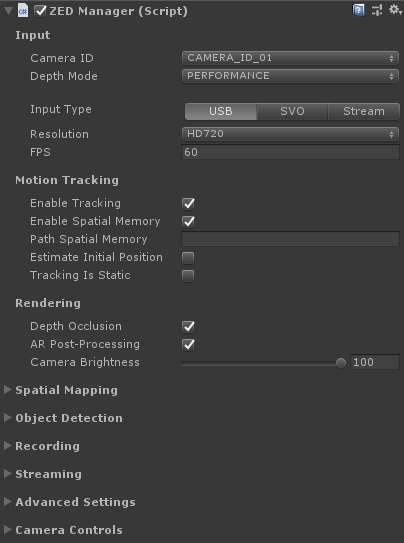
Click on ZED_Rig_Mono in the Hierarchy to display the attached ZED Manager script in the Inspector panel.
-
Enable Positional Tracking so that the pose of the virtual camera follows the movement of the device in the real world.
-
Enable Spatial Memory. This allows the ZED to detect and correct positional tracking drift while moving and maintains the real world position of virtual objects.

Adding AR Passthrough to HMD
This assumes you have a VR headset (Oculus Rift, HTC Vive, HTC Vive Pro or Windows Mixed Reality headset) with a ZED Mini mounted on front.
- If you used ZED_Rig_Mono in the last steps, replace it with ZED_Rig_Stereo.
- Go to Edit -> Project Settings -> XR Plug-In Manager -> Click on Install XR Plugin Management.
- Now you need to choose which Provider to use. The ZED Unity Plugin is compatible with OpenVR, Oculus and OpenXR.
- If you select OpenXR, make sure the corresponding Interaction Profile is selected in the OpenXR option panel.
- Run the scene and put on the headset.
Add a Virtual Object
Let’s add a virtual sphere to the scene. When you add virtual content, make sure to move it into the field of view of the camera and leave the camera rig at its origin (0,0,0). The field of view of the rig is automatically determined by the camera calibration parameters, and rig position is updated by positional tracking.
- To add a sphere to the scene, right-click in the Hierarchy and select 3D Object > Sphere.
- The sphere should appear at the camera’s origin. Move the sphere 2 meters away from the camera by setting the sphere’s position to X = 0, Y = 0 and Z = 2.
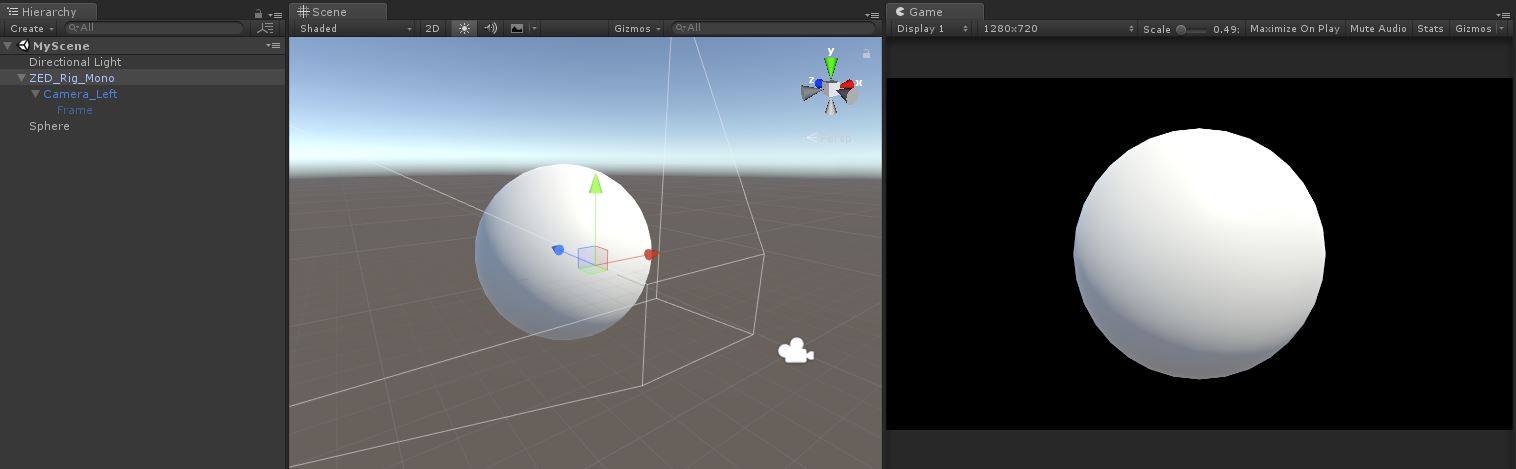
- Now you can click on Play to see the virtual sphere in the real world and move around it.
To properly align the direction of Unity and the real world z-axis, the plugin will automatically use the gravity provided by the inertial sensor of the ZED Mini. If using the original ZED, the plugin makes no assumptions about the 3D world. Axis alignment is not guaranteed unless you maintain the device parallel to the floor before playing a scene.
Unity’s default scale is in meters, which affects physics, terrain, gravity, etc. To make sure your 3D objects integrate and behave realistically with respect to the real world, always use meters and keep your units consistent, especially when creating and importing artwork from third-party software such as Maya or Blender.