
Getting Started with ROS 2 and ZED
The ZED ROS 2 wrapper lets you use the ZED stereo cameras with the second version of ROS. It provides access to the following data:
- Left and right rectified/unrectified images
- Depth data
- Colored 3D point cloud
- IMU data
- Sensors data
- Visual Inertial Odometry: Position and orientation of the camera
- Pose tracking: localization of the camera with loop closure
- Detected objects
- Human body skeleton
Installation #
Prerequisites #
- Ubuntu 22.04 (Jammy Jellyfish)
- ZED SDK v4.2 or later
- CUDA dependency
- ROS 2 Humble Hawksbill (LTS):
📌 Note: The ZED ROS 2 Wrapper has limited compatibility with ROS 2 Foxy (EOL) on Ubuntu 20.04. Modules requiring ROS 2 Humble features are disabled in Foxy. (e.g. Benchmarking, Point Cloud compression).
📌 Note: We recommend to setup your environment according to the recommended DDS and Network configurations to obtain the maximum performance.
Build the package #
The zed_ros2_wrapper is a colcon package.
📌 Note: If you haven’t set up your colcon workspace yet, please follow this tutorial.
To install the zed_ros2_wrapper, open a bash terminal, clone the package from GitHub, and build it:
# Create your ROS 2 Workspace if you do not have one
mkdir -p ~/ros2_ws/src/
# Move to the `src` folder of the ROS 2 Workspace
cd ~/ros2_ws/src/
git clone https://github.com/stereolabs/zed-ros2-wrapper.git
cd ..
sudo apt update
# Install the required dependencies
rosdep install --from-paths src --ignore-src -r -y
# Build the wrapper
colcon build --symlink-install --cmake-args=-DCMAKE_BUILD_TYPE=Release
# Setup the environment variables
echo source $(pwd)/install/local_setup.bash >> ~/.bashrc
source ~/.bashrc
📌 Note: The option
--symlink-installis useful while developing your robotics system. It allows using symbolic links instead of copying files to the ROS 2 folders during the installation, where possible. Each package in ROS 2 must be installed and all the files used by the nodes must be copied into the installation folders. Using symbolic links allows you to modify them in your workspace, reflecting the modification during the next executions without the needing to issue a newcolcon buildcommand to overwrite the files in theinstallfolders. This is true only for all the files that don’t need to be compiled (Python launch scripts, YAML configurations, etc).📌 Note: If you are using a different console interface like
zsh, you have to change thesourcecommand as follows:echo source $(pwd)/install/local_setup.zsh >> ~/.zshrcandsource ~/.zshrc.
Starting the ZED node #
To start the ZED node, open a terminal and use the CLI command ros2 launch:
ros2 launch zed_wrapper zed_camera.launch.py camera_model:=<camera model>
The zed_camera.launch.py is a ROS 2 launch Python scripts that automatically start the ZED node using “manual composition”, loading the parameters from the right “YAML files” associated to the specific camera model, and creating the static TF tree from the “URDF file” that is automatically generated from a xacro configuration file.
📌 Note: You can set your own configurations by modifying the parameters in the files
common_stereo.yaml,common_mono.yaml,zed.yaml,zedm.yaml,zed2.yaml,zed2i.yaml,zedx.yaml,zedxm.yaml,virtual.yaml,zedxonegs.yaml, andzedxone4k.yamlavailable in the folderzed_wrapper/config. For a full descriptions of each parameter, follow the complete guide.
Displaying ZED data #
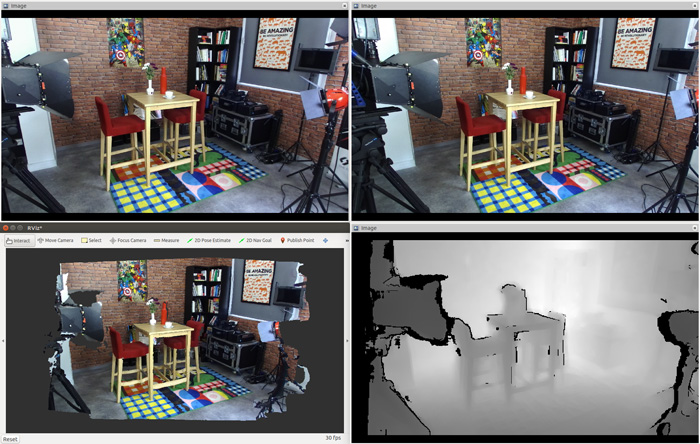
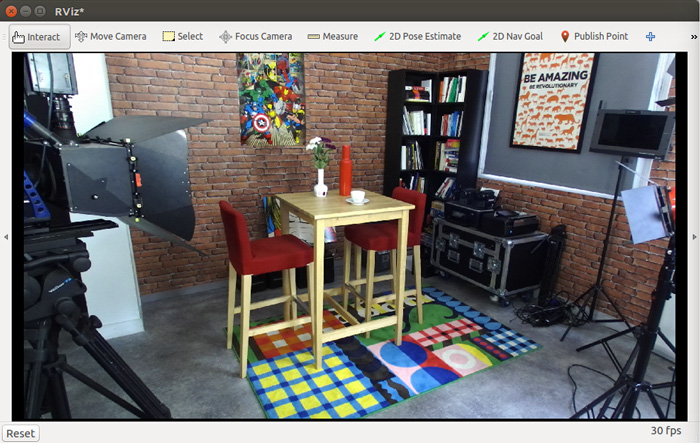
Using RVIZ 2 #
RVIZ 2 is a useful visualization tool in ROS 2. With RVIZ 2, you can visualize the left and right images acquired by the ZED cameras, the depth image, and the 3D colored point cloud, plus other useful information.
Launch the ZED wrapper along with RVIZ 2 by using the following command (installing the packages included in the zed-ros2-examples repository is required):
ros2 launch zed_display_rviz2 display_zed_cam.launch.py camera_model:=<camera model>
📌 Note: If you haven’t yet configured your own RVIZ 2 interface, you can find a detailed tutorial here.
⚠️ Warning: Using RVIZ 2 on NVIDIA® Jetson™ devices is not recommended for heavy tasks such as processing point clouds and full-resolution images; doing so may slow down the system and affect the reliability of the ZED nodes.
Displaying Images #
The ZED node publishes both original (raw) and stereo-rectified (aligned) left and right images. In RVIZ 2, select a topic and use the image preview mode.
Here is a list of the main available image topics (more image topics are available):
- rgb/image_rect_color: Color rectified image (left image by default)
- rgb/image_raw_color: Color unrectified image (left image by default)
- right/image_rect_color: Color rectified right image
- right/image_raw_color: Color unrectified right image
- left/image_rect_color: Color rectified left image
- left/image_raw_color: Color unrectified left image
- confidence/confidence_image: Confidence map
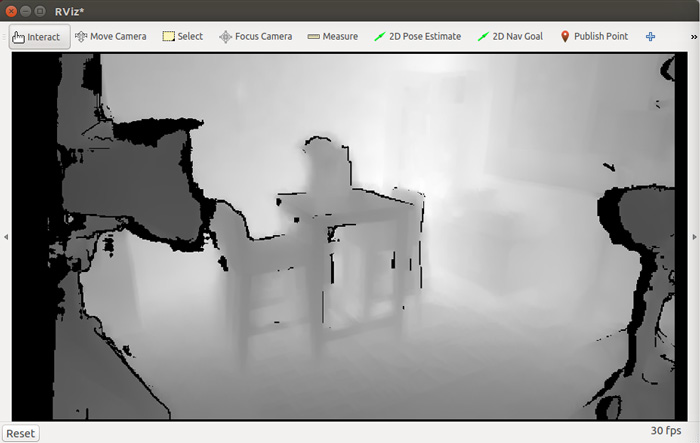
Displaying Depth #
The depth map can be displayed in RVIZ 2 by subscribing to the following topic:
- depth/depth_registered: 32-bit depth values in meters. RVIZ 2 will normalize the depth map on 8-bit and display it as a grayscale depth image.
📌 Note: An OpenNI compatibility mode is available by modifying the
config/common.yamlfile. Setdepth.openni_depth_modetotrueto get depth in millimeters with 16-bit precision, then restart the ZED node.
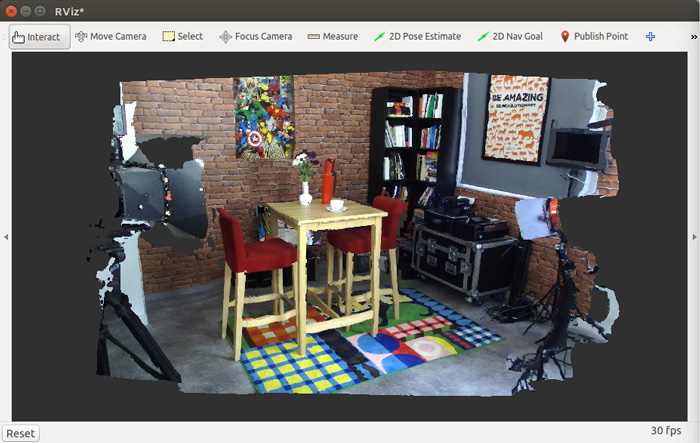
Displaying the Point cloud #
A 3D colored point cloud can be displayed in RVIZ 2 subscribing to the point_cloud/cloud_registered topic.
Add it in RVIZ 2 with point_cloud -> cloud -> PointCloud2.
📌 Note: Using RVIZ 2 on NVIDIA® Jetson™ devices is not recommended for heavy tasks such as processing point clouds and full-resolution images; doing so may slow down the system and affect the reliability of the ZED nodes.
Displaying Position and Path #
The ZED position and orientation in space over time are published to the following topics:
- odom: Odometry pose referred to odometry frame (only visual odometry is applied for ZED, visual-inertial for ZED Mini)
- pose: Camera pose referred to Map frame (complete data fusion algorithm is applied)
- pose_with_covariance: Camera pose referred to Map frame with covariance (if spatial_memory is false in launch parameters)
- path_odom: The sequence of camera odometry poses in Map frame
- path_map: The sequence of camera poses in Map frame
Launching with a recorded SVO video #
With the ZED SDK, you can record and play back stereo video by using Stereolabs’ SVO file format. To record a sequence, open the ZED Explorer app (/usr/local/zed/tools) and click on the REC button.
To launch the ROS wrapper with an SVO file, set the relative parameter while starting the node. For example, to start the ZED 2 node using the SVO as input source:
ros2 launch zed_wrapper zed_camera.launch.py camera_model:=<camera model> svo_path:=<full_path_to_svo_file>
with RVIZ 2:
ros2 launch zed_display_rviz2 display_zed_cam.launch.py camera_model:=<camera model> svo_path:=<full_path_to_svo_file>
📌 Note: The ZED ROS 2 Wrapper now supports the SVO v2 format, which is available from the ZED SDK v4.1.
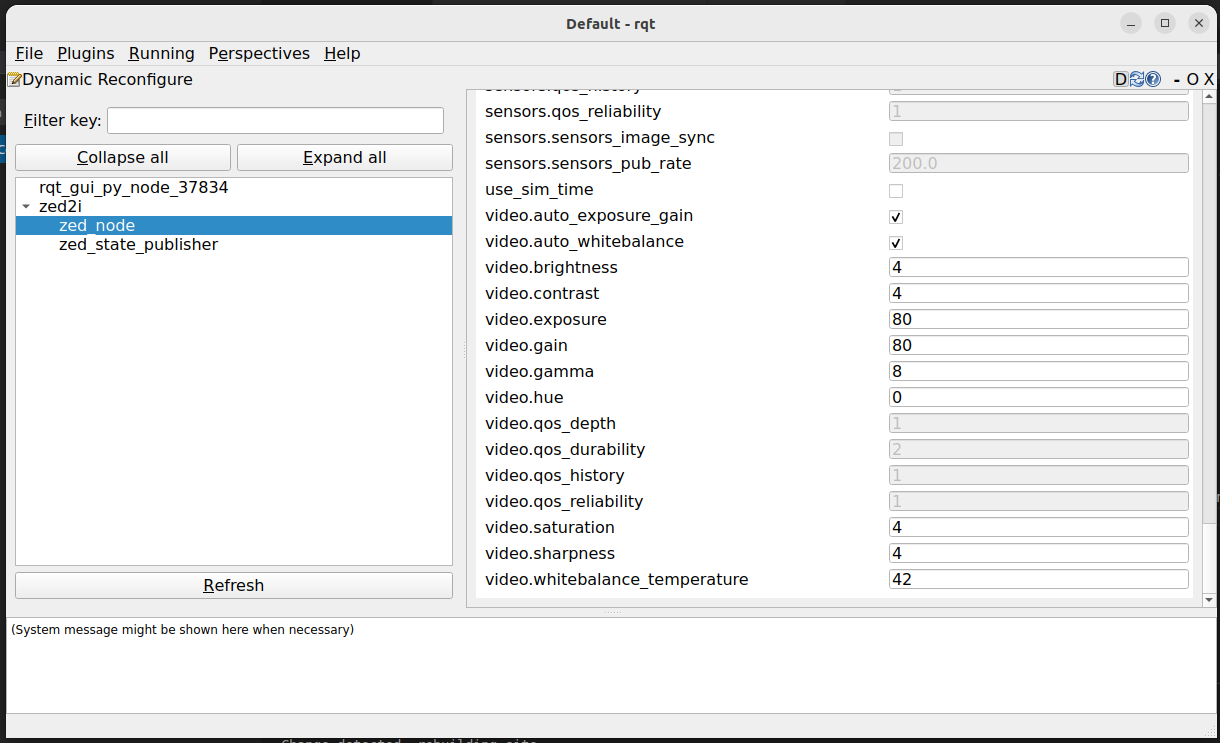
Dynamic reconfigure #
You can dynamically change many configuration parameters during the execution of the ZED node.
All the parameters that can be dynamically changed while the node is running are marked as [DYNAMIC] in the YAML configuration files.
For a full description of each parameter please read the complete guide.
You can set the parameters by using the CLI command ros2 param set, e.g.:
ros2 param set /zed/zed_node depth.depth_confidence 80
if the parameter is successfully set you will get a confirmation message:
Set parameter successful
If you try to set a parameter that’s not dynamically reconfigurable, or if you provided an invalid value, you will get this type of error:
ros2 param set /zed/zed_node depth.depth_confidence 150
Setting parameter failed: depth.depth_confidence must be a positive integer in the range [0,100]
You can also use a GUI to set dynamic parameters values:
rqt
select Plugins -> Configuration -> Dynamic Reconfigure
Node Diagnostic #
The ZED ROS 2 node publishes useful diagnostic information aggregated into the /diagnostics topic using the diagnostic_updater package.
Diagnostic information can be analyzed and parsed by using ROS 2 tools, like for example the Runtime Monitor plugin of rqt.
