Adding Depth Perception in ROS
Depth with RViz
In this tutorial, you will learn in detail how to configure your own RViz session to see only the depth data that you require.
Depth information can be visualized in many different ways: 2D depth images, 3D point clouds, 3D registered depth clouds, and the confidence image to name a few.
Depth image
To visualize a depth image, you can use the simple Image plugin since the depth data are published on topics of type sensor_msgs/Image (see above). It differs from a “normal” image in that the data is encoded in 32-bit (floating point) not 8-bit.
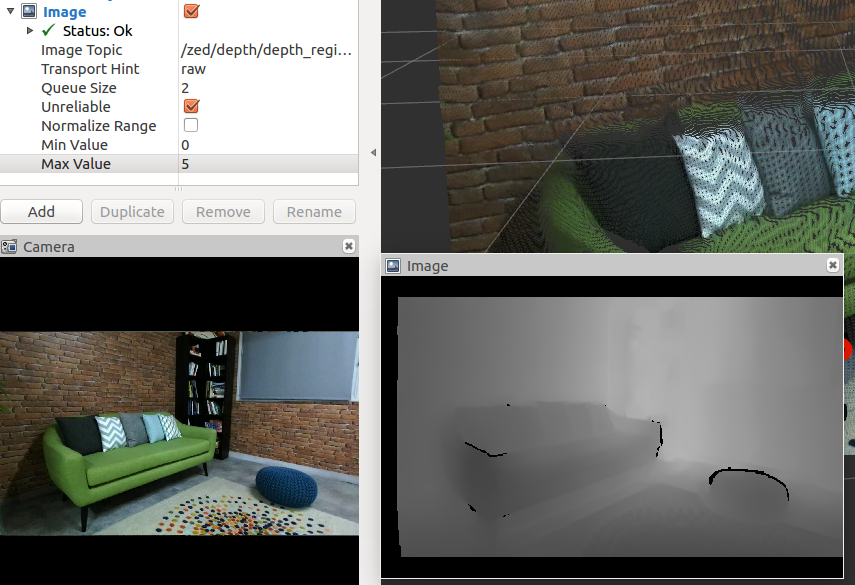
The parameters are the same as for Image, with three additions:
Normalize range: Since a floating point image is not directly rendered, it is converted to an 8-bit grayscale image. Enabling this field means the normalization range is automatically calculatedMin value: IfNormalize rangeis unchecked, you can manually set the minimum depth range in metersMax value: IfNormalize rangeis unchecked, you can manually set the maximum depth range in meters
Manually setting the normalization range is useful if you know the maximum value measured for the depth and you want to keep the image scale static.
Depth cloud
The Depth Cloud plugin is the first method to visualize the registered point cloud generated by the Depth and Video data streams.
This plugin takes a depth image and an RGB image (both published in the same frame_id) and automatically generates a 3D RGB point cloud.
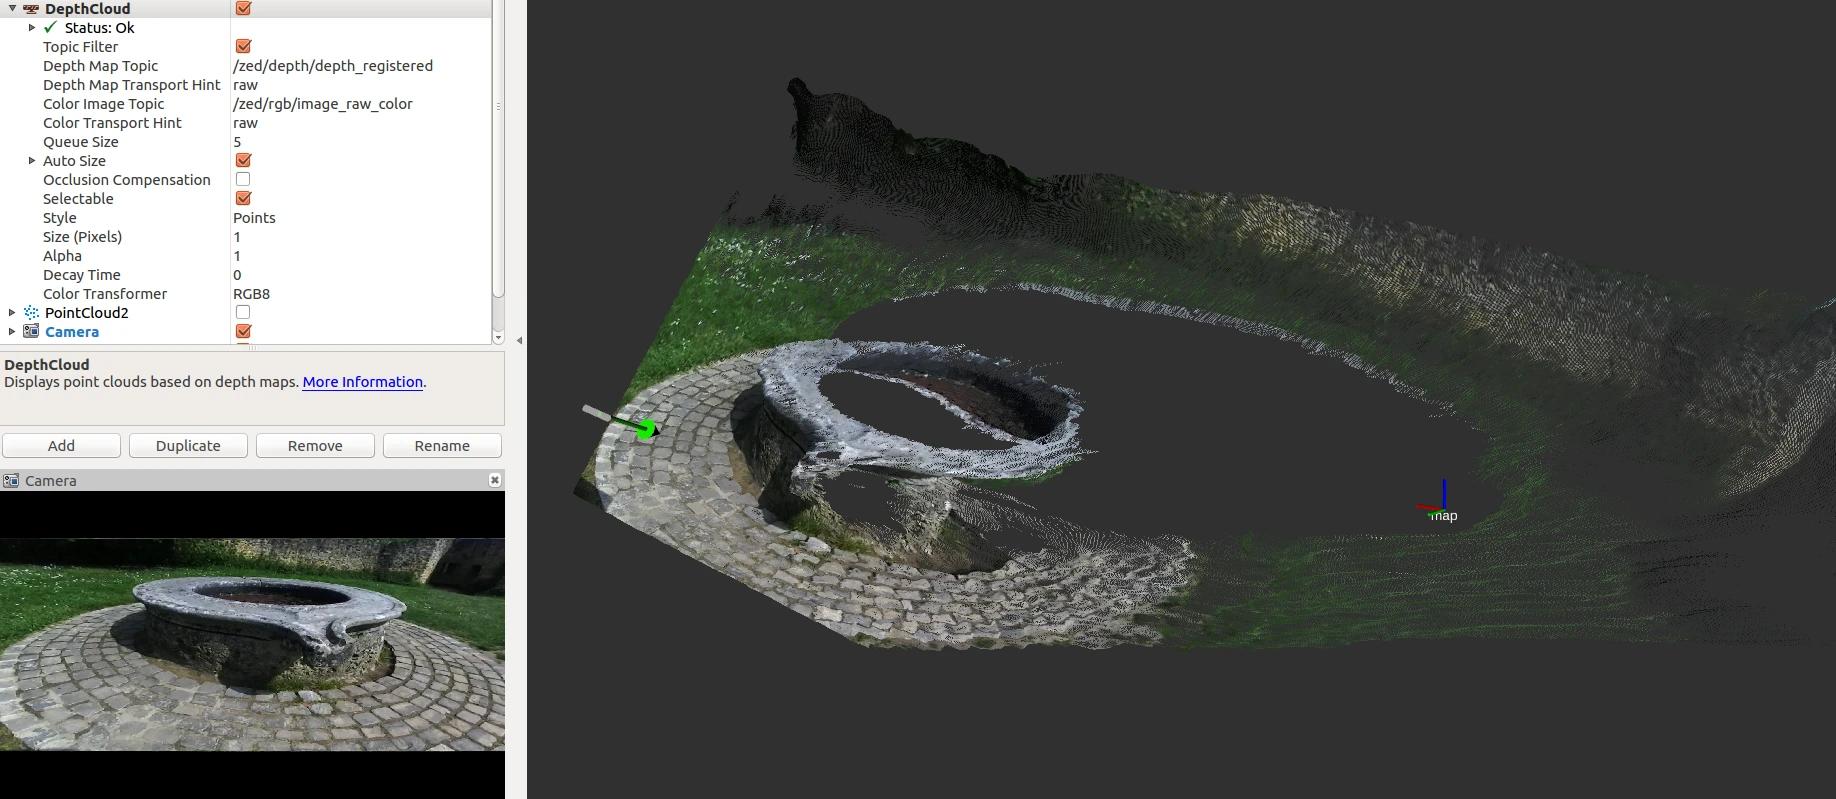
Key parameters:
Depth map topic: Selects the depth image topic to visualize from the list of available images in the combo box (checkTopic filterto select only image topics with a name that recalls a depth image)Color image topic: Selects the RGB image topic to associate with the depth image from the list of available images in the combo boxStyle: The style used to render each point. UsePointsandSize=1to maximize FPSColor transformer: Selects how points are colored. UseRGB8to match the color image pixels to the corresponding depth pixels. UseAxis colorto use a color proportional to the value of theAxisvalue (e.g.Zto use a color scale proportional to the distance from the floor orXto use a color proportional to the distance from the camera)
Pointcloud
To directly visualize a topic of type sensor_msgs/Pointcloud2 you can use the Pointcloud2 plugin.
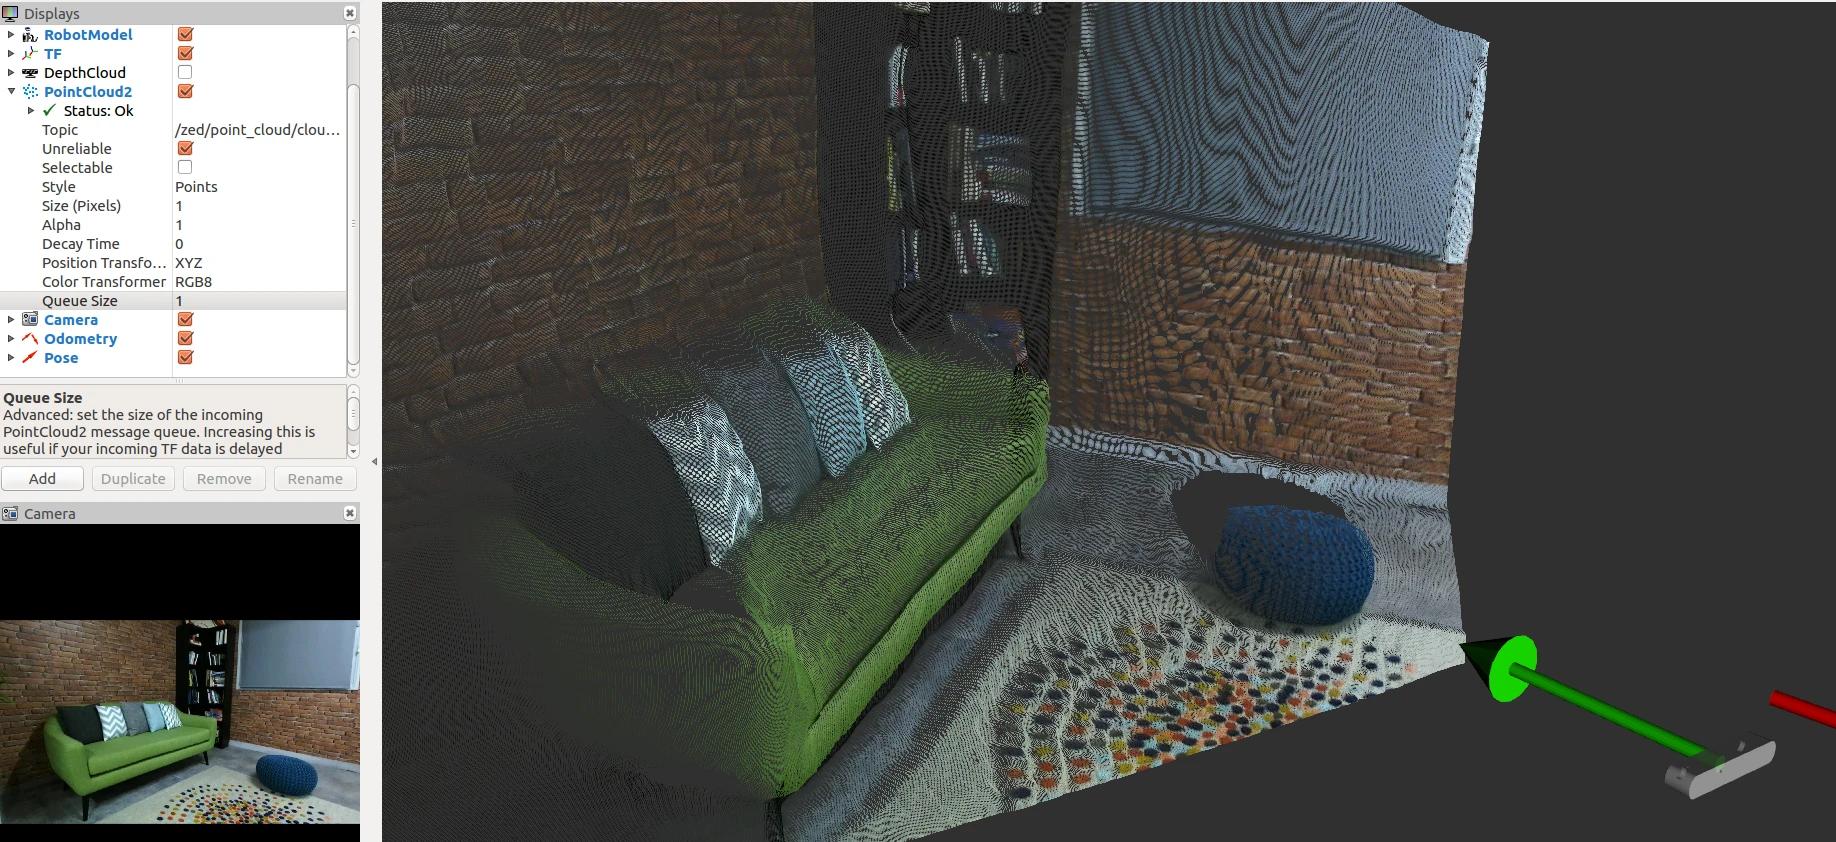
Key parameters:
Topic: Selects the topic to visualize from the list of available point cloud messagesUnreliable: Check this option to reduce the bandwidth required to subscribe to pointcloud2 topics. The subscriber will use the UDP protocol and will receive messages according to the available bandwidth
You can change the rendering style and the color transformer as explained above for the Depthcloud plugin.
if mapping is enabled (see the mapping/mapping_enabled parameter), the Pointcloud2 plugin is also used to visualize the fused point cloud produced by the mapping process, by subscribing to the topic /zed/zed_node/point_cloud/fused_cloud_registered.
Confidence
To visualize the Confidence Map as an image, you can use the Image plugin subscribing to the topic /zed/zed_node/confidence/confidence_image.
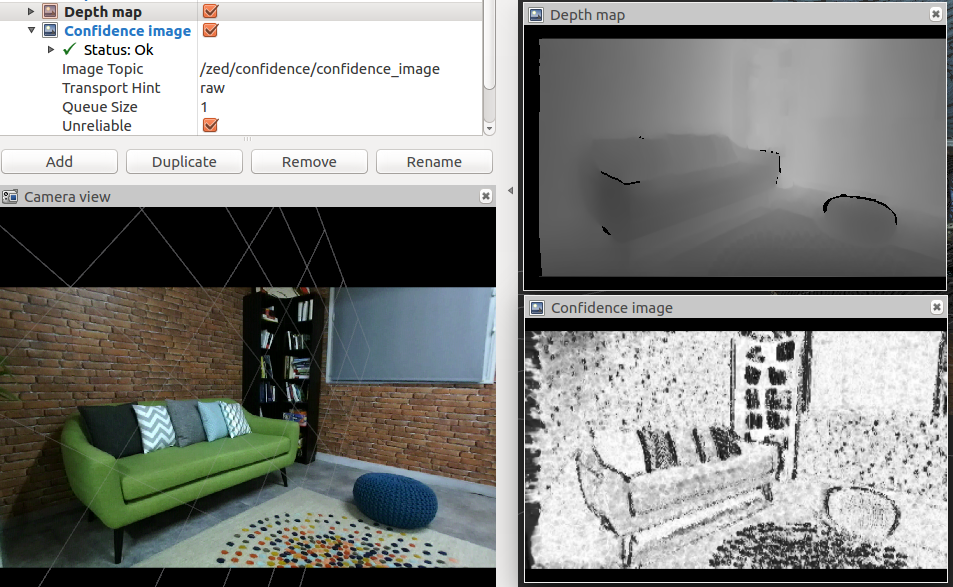
The lighter a pixel, the more reliable its corresponding depth value is.
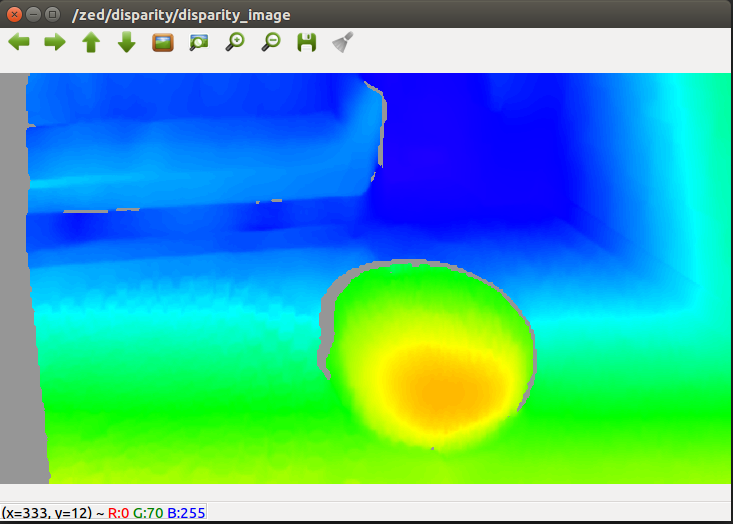
Disparity
A plugin for RViz to visualize a disparity message on the topic of type stereo_msgs/Disparity is not available, but you can use the disparity_view node available in the image_view package.
Launch the Disparity Viewer to visualize the disparity image that is published on the topic /zed/zed_node/disparity/disparity_image:
Depth subscribing in C++
In this tutorial, you will learn how to write a simple C++ node that subscribes to messages of type
sensor_msgs/Image in order to retrieve depth images published by the ZED node and to get the measured distance at the center of the image.
Introduction
Use the following command to connect the ZED camera to the ROS network:
- ZED:
- ZED-M:
- ZED2:
- ZED2i:
The ZED node starts to publish depth data to the network only if there is another node that subscribes to the relative topic.
Running the tutorial
If you correctly followed the ROS Installation Guide, the executable of this tutorial has already been compiled and you can run the subscriber node using this command:
If the ZED node is running and a ZED or ZED-M is connected or you have loaded an SVO file, you will receive the following stream of messages confirming that you are correctly subscribing to the ZED image topics:
The code
The source code of the subscriber node zed_depth_sub_tutorial.cpp:
The code explained
The following is a brief explanation of the source code above.
This callback is executed when the subscriber node receives a message of type sensor_msgs/Image that matches
the subscribed topic /zed/zed_node/depth/depth_registered.
The parameter of the callback is a boost::shared_ptr to the received message. This means you don’t have to worry about memory management.
The callback demonstrates how to access message data:
- The pointer to the
datafield is cast tofloat*as it is declared as a pointer to an array ofcharvalues - The image coordinates [u,v] of the center of the depth image are calculated
- Since the data are organized in a linear vector, the index of the central pixel is calculated from the image coordinates
- The measure in meters of the center point is printed on the screen
The main function is very standard and it is explained in detail in the “Talker/Listener” ROS tutorial.
The most important lesson of the above code is how the subscribers are defined:
A ros::Subscriber is a ROS object that listens to the network and waits for its own topic message to be available.
When a message is received, it executes the callback assigned to it.
In the tutorial, we declared one subscriber to the depth data. The subscriber to the /zed/zed_node/depth/depth_registered topic calls the depthCallback function when it receives a message of type
sensor_msgs/Image that matches that topic.
Conclusions
The full source code of this tutorial is available on GitHub in the zed_depth_sub_tutorial sub-package.
Along with the node source code, you can find the package.xml and CMakeLists.txt files that complete the tutorial package.