Getting Started with ROS and ZED
The ZED ROS Wrapper packages are no longer maintained because ROS 1 reached end-of-life (EOL) on 2025-05-31 with the final Noetic release.
We recommend upgrading to ROS 2 to take advantage of the latest ZED SDK features for robotics applications.
The ZED ROS wrapper lets you use the ZED stereo cameras with ROS. It provides access to the following data:
- Left and right rectified/unrectified images
- Depth map
- Colored 3D point cloud
- Visual odometry: Position and orientation of the camera
- Pose tracking: Position and orientation of the camera fixed and fused with IMU data
- Spatial mapping: Fused 3d point cloud
- Sensors data: accelerometer, gyroscope, barometer, magnetometer, internal temperature sensors
Installation
Prerequisites
- Ubuntu 20.04
- ZED SDK ≥ 3.5 and its dependency CUDA
- ROS Noetic
or
- Ubuntu 18.04
- ZED SDK ≥ 3.5 and its dependency CUDA
- ROS Melodic
Build the packages
The ZED ROS wrapper is available on GitHub and divided into three repositories:
- zed-ros-wrapper: the main package that provides the ZED ROS Wrapper node
- zed-ros-interfaces: the package declaring custom topics, services and actions
- zed-ros-examples: a support package that contains examples and tutorials on how to use the ZED ROS Wrapper
We suggest installing the main package on the robot and using the examples on a desktop PC to get familiar with the many features provided by the ROS wrapper. This way, the robot installation stays clean and the many dependencies required by the examples are not installed on it.
The zed-ros-interfaces repository is automatically integrated by zed-ros-wrapper as a git submodule to satisfy all the required dependencies.
You only need to install the zed-ros-interfaces repository separately on a remote system that must retrieve the topics sent by the ZED Wrapper (e.g. the list of detected objects obtained with the Object Detection module) or call services and actions to control the status of the ZED Wrapper.
zed-ros-wrapper
zed-ros-wrapper is a catkin package that depends on the following ROS packages:
- nav_msgs
- tf2_geometry_msgs
- message_runtime
- catkin
- roscpp
- stereo_msgs
- rosconsole
- robot_state_publisher
- urdf
- sensor_msgs
- image_transport
- roslint
- diagnostic_updater
- dynamic_reconfigure
- tf2_ros
- message_generation
- nodelet
If you haven’t set up your catkin workspace yet, please follow this short tutorial. To install the zed-ros-wrapper, open a bash terminal, clone the repository, update the dependencies and build the packages.
If you are using a different console interface like zsh, you have to change the source command as follows: echo source $(pwd)/devel/setup.zsh >> ~/.zshrc and source ~/.zshrc.
If an error mentioning /usr/lib/x86_64-linux-gnu/libEGL.so blocks compilation, use the following command to repair the libEGl symlink before restarting the catkin_make command:
zed-ros-interfaces
The zed_interfaces package is a catkin package. It depends on the following ROS packages:
- catkin
- std_msgs
- sensor_msgs
- actionlib_msgs
- geometry_msgs
- message_generation
Open a terminal, clone the repository, update the dependencies and build the packages:
this package does not require CUDA, so it can also be used to receive the ZED data on machines not equipped with an NVIDIA® GPU.
Custom Topics
- BoundingBox2Df
- BoundingBox2Di
- BoundingBox3D
- Keypoint2Df
- Keypoint2Di
- Keypoint3D
- Object
- ObjectsStamped
- RGBDSensors
- Skeleton2D
- Skeleton3D
Custom Services
- reset_odometry
- reset_tracking
- set_led_status
- set_pose
- save_3d_map
- save_area_memory
- start_3d_mapping
- start_object_detection
- start_remote_stream
- start_svo_recording
- stop_3d_mapping
- stop_object_detection
- stop_remote_stream
- stop_svo_recording
- toggle_led
zed-ros-examples
The zed-ros-examples repository is a collection of catkin packages. They depend on the following ROS packages:
- catkin
- zed_wrapper
- sensor_msgs
- roscpp
- nav_msgs
- geometry_msgs
- ar_track_alvar
- ar_track_alvar_msgs
- nodelet
- depthimage_to_laserscan
- rtabmap
- rtabmap_ros
- rviz_imu_plugin
- rviz
To install all the packages open a terminal, clone the repository, update the dependencies and build the packages:
Starting the ZED node
The ZED is available in ROS as a node that publishes its data to topics. You can read the full list of available topics here.
Open a terminal and use roslaunch to start the ZED node:
- ZED camera:
roslaunch zed_wrapper zed.launch - ZED Mini camera:
roslaunch zed_wrapper zedm.launch - ZED 2 camera:
roslaunch zed_wrapper zed2.launch - ZED 2i camera:
roslaunch zed_wrapper zed2i.launch
You can set your own configuration parameters by modifying the files param/common.yaml, param/zed.yaml, param/zedm.yaml and param/zed2.yaml as described in the parameter documentation.
Displaying ZED data
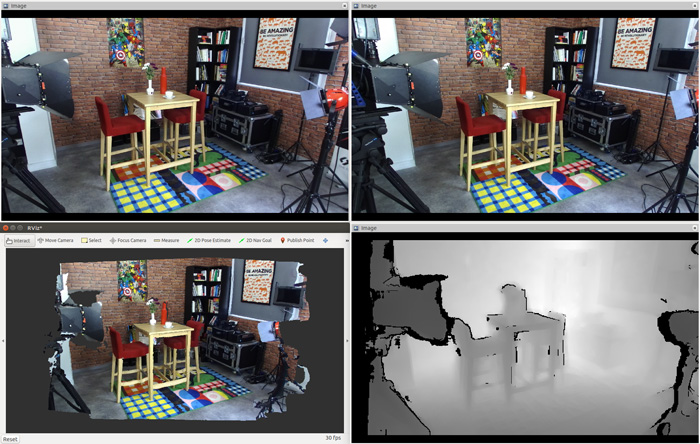
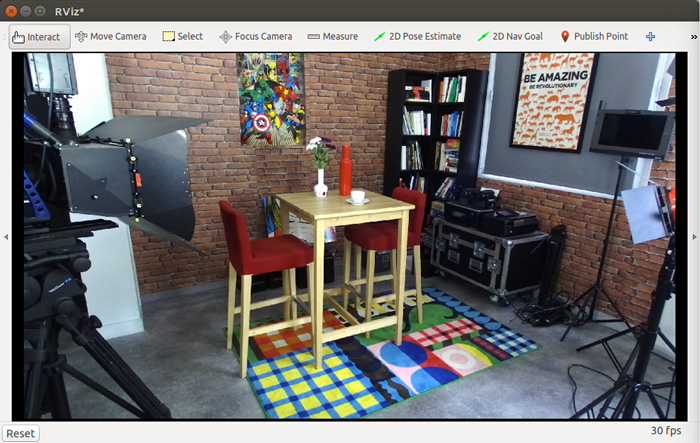
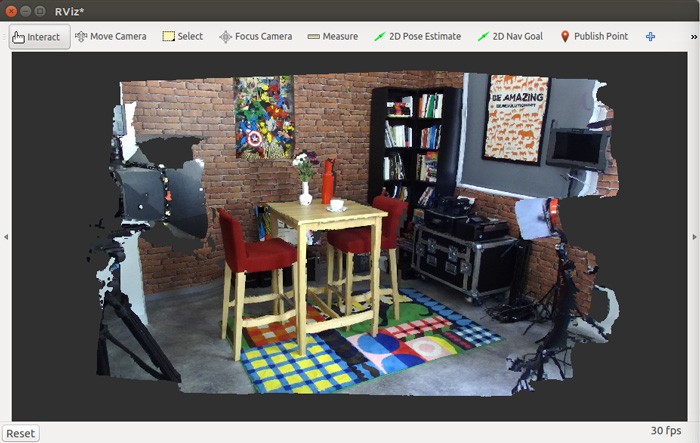
Using RViz
RViz is a useful visualization tool in ROS. Using RViz, you can visualize the ZED left and right images, depth, point cloud, and 3D trajectory.
Launch the ZED wrapper along with RViz using the following commands available if you installed the zed-ros-examples repository:
If you are using a ZED Mini camera, you can visualize additional information about IMU data using the following command:
If you are using a ZED 2 camera, you can visualize additional information about environmental sensors:
If you are using a ZED 2i camera, you can visualize additional information about environmental sensors:
If you haven’t yet configured your own RViz interface, you can find detailed tutorials here.
Displaying Images
The ZED node publishes both original and stereo rectified (aligned) left and right images. In RViz, use the image preview mode and select one of the available image topics. The main image topics are listed below:
- rgb/image_rect_color: Color rectified image (left sensor by default)
- rgb/camera_info: Color camera calibration data
- rgb_raw/image_raw_color: Color unrectified image (left sensor by default)
- rgb_raw/camera_info: Unrectified color camera calibration data
- right/image_rect_color: Right camera rectified image
- right/camera_info: Right sensor calibration data
- right_raw/image_raw_color: Right camera unrectified image
- right_raw/camera_info: Unrectified right sensor calibration data
- confidence/confidence_image: Confidence map as image
The Confidence Map is also available as a 32-bit floating point image by subscribing to the confidence/confidence_map topic.
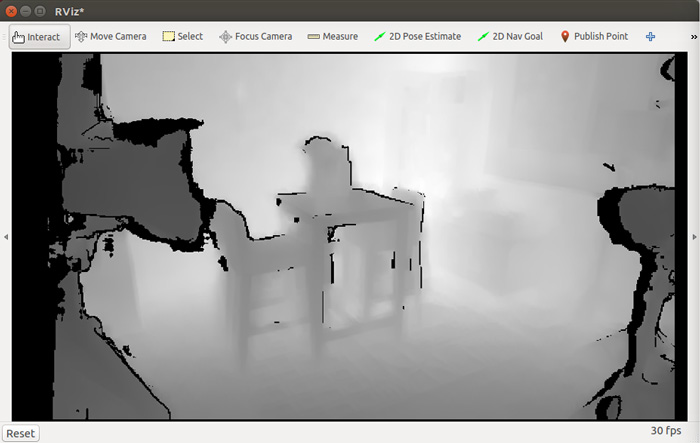
Displaying Depth
The depth map can be displayed in RViz with the following topic:
- depth/depth_registered: 32-bit depth values in meters. RViz will normalize the depth map to 8-bit and display it as a grayscale depth image.
An OpenNI compatibility mode is available in the launch/zed_camera.launch file. Set openni_depth_mode to 1 to get depth in millimeters and in 16-bit precision, and restart the ZED node.
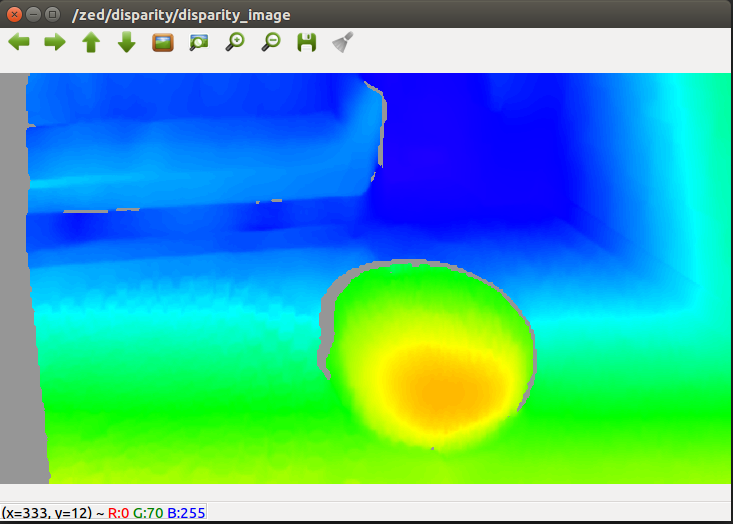
Displaying Disparity
The Disparity Image is available by subscribing to the disparity/disparity_image topics.
Launch the Disparity Viewer to visualize it:
Displaying the Point cloud
A 3D colored point cloud can be displayed in RViz with the zed/zed_node/point_cloud/cloud_registered topic.
Add it in RViz with point_cloud -> cloud -> PointCloud2. Note that displaying point clouds slows down RViz, so open a new instance if you want to display other topics.
Displaying position and path
The ZED position and orientation in space over time are published on the following topics:
- odom: Odometry pose referred to the Odometry frame (only visual odometry is applied for ZED, visual-inertial for ZED Mini)
- pose: Camera pose referred to the Map frame (complete data fusion algorithm is applied)
- pose_with_covariance: Camera pose referred to the Map frame, with covariance
- path_odom: The sequence of camera odometry poses in Map frame
- path_map: The sequence of camera poses in Map frame
Important: By default, RViz does not display odometry data correctly. Open the newly created Odometry object in the left list, and set Position Tolerance and Angle Tolerance to 0, and Keep to 1.
Launching with recorded SVO video
With the ZED, you can record and play back stereo video using the .svo file format. To record a sequence, open the ZED Explorer app and click on the REC button.
To launch the ROS wrapper with an SVO file, set an svo_file path launch parameter in the command line when starting the package:
ZED:
ZED Mini:
ZED 2:
ZED 2i:
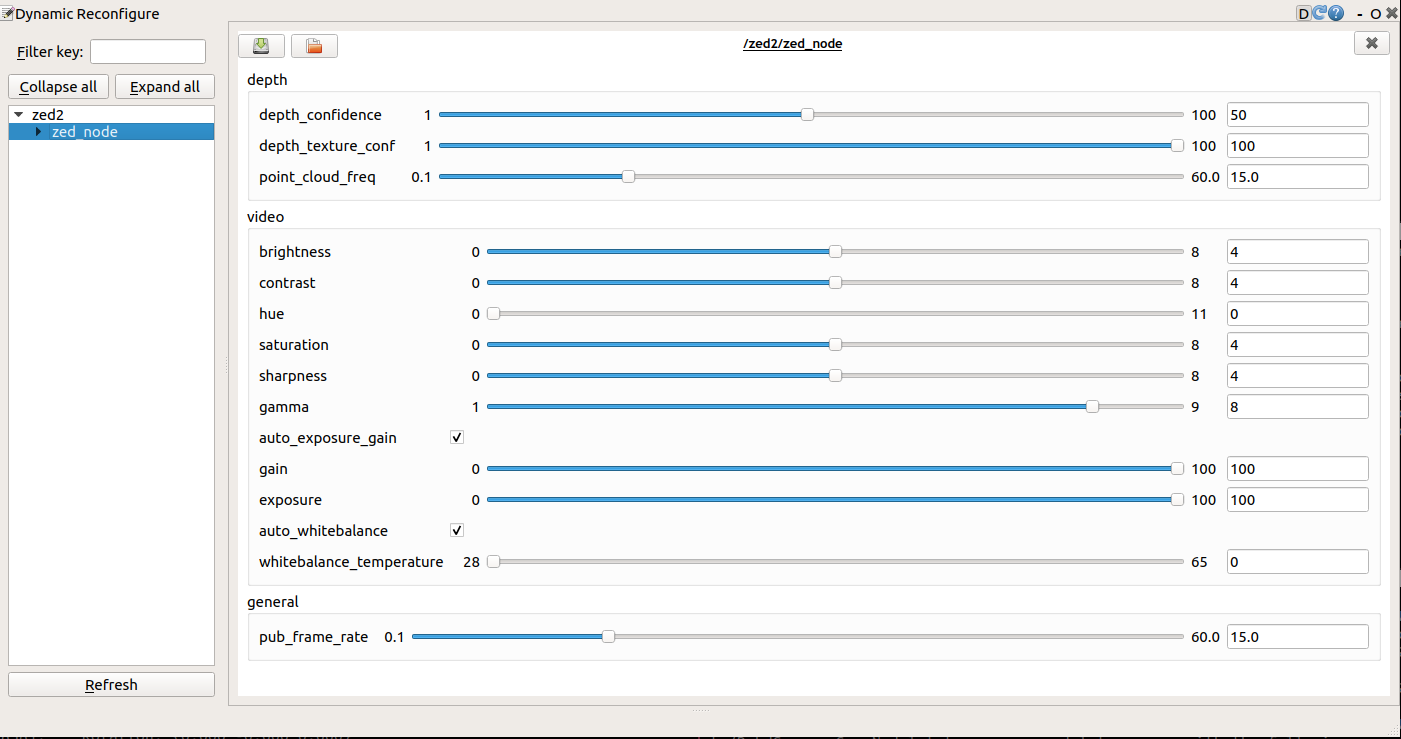
Dynamic reconfigure
You can dynamically change many configuration parameters during the execution of the ZED node.
You can set the parameters using the command dynparam set, e.g.:
or you can use the GUI provided by the rqt stack:
The full list of available dynamic parameters is available here