Setting up ZED Camera in Isaac™ Sim
Setting up ZED Camera in Isaac™ Sim
This tutorial guides you through setting up a ZED camera in NVIDIA® Isaac™ Sim and connecting it to the ZED SDK. If you’re not familiar with Isaac™ Sim, make sure to go through the official Isaac™ Sim documentation.
Install the ZED Camera extension
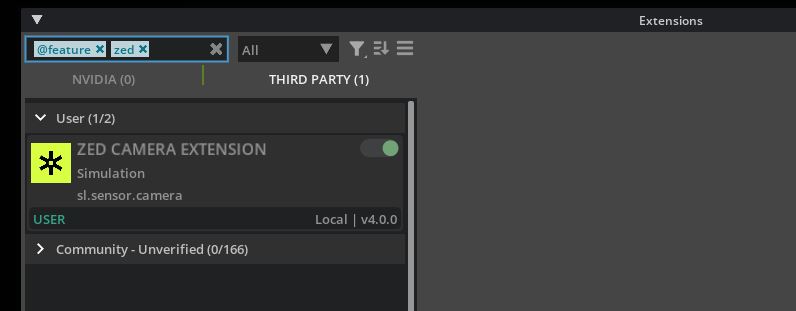
The ZED Camera extension is available through the Isaac Sim Extension manager in the Third-Party tab.
If you cannot find it, you can manually install it by cloning and building the GitHub repository:
Linux:
Windows:
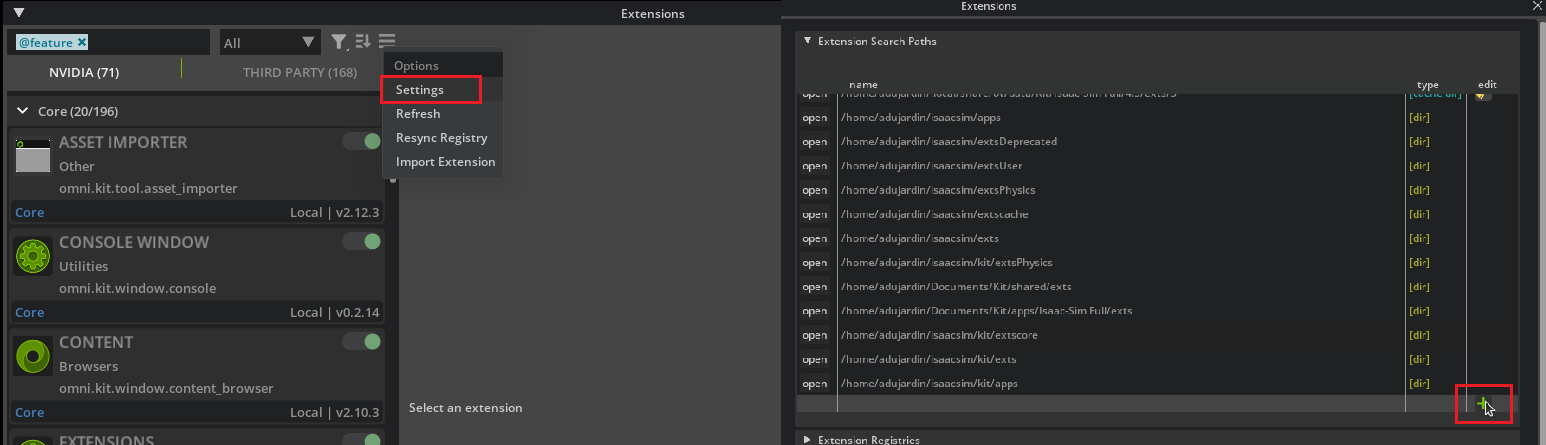
In the Extensions manager, click the menu button (hamburger icon near the search field), open Settings, and click the + button to add the path to the exts folder of the cloned repository (e.g. <your_workspace>/zed-isaac-sim/exts).
Enable the ZED Camera extension in the Third-Party tab.
Verify the installation (headless)
Before building a scene in the GUI, you can run a quick headless check to confirm that Isaac™ Sim starts and that the ZED Camera extension and its OmniGraph nodes load correctly. This is handy for automated or CI setups.
Save the following script as verify_zed_extension.py, updating EXTS_FOLDER to point to the exts folder of your cloned extension:
Run it with the Python interpreter shipped with your Isaac™ Sim build:
If everything is set up correctly, zed_verify_result.txt ends with ZED_EXTENSION_OK and lists the three registered node types (ZED Camera Helper, ZED Camera One Helper, and the low-level ZED Stream). A missing node type makes the script exit with an error instead.
If you run this inside the NVIDIA® Isaac™ Sim container, make sure GPU access is enabled with the NVIDIA Container Toolkit, launch with full driver capabilities (-e NVIDIA_DRIVER_CAPABILITIES=all), and install the runtime dependencies of libsl_zed.so that are not bundled in the image: libpng16-16, libjpeg-turbo8, libturbojpeg, and libusb-1.0-0.
Add a camera to the scene
The following camera models are available: ZED_X, ZED_X_4MM, ZED_XM, ZED_XM_4MM, ZED_X_Nano, ZED_XONE_UHD, ZED_XONE_GS, ZED_XONE_GS_4MM.
The extension ships USD models for the five camera bodies in the exts/sl.sensor.camera/data/usd folder: ZED_X.usdc, ZED_XM.usdc, ZED_X_Nano.usdc, ZED_XONE_GS.usdc, and ZED_XONE_UHD.usdc. The _4MM variants reuse the USD of their base model; to simulate them, select the matching value in the Camera Model property of the node.
Select the desired model USD and drag it into the Viewport or the Stage view.
You will notice that the prim has a base_link XForm; this is the reference frame of the mounting point on the bottom of the camera.
Build the action graph
The simulated camera takes advantage of the ZED SDK streaming input to stream its data into the ZED SDK.
To initiate the virtual ZED camera streaming, we will use the ZED Camera Helper OmniGraph node. To stream data at each simulation tick, drag and drop this node into the graph (you can type zed in the search panel to quickly find it), set its ZED Camera prim target to the camera in the scene, and connect its ExecIn input to the Tick output of the On Playback Tick node.
The ZED Camera extension also includes a lower-level ZED Stream node. For most use cases, make sure to use the ZED Camera Helper node (or the ZED Camera One Helper node for monocular ZED X One cameras).
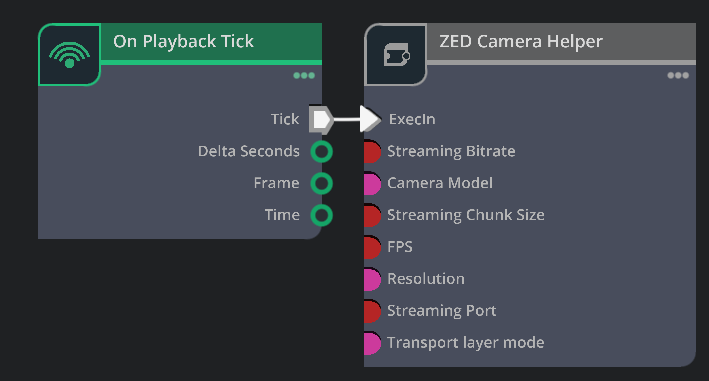
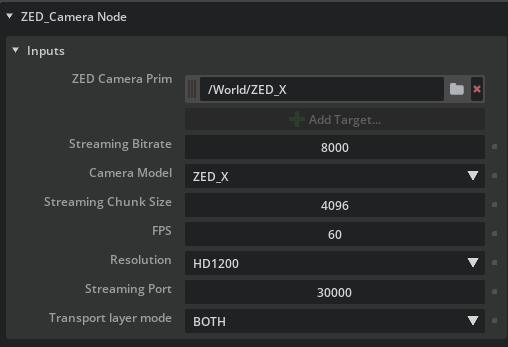
You can also configure the streamer properties in the Property panel on the right:
- ZED Camera Prim: this parameter should be set to the ZED camera prim in the stage as shown in the picture above.
- Camera Model: Defines the simulated camera model. Must match the ZED Camera Prim USD to provide accurate depth.
- Resolution: Defines the camera resolution used:
HD1200,HD1080, orSVGA. Lowering the resolution may provide better runtime performance. - FPS: Target frame rate streamed to the ZED SDK (default:
60). - Transport layer mode: Defines the transport mode used to stream data to the ZED SDK. Available values:
IPC(inter-process communication, Linux only, same machine),NETWORK(network streaming), orBOTH(default). IPC provides the best performance on Linux. On Windows, onlyNETWORKis available. - Streaming Port: Defines which port is used for streaming. It must be an even number (default:
30000). A different port is required for each camera in multi-camera simulations. - Streaming Bitrate: Bitrate (in Kbps) of the network stream; used only when not streaming over IPC (default:
8000). - Streaming Chunk Size: Size (in bytes) of the network streaming chunks; used only when not streaming over IPC (default:
4096).
And that’s it, you can now start the simulation to stream your stage into the ZED SDK!
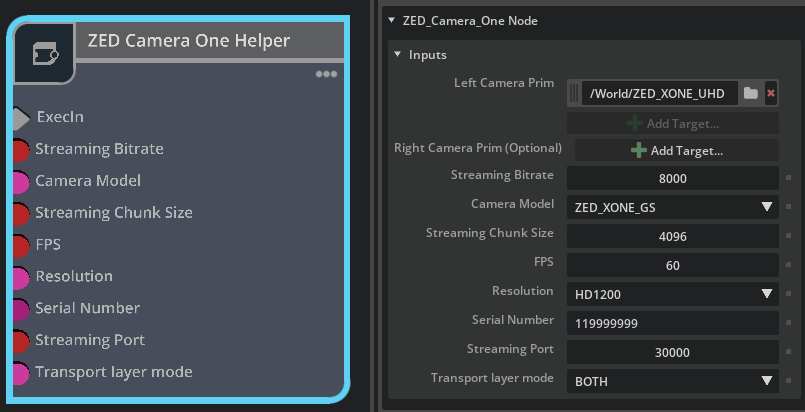
To stream a monocular camera (ZED X One), use the ZED Camera One Helper node instead.
The Serial Number input is only used for virtual stereo cameras.
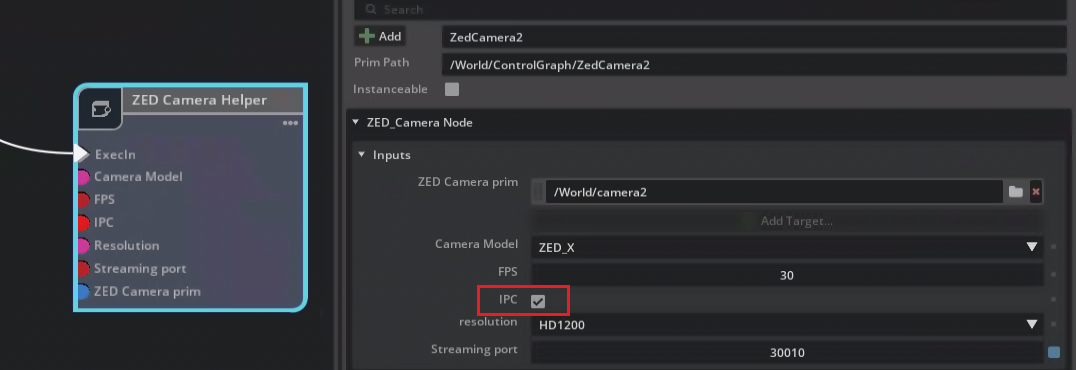
Using IPC
It is possible to stream images to the ZED SDK using IPC instead of NETWORK streaming for better performance. This feature is only available on Linux and only when streaming to the same machine.
To use IPC, set the Transport layer mode property of the ZED Camera Helper node to IPC or BOTH.
Important:
To receive a stream using IPC, the IP address must be set to 127.0.0.1 or localhost.
Create a Virtual stereo Camera
It is also possible to create what we call “virtual stereo cameras” by pairing two ZED X One cameras together. To do that, a calibration step is required.
- First, open the Extensions window and enable the
ZED Calibration Exporterextension in the Third-Party tab. - In the top menu bar, click
ZED->ZED Calibration Exporter. A new window will open. - Set the left and right cameras by selecting each prim in the Stage and clicking
Select. - Select the Camera model.
- Change the Serial Number if necessary.
- Click Generate. A calibration file (.conf) will be generated and saved on your machine.
- Then, in your action graph, add a
ZED Camera One Helperand set the left and right cameras. - You also need to set the serial number chosen during the calibration process.
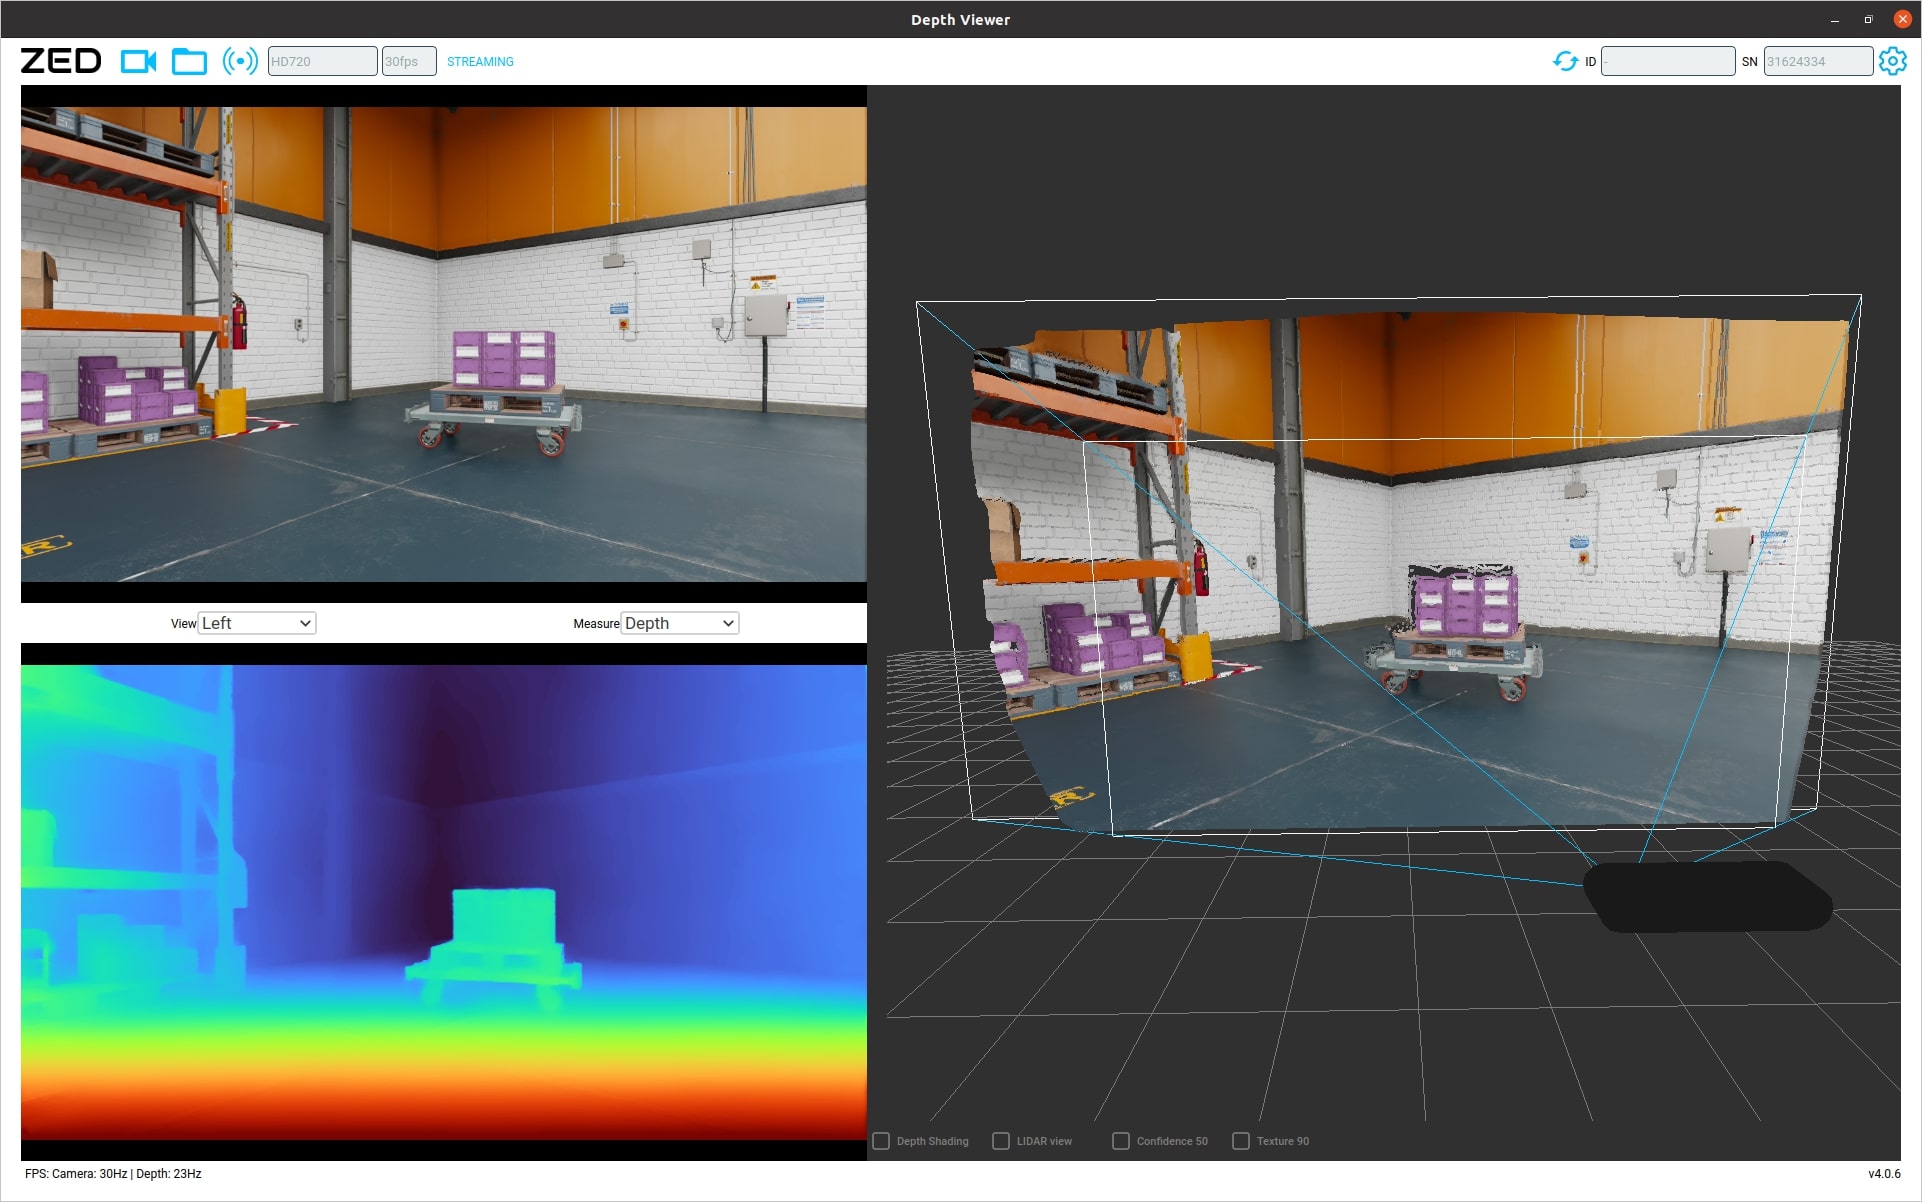
Test it in ZED DepthViewer
Once streaming is started, you can test it by connecting the ZED DepthViewer to the virtual camera. Simply launch the tool, click on the streaming input button, set the IP Address (the streaming computer) and the port (set in Streaming port), and you should see the depth data coming from the virtual environment.