Using ZED with ROS 2 and Isaac™ Sim
This tutorial guides you to configure the Isaac™ Sim ROS 2 Bridge to send simulated information to a ZED ROS 2 Wrapper node.
Install the dependencies #
📌 Note: the installation guide is valid only for Ubuntu. For other OS please refer to the official NVIDIA®documentation.
The Isaac™ Sim ROS 2 Bridge requires the Vision Messages ROS 2 package to run. You can install it by using the command
sudo apt install ros-humble-vision-msgs
If this dependency is not installed the ROS 2 Bridge extension will not start, and you will get an error message similar to this in the Isaac™ Sim log terminal:
2023-11-24 16:04:22 [73,377ms] [Error] [omni.isaac.ros2_bridge.plugin] Could not load ROS2 Bridge due to missing library dependencies, please make sure your sourced ROS2 workspace has the correct packages/libraries installed
[73.388s] To use the internal libraries included with the extension please set:
RMW_IMPLEMENTATION=rmw_fastrtps_cpp
LD_LIBRARY_PATH=$LD_LIBRARY_PATH:/home/<user>/.local/share/ov/pkg/isaac_sim-2023.1.0-hotfix.1/exts/omni.isaac.ros2_bridge/humble/lib
Before starting Isaac™ Sim
2023-11-24 16:04:22 [73,377ms] [Error] [omni.isaac.ros2_bridge.scripts.extension] ROS2 Bridge startup failed
IMPORTANT: do not add the new path to LD_LIBRARY_PATH in ~/.bashrc as suggested, otherwise you will create conflicts between libraries that will not allow you to start rviz2 and other ROS 2 tools.
For additional details, we recommend reading the official NVIDIA®documentation.
Setup the environment variables for ROS 2 #
Ensure that the ROS environment is sourced in the terminal or in your ~/.bashrc file before starting Isaac™ Sim:
source /opt/ros/humble/setup.bash
📌 Note: if you want to launch Isaac™ Sim by using the Omniverse Launcher it is required that you add the line
source /opt/ros/humble/setup.bashto~/.bashrcto automatically configure the ROS 2 environment variables each time you open a terminal console. Otherwise, you must launch that command in the terminal console before manually starting Isaac™ Sim with the commandisaac-sim.shwhich is located in the folder~/.local/share/ov/pkg/isaac_sim-<version>/.
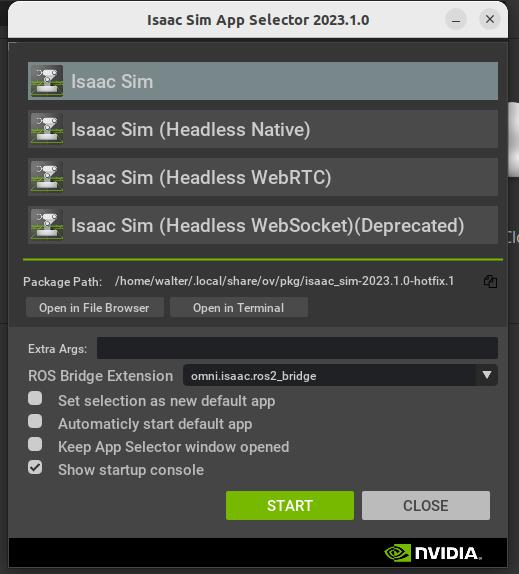
Initialize the simulator #
First of all, remember to select the correct ROS Bridge Extension when starting Isaac™ Sim: omni.isaac.ros2_bridge
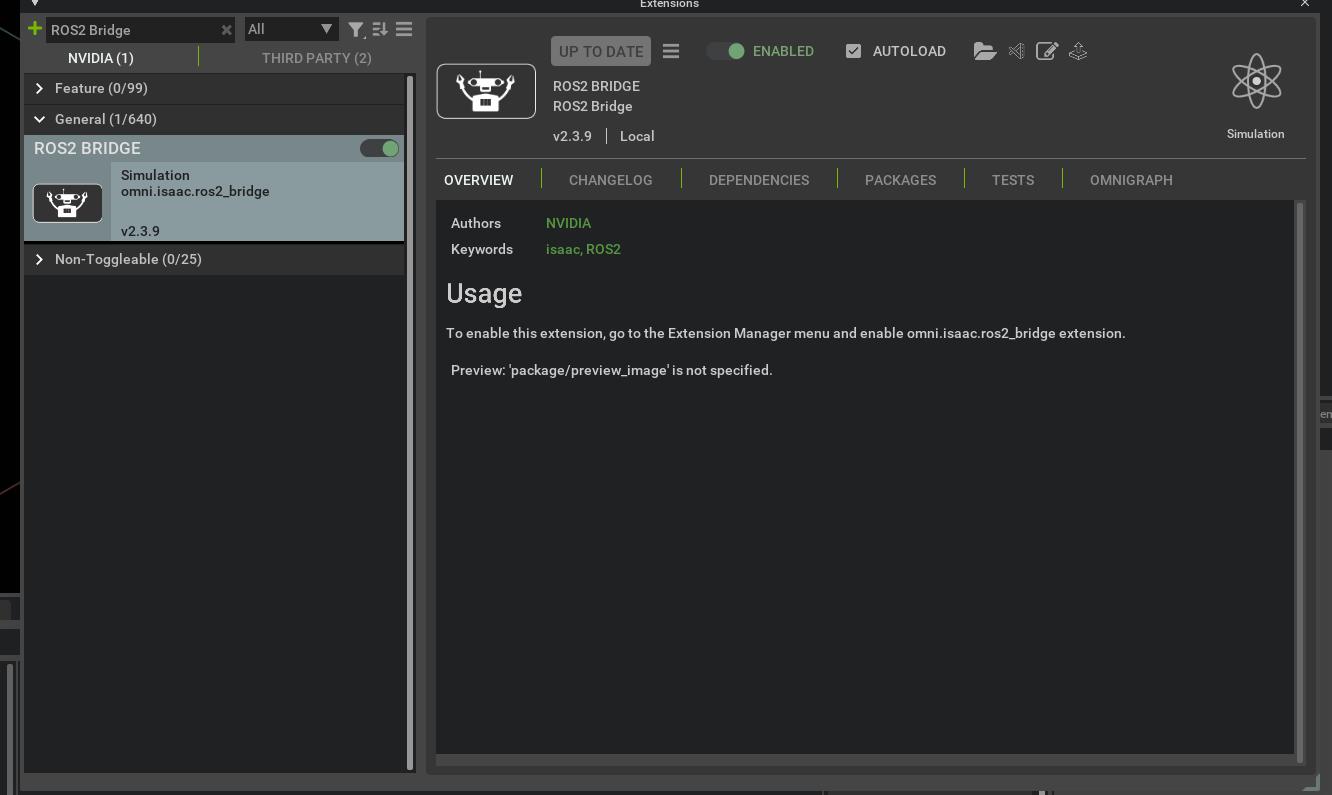
Enable the ROS 2 Bridge Extension #
When Isaac™ Sim is ready you must enable the ROS2 Bridge extension.
- Open the Extension view from the menu, Window -> Extensions.
- Search for
ROS2 Bridgeby using the search form in the top left. - Click the
DISABLEDswitch to set it toENABLED. - [Optional] Flag the
AUTOLOADoption to avoid performing these initialization steps each time you start Isaac™ Sim.
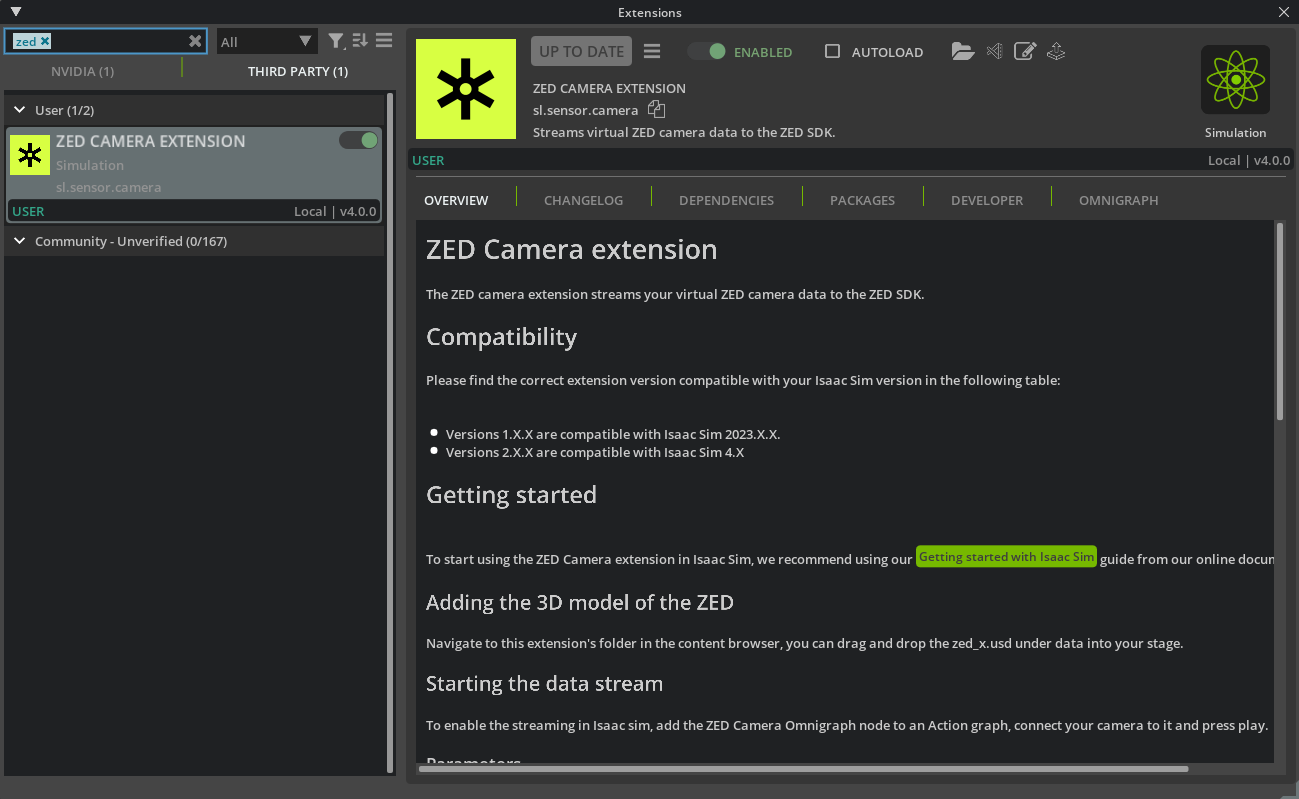
Enable the ZED Extension #
The ZED Camera Extension is required to send the simulated ZED images to the ZED ROS 2 Wrapper.
- Open the Extension view from the menu, Window -> Extensions.
- Search for “ZED” by using the search form in the top left.
- Select
THIRD PARTYif you have installed the extension from the GitHub repository (see here for adding the extension if it’s not available).
- Select
- Click the
DISABLEDswitch to set it toENABLED. - [Optional] Flag the
AUTOLOADoption to avoid performing these initialization steps each time you start Isaac™ Sim.
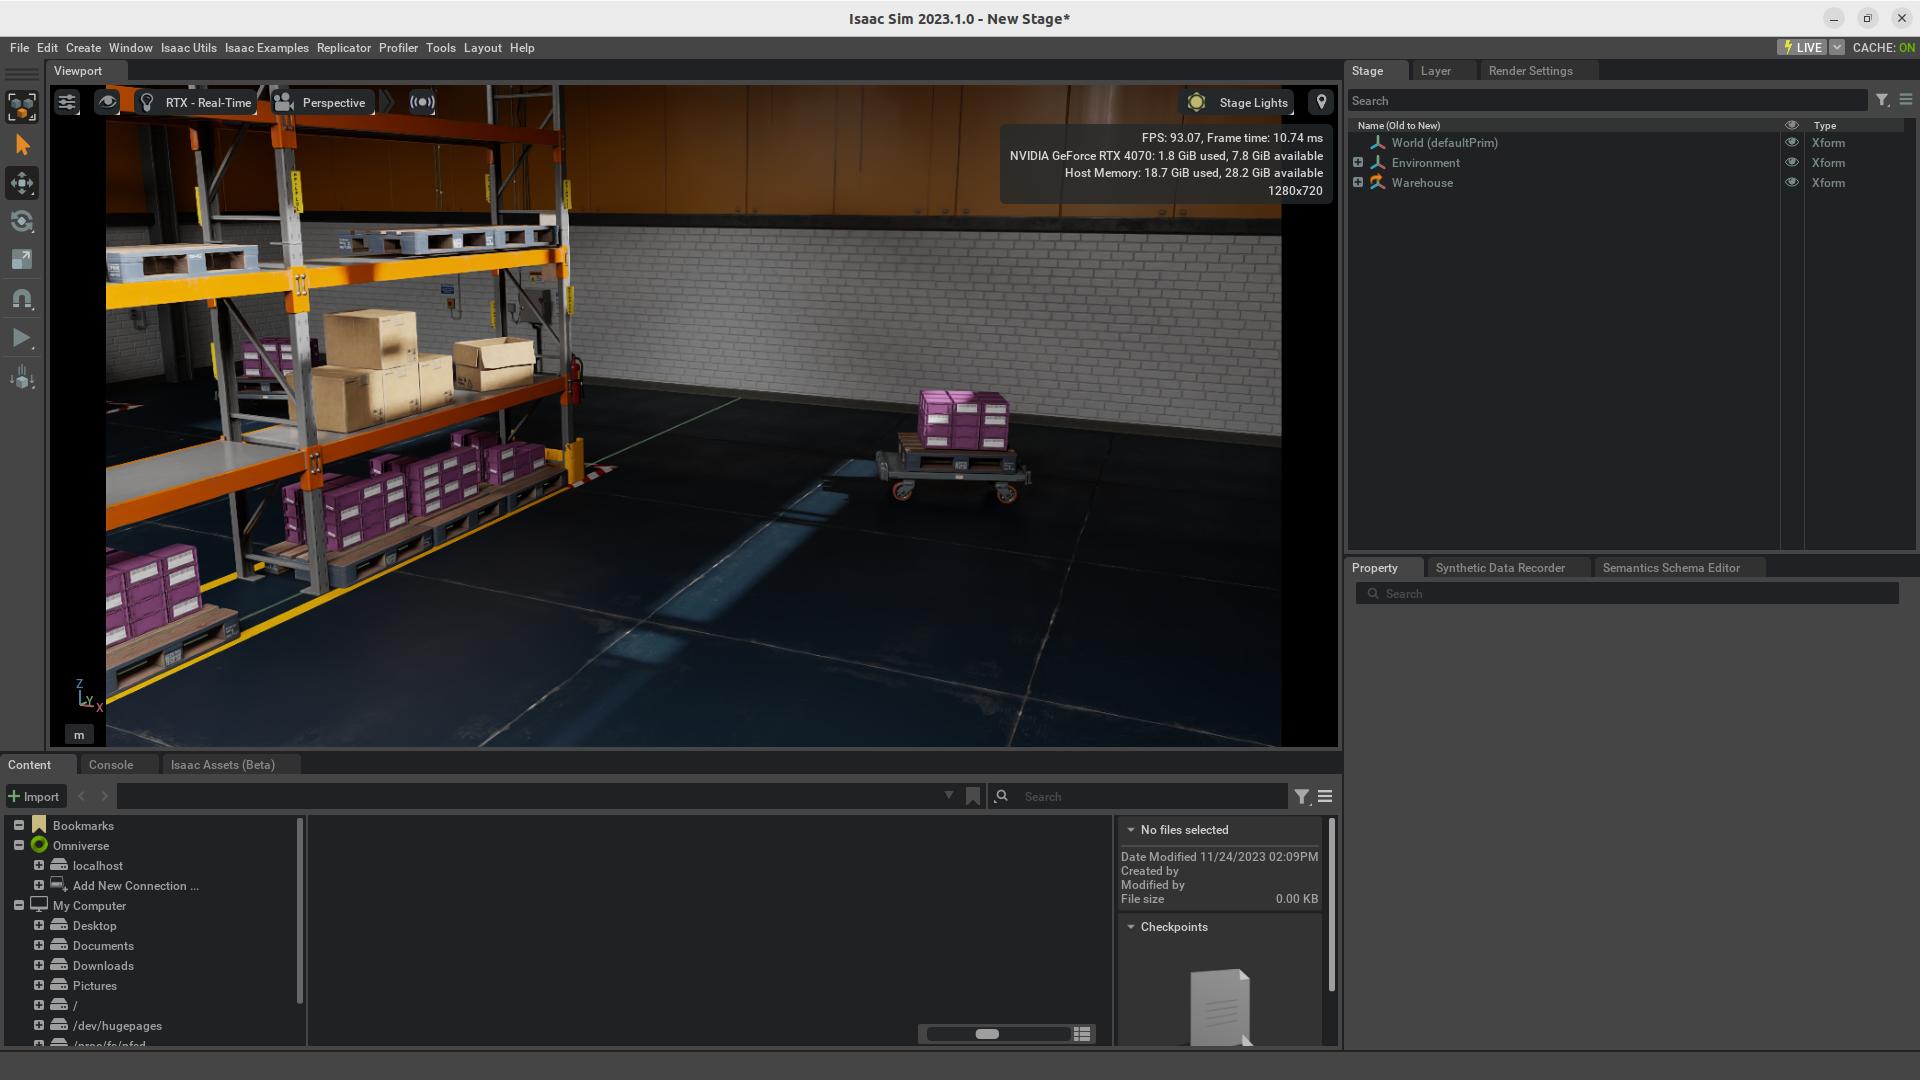
Add a scenario to the Stage #
The ZED camera is a visual sensor, so it’s important to add an environment that is rich in visual features for a good simulation experience.
Isaac™ Sim provides ready environments to be used, from Create -> Isaac -> Environments you can select for example the environment named Small Warehouse with Multiple Shelves.
Wait for the simulator to load the environment. This task can take a while, according to the dimension of the environment that you selected.
When all the object of the scene are finally loaded, the simulator will display the selected environment from the default point of view of the viewport camera.
Add a ZED camera to the scene #
The ZED X model will be available in the Isaac Assets tab on the bottom panel, with the latest versions of the Isaac™ Sim app.
If you cannot find the ZED X Model, then you can manually add it by cloning the GitHub repository:
cd <your_workspace>
git clone git@github.com:stereolabs/zed-isaac-sim.git

Select the model ZED_X.usd and drag it in the Viewport to place it in the position that you prefer.
A new prim named ZED_X will appear in the Stage view as a child of World.
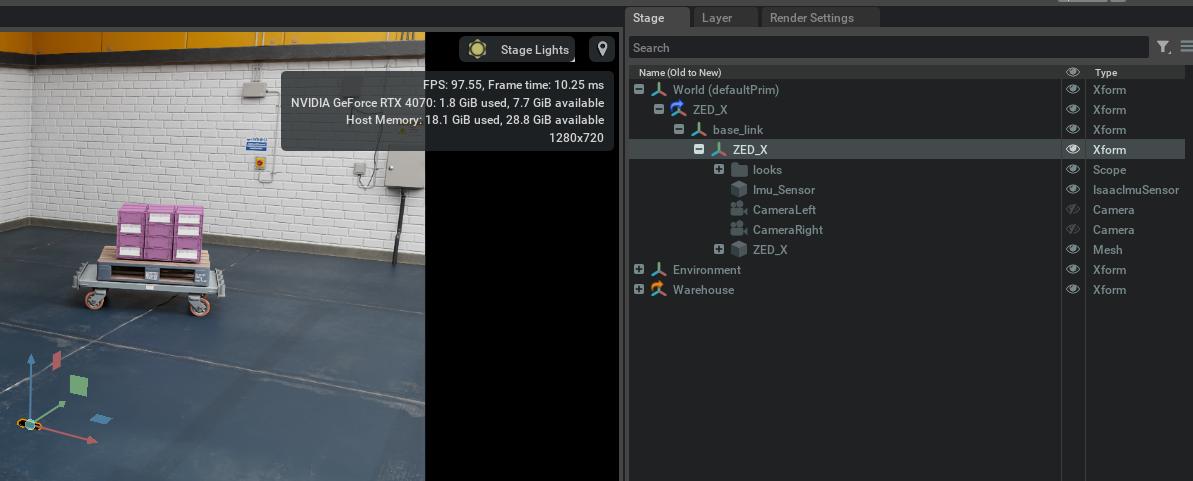
The ZED_X prim has an important XForm named base_link, this is the reference frame of the mounting point on the bottom of the camera.
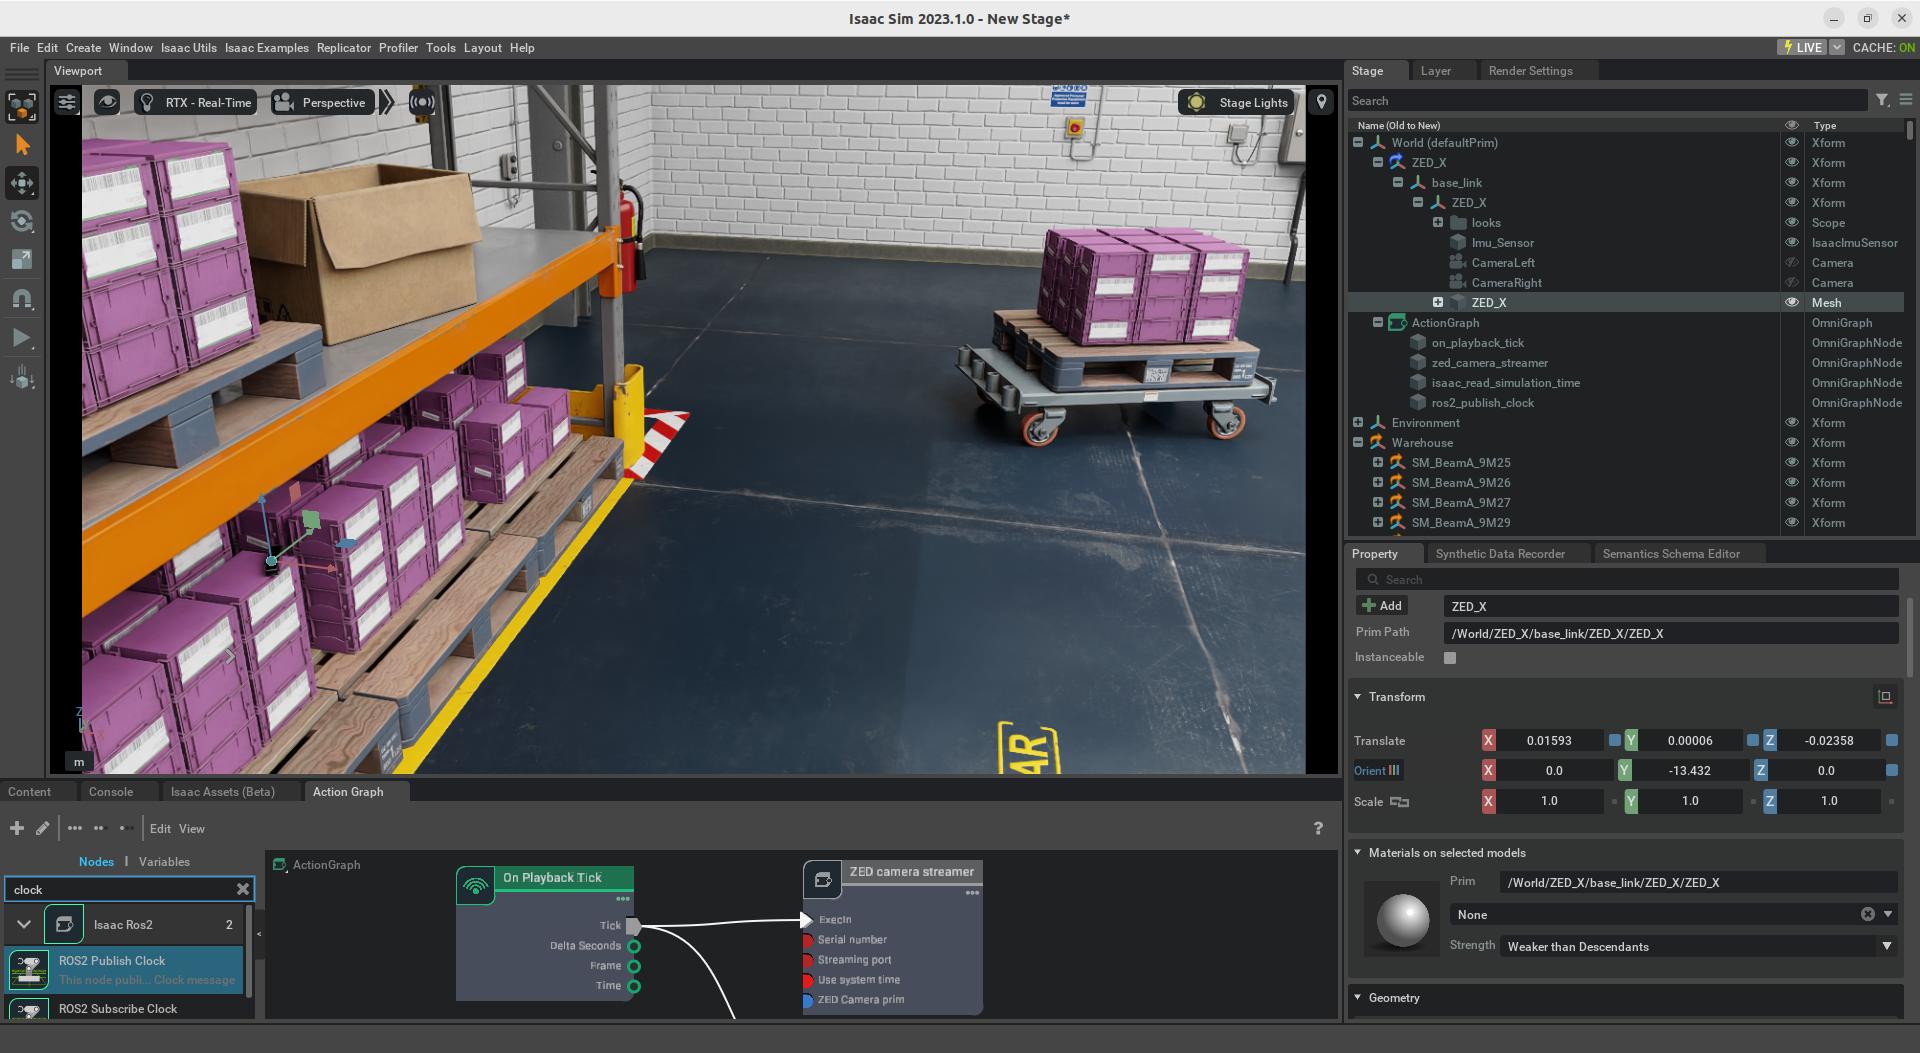
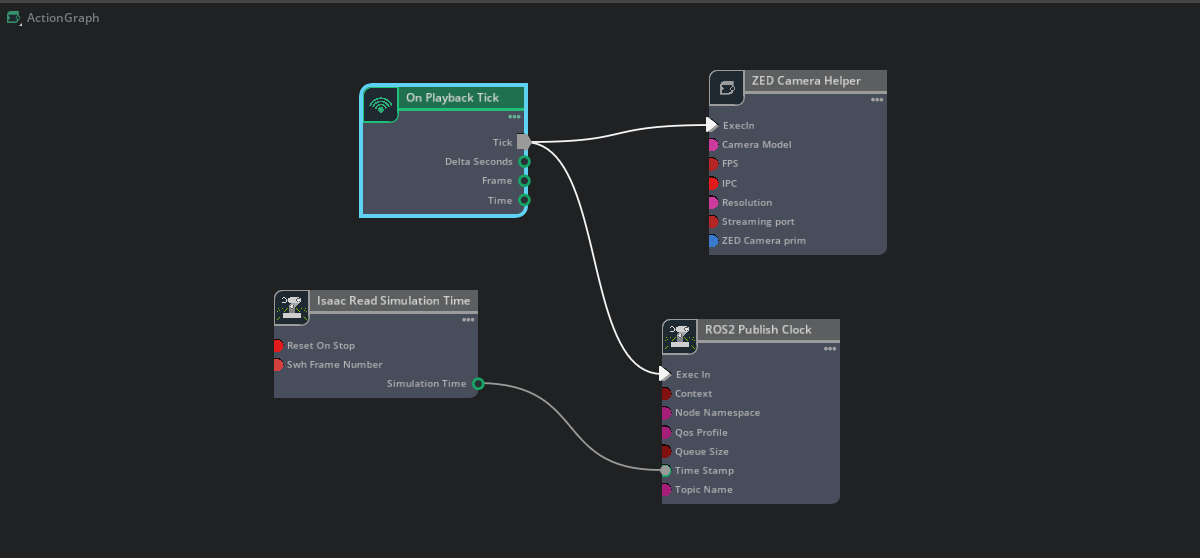
Enable the ZED camera #
The data streaming is activated by using the Omnigraph node ZED Camera Helper.
- Create a new
Action Graph, Create -> Visual Scripting -> Action Graph. - Add a new node of type
On Playback Tickto the graph. You can easily search for it by writingTickin the search form. - Type
ZEDin the search form and drag theZED Camera Helpernode into the graph. - Connect the
ExecIninput ofZED Camera Helperto theTickoutput of theOn Playback Ticknode.
📌 Note: Starting from version 4.0.0 of the extension, two nodes are available by the ZED Camera Extension, ZED Camera Helper and ZED Bridge. Please make sure to choose the ZED Camera Helper node.

- Click on the
ZED Camera Helperin the graph and select thePropertytab on the right. - Click
+ Add TargetnearZED Camera prim. - Select the root XForm named
ZED_Xand hitSelect.

Publish simulation time to ROS 2 #
When working with simulated data, the ROS 2 nodes cannot rely on the system clock to timestamp the data accurately. Instead, they have to use the simulation time, which can be faster or slower than the real time.
To handle this behavior, Isaac™ Sim ROS 2 Bridge provides a method to publish messages to the /clock topic with simulation time data.
All the ROS 2 nodes have a parameter named use_sim_time. When this parameter is set to true, each ROS 2 node subscribes to the /clock topic, and uses the simulation time as the reference for time instead of the system time.
- Select the
Action Graphtab in the bottom panel. - Add a new node of type
Isaac Read Simulation Time.- [Optional] Click on the
Isaac Read Simulation Time. - [Optional] Select the
Propertiestab in the right panel. - [Optional] Check the
Reset on stopoption to reset to zero the simulation time each time the simulation is stopped and restarted.
- [Optional] Click on the
- Add a new node of type
ROS2 Publish Clock. - Connect the
Tickoutput of theOn Playback Ticknode to theExecIninput ofROS2 Publish Clock. - Connect the
Simulation Timeoutput of theIsaac Read Simulation Timenode to theTime Stampinput ofROS2 Publish Clock.
- Start the simulation by hitting the Play button on the left panel
Now you can verify that the configuration is valid:
- open a Terminal console (
Ctrl + Alt + t). - enter the command
ros2 topic echo /clock. - verify that the
/clocktopic is correctly published:
ros2 topic echo /clock
clock:
  sec: 6
  nanosec: 900000359
---
clock:
  sec: 6
  nanosec: 916667027
---
clock:
  sec: 6
  nanosec: 933333694
---
clock:
  sec: 6
  nanosec: 950000362
---
[...]
- stop listening to the
/clocktopic withCtrl+c.
Start the ZED ROS 2 Wrapper node with simulated data #
The ZED ROS 2 Wrapper enables connection to the ZED Isaac™ Sim Extension, publishing ZED data in ROS 2 as if a real camera is present.
Prerequisites #
The “ZED ROS 2 Wrapper” and the “ZED ROS 2 Examples” packages must be installed in the system.
Follow the relative guides to install them if not already done:
Launch the ZED ROS 2 node #
Launch a standalone ZED ROS 2 node with simulated ZED data as input:
ros2 launch zed_wrapper zed_camera.launch.py camera_model:=zedx sim_mode:=true use_sim_time:=true
Launch options:
- [Mandatory]
sim_mode: start the ZED node in simulation mode iftrue. - [Mandatory]
use_sim_time: force the node to wait for valid messages on the topic/clock, and use the simulation time as the reference. - [Optional]
sim_address: set the address of the simulation server. Default is127.0.0.1and it’s valid if the node runs on the same machine as the simulator. - [Optional]
sim_port: set the port of the simulation server. It must match the value of the fieldStreaming Portof the properties of theZED Camera HelperAction Graph node. A differentStreaming Portvalue for each camera is required in multi-camera simulations.
camera_modelis currently limited tozedx. We are working to support other models in the near future.
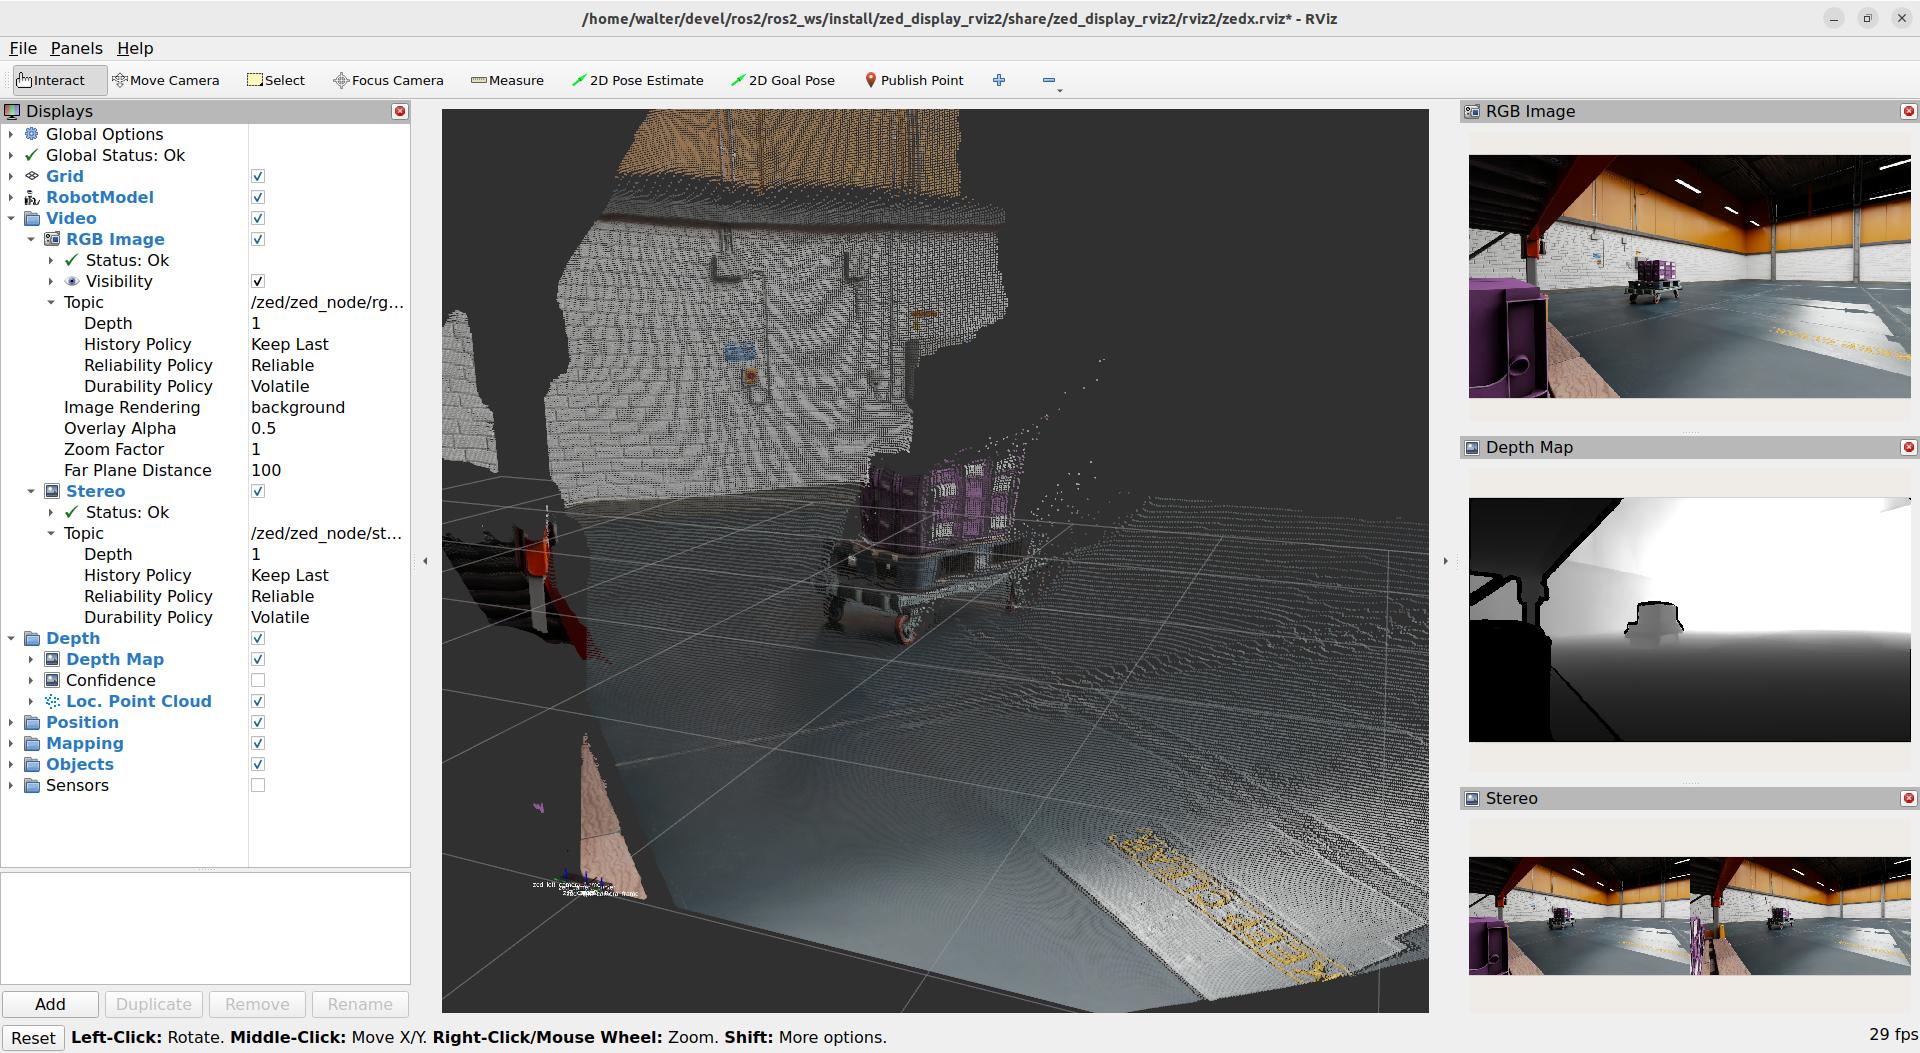
You can also start a preconfigured instance of rviz2 to visualize all the information available in simulation by using the command:
ros2 launch zed_display_rviz2 display_zed_cam.launch.py camera_model:=zedx sim_mode:=true use_sim_time:=true
the display_zed_cam.launch.py launch file includes the zed_camera.launch.py launch file, so it provides the same parameters.
You can get the list of all the available launch parameters by using the -s launch option:
ros2 launch zed_wrapper zed_camera.launch.py -s
ros2 launch zed_display_rviz2 display_zed_cam.launch.py -s
Here’s an example of rviz2 running with the simulated information obtained by placing the ZED camera on a shelf of a simulated warehouse: