NewsTutorials
Jun 28, 2015.Using the ZED Camera With OpenCV
In this tutorial, you will learn how to use the ZED SDK to capture and display color and depth images from your ZED.

In this tutorial, you will learn how to use the ZED SDK to capture and display color and depth images from your ZED.
Important: This article is outdated (ZED SDK 1.2). Please see the new OpenCV guide here.
Redirect me to the updated tutorial
In this tutorial, you will learn how to use the ZED SDK to capture and display color and depth images from your ZED.
The code of this tutorial is a simplified version of the sample “ZED with OpenCV” available on our GitHub page.
depth grab
Before starting this tutorial, make sure you have OpenCV installed and read our tutorial “How to Build an App with the ZED SDK” which will help you set up your coding environment and build applications with the ZED SDK.
Here’s the complete source code:
/**********************************
** Using ZED with OpenCV
**********************************/

#include <iostream>

// OpenCV
#include <opencv2/core/core.hpp>
#include <opencv2/highgui/highgui.hpp>
#include <opencv2/imgproc/imgproc.hpp>

// ZED
#include <zed/Camera.hpp>

// Input from keyboard
char keyboard = ' ';

int main(int argc, char** argv)
{
  // Initialize ZED color stream in HD and depth in Performance mode
  sl::zed::Camera* zed = new sl::zed::Camera(sl::zed::HD1080);
  sl::zed::ERRCODE err = zed->init(sl::zed::MODE::PERFORMANCE, 0, true);

  // Quit if an error occurred
  if (err != sl::zed::SUCCESS)
  {
    std::cout << "Unable to init the ZED:" << errcode2str(err) << std::endl;
    delete zed;
    return 1;
  }

  // Initialize color image and depth
  int width = zed->getImageSize().width;
  int height = zed->getImageSize().height;
  cv::Mat image(height, width, CV_8UC4,1);
  cv::Mat depth(height, width, CV_8UC4,1);

  // Create OpenCV windows
  cv::namedWindow("Image", cv::WINDOW_AUTOSIZE);
  cv::namedWindow("Depth", cv::WINDOW_AUTOSIZE);

  // Settings for windows
  cv::Size displaySize(720, 404);
  cv::Mat imageDisplay(displaySize, CV_8UC4);
  cv::Mat depthDisplay(displaySize, CV_8UC4);

  // Loop until 'q' is pressed
  while (keyboard != 'q')
  {
    // Grab frame and compute depth in FILL sensing mode
    if (!zed->grab(sl::zed::SENSING_MODE::FILL))
    {
      // Retrieve left color image
      sl::zed::Mat left = zed->retrieveImage(sl::zed::SIDE::LEFT);
      memcpy(image.data,left.data,width*height*4*sizeof(uchar));

      // Retrieve depth map
      sl::zed::Mat depthmap = zed->normalizeMeasure(sl::zed::MEASURE::DEPTH);
      memcpy(depth.data,depthmap.data,width*height*4*sizeof(uchar));

      // Display image in OpenCV window
      cv::resize(image, imageDisplay, displaySize);
      cv::imshow("Image", imageDisplay);

      // Display depth map in OpenCV window
      cv::resize(depth, depthDisplay, displaySize);
      cv::imshow("Depth", depthDisplay);
    }

    keyboard = cv::waitKey(30);
  }

  delete zed;
}
Let’s break down the code piece by piece.
Create a main C++ file and include standard headers for I/O, OpenCV (core, highgui and imgproc), and ZED (Camera.hpp). Then create your standard main function:
#include <iostream>

// OpenCV
#include <opencv2/core/core.hpp>
#include <opencv2/highgui/highgui.hpp>
#include <opencv2/imgproc/imgproc.hpp>

// ZED
#include <zed/Camera.hpp>

int main(int argc, char** argv)
{
}
Do not forget to add the links to OpenCV (headers and libs) and ZED SDK (headers and libs).
Let’s create our ZED Camera object and select its resolution. Here, we will work in Full HD (HD1080). Each image will have a 1920×1080 resolution. Please note that there are four resolutions and framerate available, as detailed in our Developer’s guide. Then, we initialize the ZED with its depth computation mode (QUALITY, MEDIUM, PERFORMANCE or NONE), device number and verbosity.
// Initialize ZED color stream in HD and depth in Performance mode
sl::zed::Camera* zed = new sl::zed::Camera(sl::zed::HD1080);
sl::zed::ERRCODE err = zed->init(sl::zed::MODE::PERFORMANCE, 0, true);

// Quit if an error occurred
if (err != sl::zed::SUCCESS)
{
  std::cout << "Unable to init the ZED:" << errcode2str(err) << std::endl;
  delete zed;
  return 1;
}Now, assuming the initialization was correct, we can create our OpenCV matrix and OpenCV windows with the correct resolutions and types.
We use the width and height of the ZED frames to create the OpenCV matrix with those parameters. Because we want to display the color image and normalized depth image, we have to create each matrix in 8 bits / 4 channels format (CV_8UC4):
// Initialize color image and depth
int width = zed->getImageSize().width;
int height = zed->getImageSize().height;
cv::Mat image(height, width, CV_8UC4,1);
cv::Mat depth(height, width, CV_8UC4,1);
On the display side, we will create smaller windows to make sure they fit on our screen.
Let’s choose a 720 x 404 size and create the OpenCV windows.
// Create OpenCV windows
cv::namedWindow("Image", cv::WINDOW_AUTOSIZE);
cv::namedWindow("Depth", cv::WINDOW_AUTOSIZE);

// Settings for windows
cv::Size displaySize(720, 404);
cv::Mat imageDisplay(displaySize, CV_8UC4);
cv::Mat depthDisplay(displaySize, CV_8UC4);Let’s write our main loop. The simplest way is to create a ‘while’ loop and handle all the events with OpenCV.
To grab an image and depth, we first need to select a sensing mode. There are two sensing modes available: STANDARD and FILL. STANDARD mode is suited for applications such as collision avoidance and navigation, while FILL mode is targeted at augmented reality and computational imaging where a fully dense depth map is needed. Here, we decide to use the FILL sensing mode.
// Grab frame and compute depth in FILL sensing mode
grab(sl::zed::SENSING_MODE::FILL))
Then, we just retrieve the color image and depth map and copy the buffers in our two OpenCV matrix. As you can see, we can directly copy the buffer of the zed::Mat into the buffer of cv::Mat:
//get left image and copy to opencv data
sl::zed::Mat left = zed->retrieveImage(sl::zed::SIDE::LEFT);
memcpy(image.data,left.data,width*height*4*sizeof(uchar));
//get depth image and copy to opencv data
sl::zed::Mat depthmap= zed->normalizeMeasure(sl::zed::MEASURE::DEPTH);
memcpy(depth.data,depthmap.data,width*height*4*sizeof(uchar));
Now, our OpenCV matrix contain the correct buffers. We can use standard OpenCV functions to resize the windows and display them on our screen:
// show image in the OpenCV window
cv::resize(image, imageDisplay, displaySize);
cv::imshow("Image", imageDisplay);
// show depth map in the OpenCV window
cv::resize(depth, depthDisplay, displaySize);
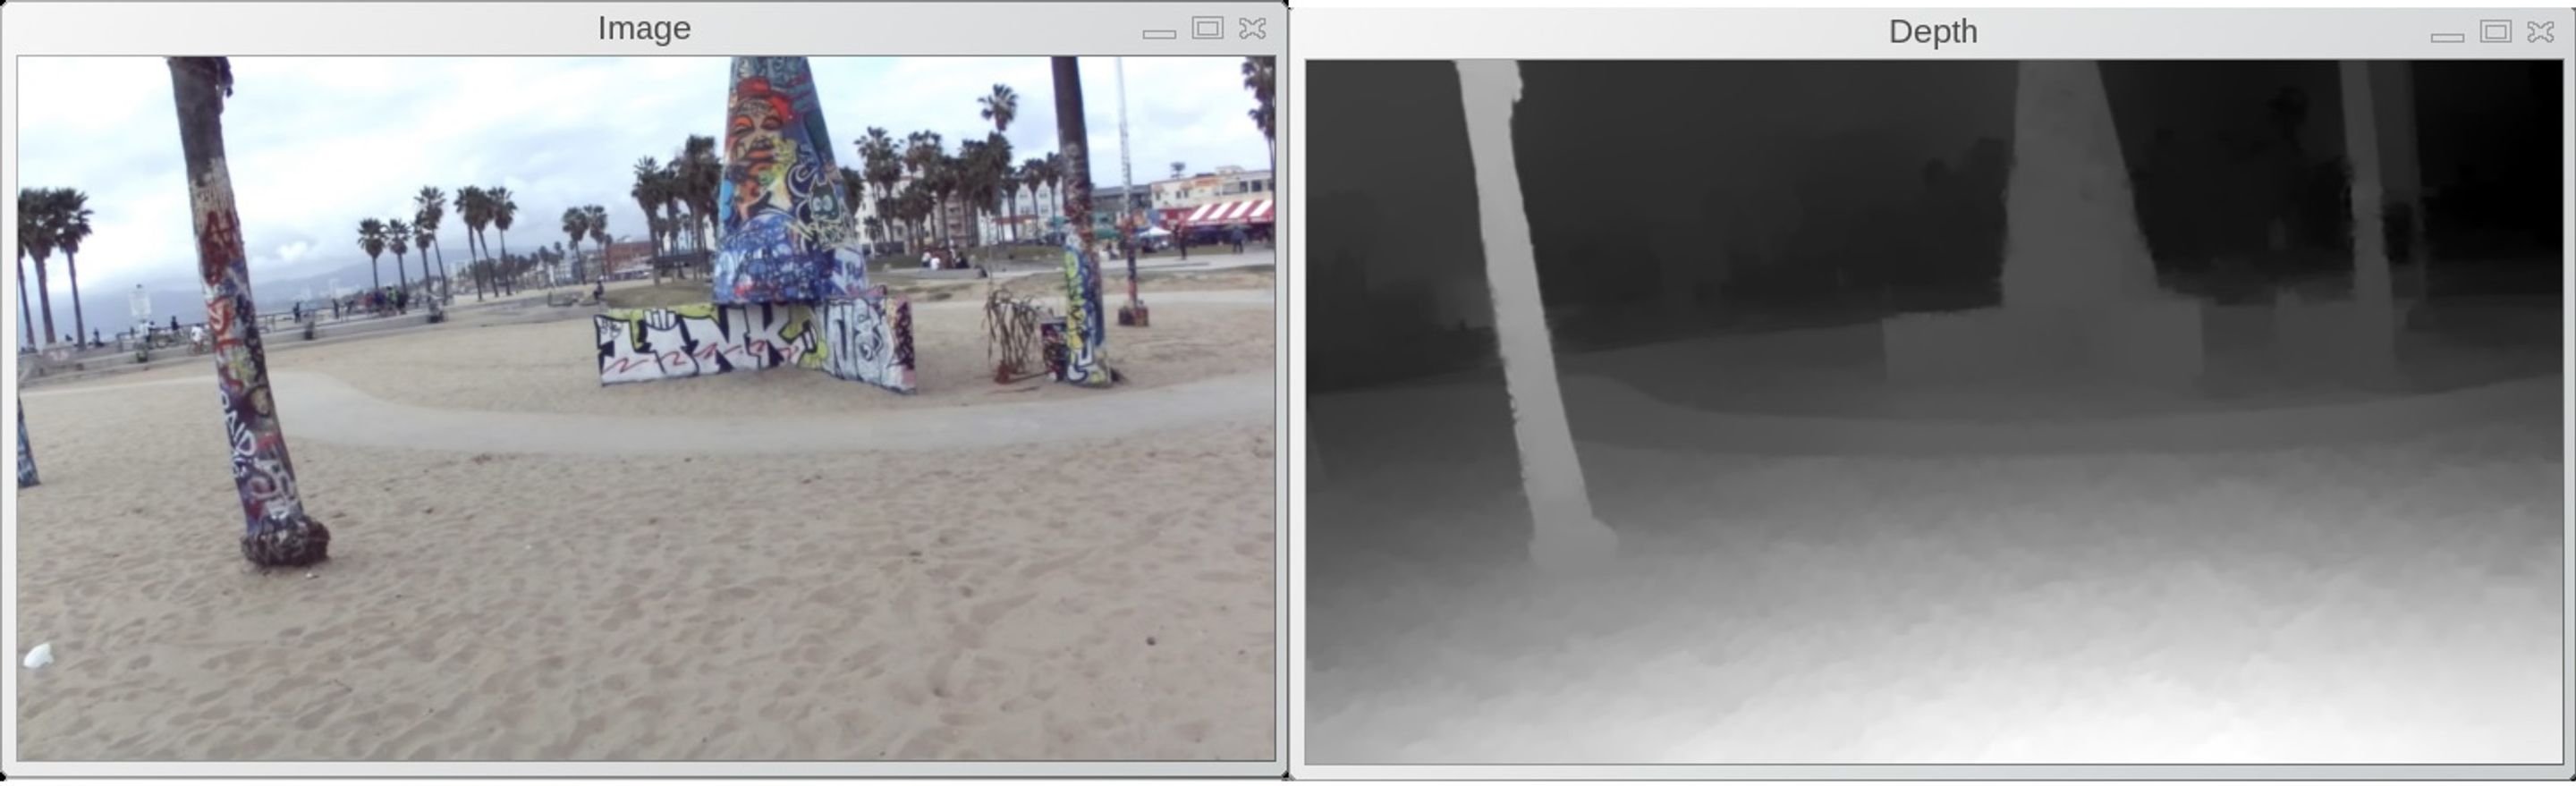
cv::imshow("Depth", depthDisplay);And that’s all we need! You can now build and run the application. You should see on your screen the two following windows: “Depth” and “Image”.
depth grab